This the multi-page printable view of this section. Click here to print.
Advanced
- 1: Installation Analytics
- 2: Semi-automatic and Automatic Annotation
- 3: Mounting cloud storage
- 4: Backup guide
- 5: IAM: system roles
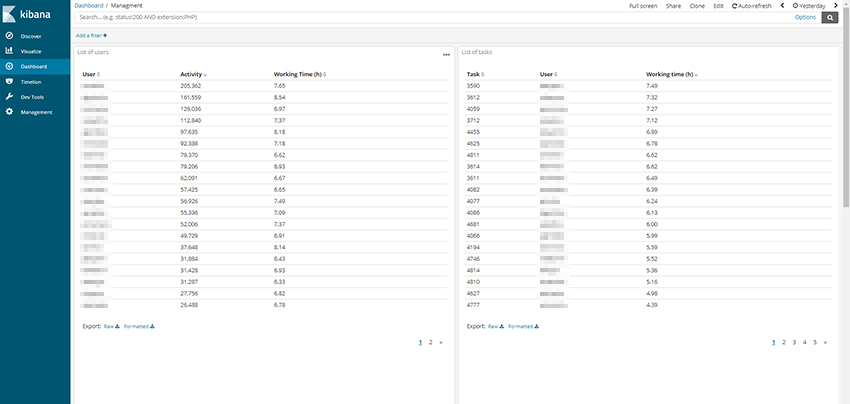
1 - Installation Analytics
It is possible to proxy annotation logs from client to ELK. To do that run the following command below:
Build docker image
# From project root directory
docker-compose -f docker-compose.yml -f components/analytics/docker-compose.analytics.yml build
Run docker container
# From project root directory
docker-compose -f docker-compose.yml -f components/analytics/docker-compose.analytics.yml up -d
At the moment it is not possible to save advanced settings. Below values should be specified manually.
Time picker default
{
"from": "now/d",
"to": "now/d",
"display": "Today",
"section": 0
}
Time picker quick ranges
[
  {
    "from": "now/d",
    "to": "now/d",
    "display": "Today",
    "section": 0
  },
  {
    "from": "now/w",
    "to": "now/w",
    "display": "This week",
    "section": 0
  },
  {
    "from": "now/M",
    "to": "now/M",
    "display": "This month",
    "section": 0
  },
  {
    "from": "now/y",
    "to": "now/y",
    "display": "This year",
    "section": 0
  },
  {
    "from": "now/d",
    "to": "now",
    "display": "Today so far",
    "section": 2
  },
  {
    "from": "now/w",
    "to": "now",
    "display": "Week to date",
    "section": 2
  },
  {
    "from": "now/M",
    "to": "now",
    "display": "Month to date",
    "section": 2
  },
  {
    "from": "now/y",
    "to": "now",
    "display": "Year to date",
    "section": 2
  },
  {
    "from": "now-1d/d",
    "to": "now-1d/d",
    "display": "Yesterday",
    "section": 1
  },
  {
    "from": "now-1w/w",
    "to": "now-1w/w",
    "display": "Previous week",
    "section": 1
  },
  {
    "from": "now-1m/m",
    "to": "now-1m/m",
    "display": "Previous month",
    "section": 1
  },
  {
    "from": "now-1y/y",
    "to": "now-1y/y",
    "display": "Previous year",
    "section": 1
  }
]
2 - Semi-automatic and Automatic Annotation
⚠ WARNING: Do not use
docker-compose upIf you did, make sure all containers are stopped bydocker-compose down.
-
To bring up cvat with auto annotation tool, from cvat root directory, you need to run:
docker-compose -f docker-compose.yml -f components/serverless/docker-compose.serverless.yml up -dIf you did any changes to the docker-compose files, make sure to add
--buildat the end.To stop the containers, simply run:
docker-compose -f docker-compose.yml -f components/serverless/docker-compose.serverless.yml down -
You have to install
nuctlcommand line tool to build and deploy serverless functions. Download version 1.5.16. It is important that the version you download matches the version in docker-compose.serverless.yml. For example, using wget.wget https://github.com/nuclio/nuclio/releases/download/<version>/nuctl-<version>-linux-amd64After downloading the nuclio, give it a proper permission and do a softlink.
sudo chmod +x nuctl-<version>-linux-amd64 sudo ln -sf $(pwd)/nuctl-<version>-linux-amd64 /usr/local/bin/nuctl -
Create
cvatproject inside nuclio dashboard where you will deploy new serverless functions and deploy a couple of DL models. Commands below should be run only after CVAT has been installed usingdocker-composebecause it runs nuclio dashboard which manages all serverless functions.nuctl create project cvatnuctl deploy --project-name cvat \ --path serverless/openvino/dextr/nuclio \ --volume `pwd`/serverless/common:/opt/nuclio/common \ --platform localnuctl deploy --project-name cvat \ --path serverless/openvino/omz/public/yolo-v3-tf/nuclio \ --volume `pwd`/serverless/common:/opt/nuclio/common \ --platform localNote:
- See deploy_cpu.sh for more examples.
GPU Support
You will need to install Nvidia Container Toolkit. Also you will need to add
--resource-limit nvidia.com/gpu=1 --triggers '{"myHttpTrigger": {"maxWorkers": 1}}'to the nuclio deployment command. You can increase the maxWorker if you have enough GPU memory. As an example, below will run on the GPU:nuctl deploy --project-name cvat \ --path serverless/tensorflow/matterport/mask_rcnn/nuclio \ --platform local --base-image tensorflow/tensorflow:1.15.5-gpu-py3 \ --desc "GPU based implementation of Mask RCNN on Python 3, Keras, and TensorFlow." \ --image cvat/tf.matterport.mask_rcnn_gpu \ --triggers '{"myHttpTrigger": {"maxWorkers": 1}}' \ --resource-limit nvidia.com/gpu=1Note:
- The number of GPU deployed functions will be limited to your GPU memory.
- See deploy_gpu.sh script for more examples.
- For some models (namely SiamMask) you need an Nvidia driver version greater than or equal to 450.80.02.
Note for Windows users:
If you want to use nuclio under Windows CVAT installation you should install Nvidia drivers for WSL according to this instruction and follow the steps up to “2.3 Installing Nvidia drivers”. Important requirement: you should have the latest versions of Docker Desktop, Nvidia drivers for WSL, and the latest updates from the Windows Insider Preview Dev channel.
Troubleshooting Nuclio Functions:
-
You can open nuclio dashboard at localhost:8070. Make sure status of your functions are up and running without any error.
-
Test your deployed DL model as a serverless function. The command below should work on Linux and Mac OS.
image=$(curl https://upload.wikimedia.org/wikipedia/en/7/7d/Lenna_%28test_image%29.png --output - | base64 | tr -d '\n')
cat << EOF > /tmp/input.json
{"image": "$image"}
EOF
cat /tmp/input.json | nuctl invoke openvino.omz.public.yolo-v3-tf -c 'application/json'
20.07.17 12:07:44.519 nuctl.platform.invoker (I) Executing function {"method": "POST", "url": "http://:57308", "headers": {"Content-Type":["application/json"],"X-Nuclio-Log-Level":["info"],"X-Nuclio-Target":["openvino.omz.public.yolo-v3-tf"]}} 20.07.17 12:07:45.275 nuctl.platform.invoker (I) Got response {"status": "200 OK"} 20.07.17 12:07:45.275 nuctl (I) >>> Start of function logs 20.07.17 12:07:45.275 ino.omz.public.yolo-v3-tf (I) Run yolo-v3-tf model {"worker_id": "0", "time": 1594976864570.9353} 20.07.17 12:07:45.275 nuctl (I) <<< End of function logs > Response headers: Date = Fri, 17 Jul 2020 09:07:45 GMT Content-Type = application/json Content-Length = 100 Server = nuclio > Response body: [ { "confidence": "0.9992254", "label": "person", "points": [ 39, 124, 408, 512 ], "type": "rectangle" } ] -
To check for internal server errors, run
docker ps -ato see the list of containers. Find the container that you are interested, e.g.,nuclio-nuclio-tf-faster-rcnn-inception-v2-coco-gpu. Then check its logs bydocker logs <name of your container>e.g.,docker logs nuclio-nuclio-tf-faster-rcnn-inception-v2-coco-gpu -
To debug a code inside a container, you can use vscode to attach to a container instructions. To apply your changes, make sure to restart the container.
docker restart <name_of_the_container>
3 - Mounting cloud storage
AWS S3 bucket as filesystem
Ubuntu 20.04
Mount
-
Install s3fs:
sudo apt install s3fs -
Enter your credentials in a file
${HOME}/.passwd-s3fsand set owner-only permissions:echo ACCESS_KEY_ID:SECRET_ACCESS_KEY > ${HOME}/.passwd-s3fs chmod 600 ${HOME}/.passwd-s3fs -
Uncomment
user_allow_otherin the/etc/fuse.conffile:sudo nano /etc/fuse.conf -
Run s3fs, replace
bucket_name,mount_point:s3fs <bucket_name> <mount_point> -o allow_other
For more details see here.
Automatically mount
Follow the first 3 mounting steps above.
Using fstab
-
Create a bash script named aws_s3_fuse(e.g in /usr/bin, as root) with this content (replace
user_nameon whose behalf the disk will be mounted,backet_name,mount_point,/path/to/.passwd-s3fs):#!/bin/bash sudo -u <user_name> s3fs <backet_name> <mount_point> -o passwd_file=/path/to/.passwd-s3fs -o allow_other exit 0 -
Give it the execution permission:
sudo chmod +x /usr/bin/aws_s3_fuse -
Edit
/etc/fstabadding a line like this, replacemount_point):/absolute/path/to/aws_s3_fuse <mount_point> fuse allow_other,user,_netdev 0 0
Using systemd
-
Create unit file
sudo nano /etc/systemd/system/s3fs.service(replaceuser_name,bucket_name,mount_point,/path/to/.passwd-s3fs):[Unit] Description=FUSE filesystem over AWS S3 bucket After=network.target [Service] Environment="MOUNT_POINT=<mount_point>" User=<user_name> Group=<user_name> ExecStart=s3fs <bucket_name> ${MOUNT_POINT} -o passwd_file=/path/to/.passwd-s3fs -o allow_other ExecStop=fusermount -u ${MOUNT_POINT} Restart=always Type=forking [Install] WantedBy=multi-user.target -
Update the system configurations, enable unit autorun when the system boots, mount the bucket:
sudo systemctl daemon-reload
sudo systemctl enable s3fs.service
sudo systemctl start s3fs.service
Check
A file /etc/mtab contains records of currently mounted filesystems.
cat /etc/mtab | grep 's3fs'
Unmount filesystem
fusermount -u <mount_point>
If you used systemd to mount a bucket:
sudo systemctl stop s3fs.service
sudo systemctl disable s3fs.service
Microsoft Azure container as filesystem
Ubuntu 20.04
Mount
-
Set up the Microsoft package repository.(More here)
wget https://packages.microsoft.com/config/ubuntu/20.04/packages-microsoft-prod.deb sudo dpkg -i packages-microsoft-prod.deb sudo apt-get update -
Install
blobfuseandfuse:sudo apt-get install blobfuse fuseFor more details see here
-
Create environments (replace
account_name,account_key,mount_point):export AZURE_STORAGE_ACCOUNT=<account_name> export AZURE_STORAGE_ACCESS_KEY=<account_key> MOUNT_POINT=<mount_point> -
Create a folder for cache:
sudo mkdir -p /mnt/blobfusetmp -
Make sure the file must be owned by the user who mounts the container:
sudo chown <user> /mnt/blobfusetmp -
Create the mount point, if it doesn’t exists:
mkdir -p ${MOUNT_POINT} -
Uncomment
user_allow_otherin the/etc/fuse.conffile:sudo nano /etc/fuse.conf -
Mount container(replace
your_container):blobfuse ${MOUNT_POINT} --container-name=<your_container> --tmp-path=/mnt/blobfusetmp -o allow_other
Automatically mount
Follow the first 7 mounting steps above.
Using fstab
-
Create configuration file
connection.cfgwith same content, change accountName, select one from accountKey or sasToken and replace with your value:accountName <account-name-here> # Please provide either an account key or a SAS token, and delete the other line. accountKey <account-key-here-delete-next-line> #change authType to specify only 1 sasToken <shared-access-token-here-delete-previous-line> authType <MSI/SAS/SPN/Key/empty> containerName <insert-container-name-here> -
Create a bash script named
azure_fuse(e.g in /usr/bin, as root) with content below (replaceuser_nameon whose behalf the disk will be mounted,mount_point,/path/to/blobfusetmp,/path/to/connection.cfg):#!/bin/bash sudo -u <user_name> blobfuse <mount_point> --tmp-path=/path/to/blobfusetmp --config-file=/path/to/connection.cfg -o allow_other exit 0 -
Give it the execution permission:
sudo chmod +x /usr/bin/azure_fuse -
Edit
/etc/fstabwith the blobfuse script. Add the following line(replace paths):/absolute/path/to/azure_fuse </path/to/desired/mountpoint> fuse allow_other,user,_netdev
Using systemd
-
Create unit file
sudo nano /etc/systemd/system/blobfuse.service. (replaceuser_name,mount_point,container_name,/path/to/connection.cfg):[Unit] Description=FUSE filesystem over Azure container After=network.target [Service] Environment="MOUNT_POINT=<mount_point>" User=<user_name> Group=<user_name> ExecStart=blobfuse ${MOUNT_POINT} --container-name=<container_name> --tmp-path=/mnt/blobfusetmp --config-file=/path/to/connection.cfg -o allow_other ExecStop=fusermount -u ${MOUNT_POINT} Restart=always Type=forking [Install] WantedBy=multi-user.target -
Update the system configurations, enable unit autorun when the system boots, mount the container:
sudo systemctl daemon-reload
sudo systemctl enable blobfuse.service
sudo systemctl start blobfuse.service
Or for more detail see here
Check
A file /etc/mtab contains records of currently mounted filesystems.
cat /etc/mtab | grep 'blobfuse'
Unmount filesystem
fusermount -u <mount_point>
If you used systemd to mount a container:
sudo systemctl stop blobfuse.service
sudo systemctl disable blobfuse.service
If you have any mounting problems, check out the answers to common problems
Google Drive as filesystem
Ubuntu 20.04
Mount
To mount a google drive as a filesystem in user space(FUSE) you can use google-drive-ocamlfuse To do this follow the instructions below:
-
Install google-drive-ocamlfuse:
sudo add-apt-repository ppa:alessandro-strada/ppa sudo apt-get update sudo apt-get install google-drive-ocamlfuse -
Run
google-drive-ocamlfusewithout parameters:google-drive-ocamlfuseThis command will create the default application directory (~/.gdfuse/default), containing the configuration file config (see the wiki page for more details about configuration). And it will start a web browser to obtain authorization to access your Google Drive. This will let you modify default configuration before mounting the filesystem.
Then you can choose a local directory to mount your Google Drive (e.g.: ~/GoogleDrive).
-
Create the mount point, if it doesn’t exist(replace mount_point):
mountpoint="<mount_point>" mkdir -p $mountpoint -
Uncomment
user_allow_otherin the/etc/fuse.conffile:sudo nano /etc/fuse.conf -
Mount the filesystem:
google-drive-ocamlfuse -o allow_other $mountpoint
Automatically mount
Follow the first 4 mounting steps above.
Using fstab
-
Create a bash script named gdfuse(e.g in /usr/bin, as root) with this content (replace
user_nameon whose behalf the disk will be mounted,label,mount_point):#!/bin/bash sudo -u <user_name> google-drive-ocamlfuse -o allow_other -label <label> <mount_point> exit 0 -
Give it the execution permission:
sudo chmod +x /usr/bin/gdfuse -
Edit
/etc/fstabadding a line like this, replacemount_point):/absolute/path/to/gdfuse <mount_point> fuse allow_other,user,_netdev 0 0For more details see here
Using systemd
-
Create unit file
sudo nano /etc/systemd/system/google-drive-ocamlfuse.service. (replaceuser_name,label(defaultlabel=default),mount_point):[Unit] Description=FUSE filesystem over Google Drive After=network.target [Service] Environment="MOUNT_POINT=<mount_point>" User=<user_name> Group=<user_name> ExecStart=google-drive-ocamlfuse -label <label> ${MOUNT_POINT} ExecStop=fusermount -u ${MOUNT_POINT} Restart=always Type=forking [Install] WantedBy=multi-user.target -
Update the system configurations, enable unit autorun when the system boots, mount the drive:
sudo systemctl daemon-reload
sudo systemctl enable google-drive-ocamlfuse.service
sudo systemctl start google-drive-ocamlfuse.service
For more details see here
Check
A file /etc/mtab contains records of currently mounted filesystems.
cat /etc/mtab | grep 'google-drive-ocamlfuse'
Unmount filesystem
fusermount -u <mount_point>
If you used systemd to mount a drive:
sudo systemctl stop google-drive-ocamlfuse.service
sudo systemctl disable google-drive-ocamlfuse.service
4 - Backup guide
About CVAT data volumes
Docker volumes are used to store all CVAT data:
-
cvat_db: PostgreSQL database files, used to store information about users, tasks, projects, annotations, etc. Mounted intocvat_dbcontainer by/var/lib/postgresql/datapath. -
cvat_data: used to store uploaded and prepared media data. Mounted intocvatcontainer by/home/django/datapath. -
cvat_keys: used to store user ssh keys needed for synchronization with a remote Git repository. Mounted intocvatcontainer by/home/django/keyspath. -
cvat_logs: used to store logs of CVAT backend processes managed by supevisord. Mounted intocvatcontainer by/home/django/logspath. -
cvat_events: this is an optional volume that is used only when Analytics component is enabled and is used to store Elasticsearch database files. Mounted intocvat_elasticsearchcontainer by/usr/share/elasticsearch/datapath.
How to backup all CVAT data
All CVAT containers should be stopped before backup:
docker-compose stop
Please don’t forget to include all the compose config files that were used in the docker-compose command
using the -f parameter.
Backup data:
mkdir backup
docker run --rm --name temp_backup --volumes-from cvat_db -v $(pwd)/backup:/backup ubuntu tar -cjvf /backup/cvat_db.tar.bz2 /var/lib/postgresql/data
docker run --rm --name temp_backup --volumes-from cvat -v $(pwd)/backup:/backup ubuntu tar -cjvf /backup/cvat_data.tar.bz2 /home/django/data
# [optional]
docker run --rm --name temp_backup --volumes-from cvat_elasticsearch -v $(pwd)/backup:/backup ubuntu tar -cjvf /backup/cvat_events.tar.bz2 /usr/share/elasticsearch/data
Make sure the backup archives have been created, the output of ls backup command should look like this:
ls backup
cvat_data.tar.bz2  cvat_db.tar.bz2  cvat_events.tar.bz2
How to restore CVAT from backup
Warning: use exactly the same CVAT version to restore DB. Otherwise it will not work because between CVAT releases the layout of DB can be changed. You always can upgrade CVAT later. It will take care to migrate your data properly internally.
Note: CVAT containers must exist (if no, please follow the installation guide). Stop all CVAT containers:
docker-compose stop
Restore data:
cd <path_to_backup_folder>
docker run --rm --name temp_backup --volumes-from cvat_db -v $(pwd):/backup ubuntu bash -c "cd /var/lib/postgresql/data && tar -xvf /backup/cvat_db.tar.bz2 --strip 4"
docker run --rm --name temp_backup --volumes-from cvat -v $(pwd):/backup ubuntu bash -c "cd /home/django/data && tar -xvf /backup/cvat_data.tar.bz2 --strip 3"
# [optional]
docker run --rm --name temp_backup --volumes-from cvat_elasticsearch -v $(pwd):/backup ubuntu bash -c "cd /usr/share/elasticsearch/data && tar -xvf /backup/cvat_events.tar.bz2 --strip 4"
After that run CVAT as usual:
docker-compose up -d