This article provides tips on how to effectively manage your
CVAT subscriptions, including tracking expenses and canceling
unnecessary subscriptions, to optimize your finances and save time.
Whether you’re a business owner or an individual,
you’ll learn how to take control of your subscriptions and manage them.
Account/Month: The Solo plan has a fixed price and is
designed for personal use only. It doesn’t allow collaboration with team members,
but removes all the other limits of the Free plan.
Note: Although it allows the creation of an organization and
access for up to 3 members – it is for trial purposes only,
organization and members will have all the limitations of the Free plan.
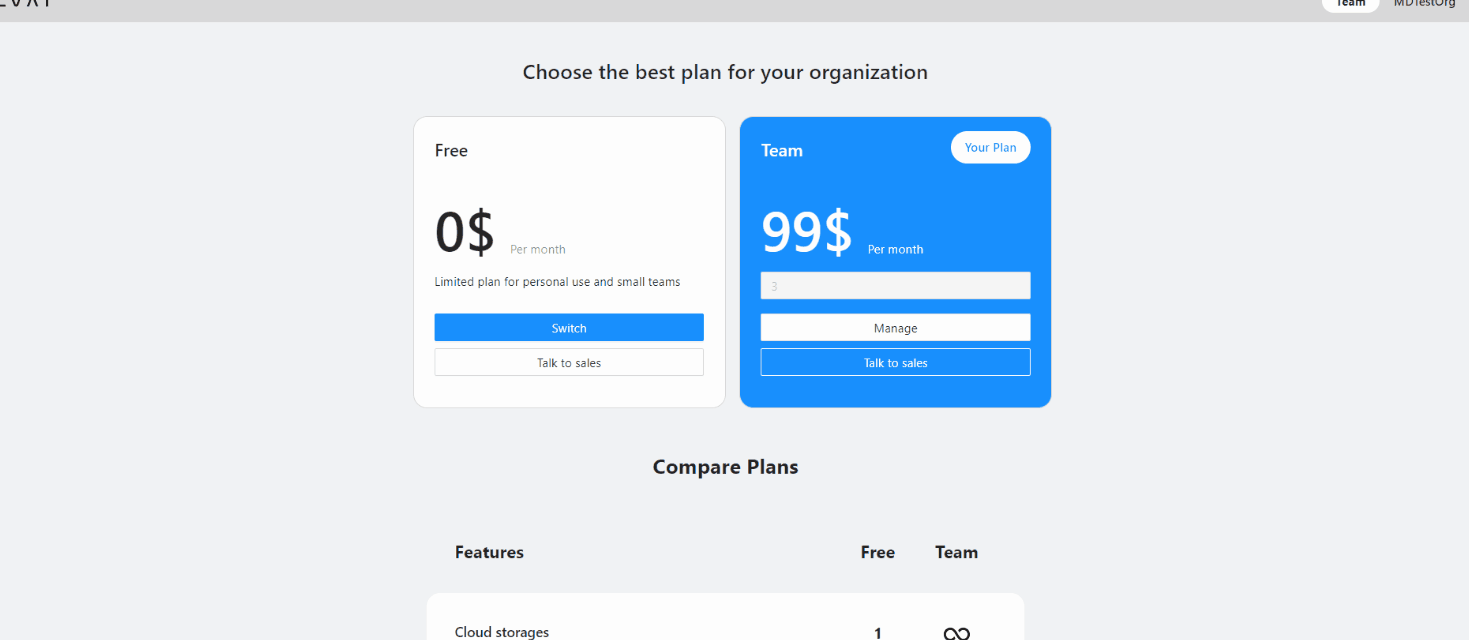
Team plan
Member/ month: The Team plan allows you to create
an organization and add team members who can collaborate on projects.
The monthly payment for the plan depends on the number of team members you’ve added.
All limits of the Free plan will be removed.
Note: The organization owner is also part of the team.
So, if you have three annotators working, you’ll need to pay
for 4 seats (3 annotators + 1 organization owner).
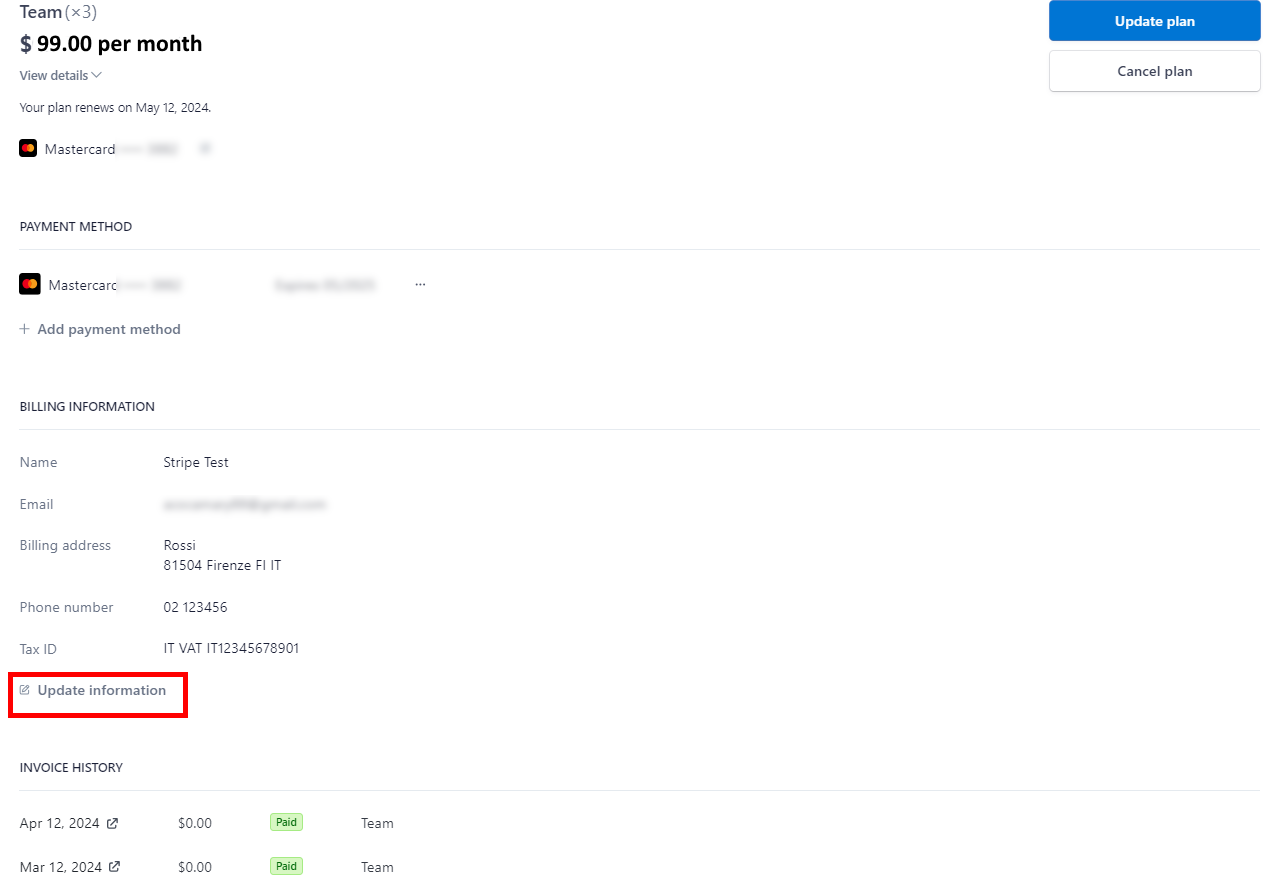
To add VAT or Organization details to the invoice, after subscribing to the Team plan,
go to Manage Team Plan > Manage > Billing information.
Payment methods
This section describes how to change or add payment methods.
Paying with bank transfer
Note at the moment this method of payment
work only with US banks.
To pay with bank transfer:
Go to the Upgrade to Solo/Team plan> Get started.
Click US Bank Transfer.
Upon successful completion of the payment, the you will receive a receipt via email.
Note that the completion of the payment process may take up to three banking days.
Change payment method on Solo plan
Access Manage Solo plan > Manage and click +Add Payment Method
Change payment method on Team plan
Access Manage Team Plan > Manage and click +Add Payment Method.
Adding and removing team members
This section describes how to add team members
to collaborate within one team.
Solo plan
Not available.
Team plan
Go to the Manage Team plan > Manage > Update quantity.
If you’ve added a user before the current billing period ends,
the payment will be prorated for the remaining time until the
next billing cycle begins. From the following month onward,
the full payment will be charged.
In case you removed the user before the current billing period ends,
funds will not be returned to your account,
but next month you will pay less by the amount of unused funds.
Change plan
The procedure is the same for both Solo and Team plans.
If for some reason you want to change your plan, you need to:
Paid plans are not mutually exclusive.
You can have several active subscriptions,
for example, the Solo plan and several Team
plans for different organizations.
Cancel plan
This section describes how to cancel your CVAT subscription
and what will happen to your data.
What will happen to my data?
Once you have terminated your subscription, your data will remain
accessible within the system for a month. During this period,
you will be unable to add new tasks and free plan limits will be applied.
In case you possess a substantial amount of data,
it will be switched to read-only mode. It means
you will not be able to save annotations, add any resources,
and so on.
Following the one month, you will receive a
notification requesting you to either remove the
excess data or it will be deleted automatically.
Solo plan
To cancel Solo plan, do the following:
In the top right corner click on your nickname, then Organization > Personal workspace.
Click again on the nickname, then follow to Manage Solo plan > Manage > Cancel plan
Please, fill out the feedback form, to help us improve our platform.
Team plan
To cancel Team plan, do the following:
In the top right corner click on your nickname, then Organization > Organization name.
Click again on the nickname, then follow to Manage Team plan > Manage > Cancel plan
Please, fill out the feedback form, to help us improve our platform.
Plan renewal
This section describes how to renew your
CVAT subscription
Solo plan
Access Manage Solo plan > Manage > Renew plan
Team plan
Access Manage Team Plan > Manage > Renew plan
Subscription management video tutorial
2 - Social auth configuration
Social accounts authentication for Self-Hosted solution
On the left menu, select OAuth consent, then select
User type (Internal or External), and click Create.
On the OAuth consent screen fill all required fields, and click Save and Continue.
On the Scopes screen, click Add or remove scopes and
select auth/userinfo.email, auth/userinfo.profile, and openid.
Click Update, and Save and Continue.
For more information, see Configure Auth Consent.
On the left menu, click Credentials, on the top
menu click + Create credentials, and select OAuth client ID.
From the Application Type select Web application and
configure: Application name, Authorized JavaScript origins, Authorized redirect URIs.
For example, if you plan to deploy CVAT instance on https://localhost:8080, add https://localhost:8080
to authorized JS origins and https://localhost:8080/api/auth/social/goolge/login/callback/ to redirect URIs.
Create conпiguration file in CVAT:
Create the auth_config.yml file with the following content:
There are 2 basic steps to enable GitHub account authentication.
Open the GitHub settings page.
On the left menu, click <> Developer settings > OAuth Apps > Register new application.
For more information, see Creating an OAuth App
Fill in the name field, set the homepage URL (for example: https://localhost:8080),
and authorization callback URL (for example: https://localhost:8080/api/auth/social/github/login/callback/).
Create conпiguration file in CVAT:
Create the auth_config.yml file with the following content:
Note: You can also configure GitHub App,
but don’t forget to add required permissions.
In the Permission > Account permissions > Email addresses must be set to read-only.
Fill in the name field, set the homepage URL (for example: https://localhost:8080),
and authorization callback URL (for example: https://localhost:8080/api/auth/social/amazon-cognito/login/callback/).
Create conпiguration file in CVAT:
Create the auth_config.yml file with the following content: