Getting started
This section contains basic information and links to sections necessary for a quick start.
Installation
First step is to install CVAT on your system. Use the Installation Guide.
Getting started in CVAT
To find out more, go to the authorization section.
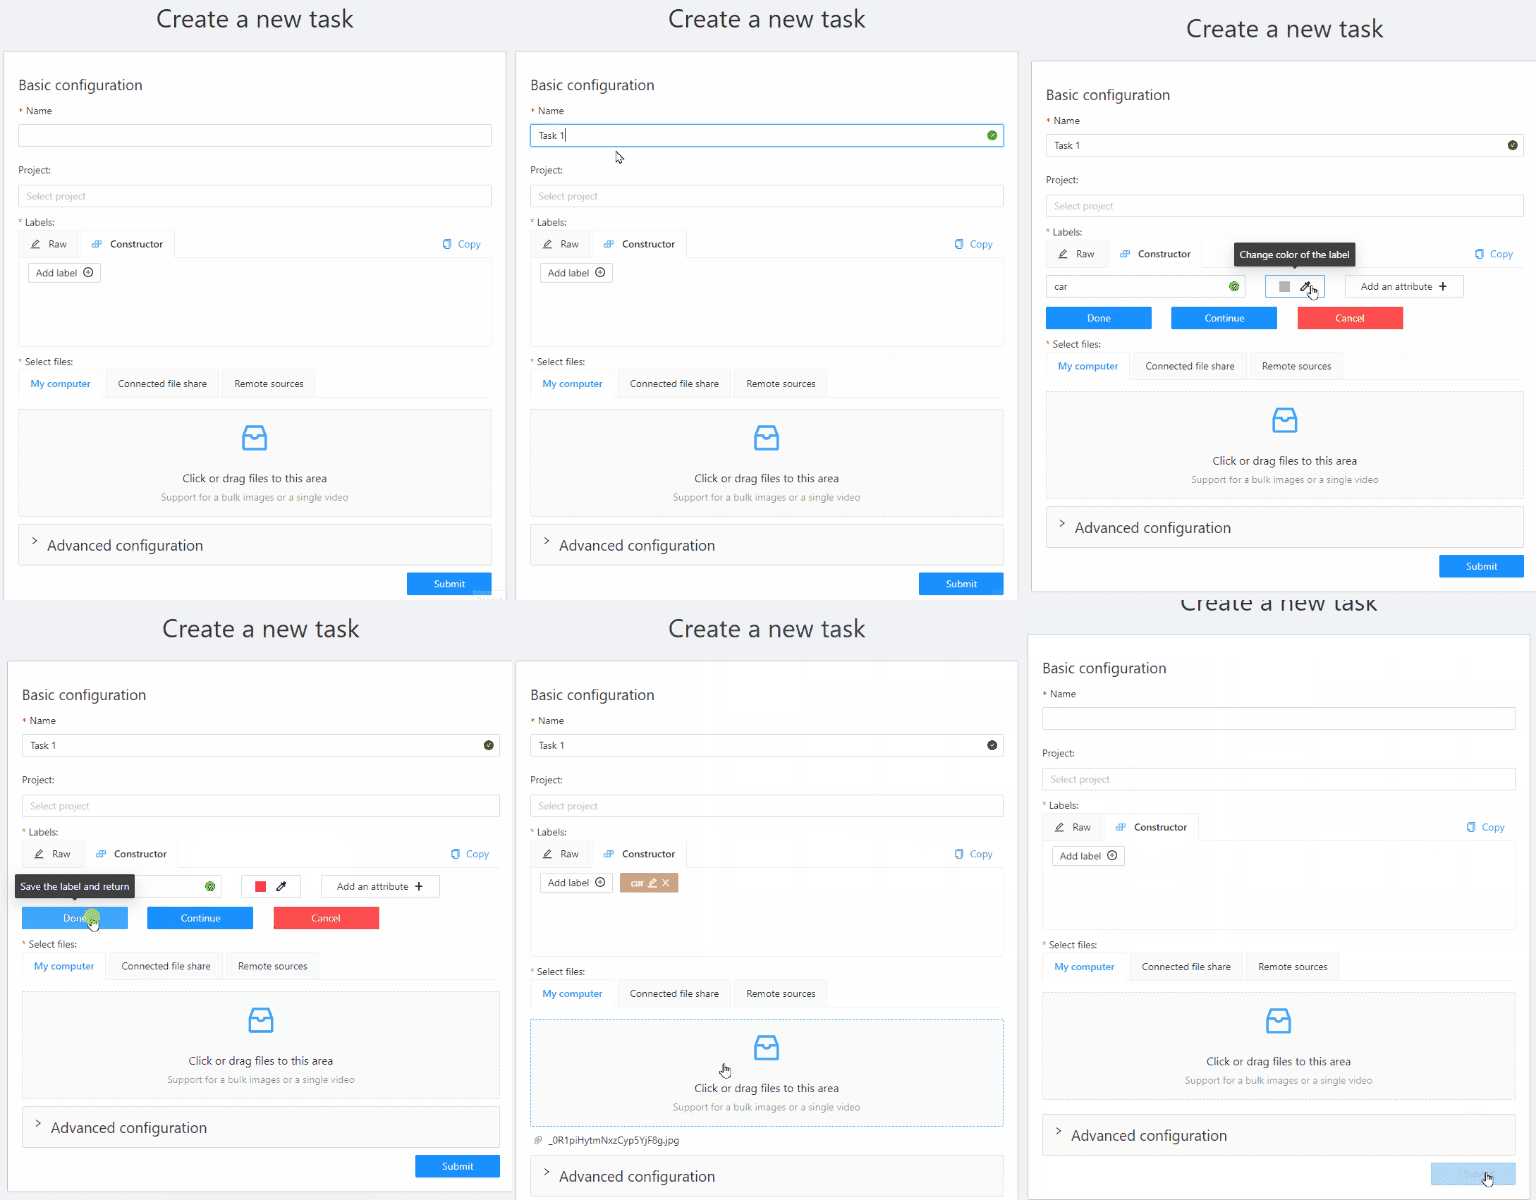
To create a task, go to Tasks section. Click Create new task to go to the task creation page.
Set the name of the future task.
Set the label using the constructor: first click “add label”, then enter the name of the label and choose the color.

You need to upload images or videos for your future annotation. To do so, simply drag and drop the files.
To learn more, go to creating an annotation task
Basic annotation
When the task is created, you will see a corresponding message in the top right corner. Click the “Open task” button to go to the task page.
Once on the task page, open a link to the job in the jobs list.
Choose a correct section for your type of the task and start annotation.
| Shape | Annotation | Interpolation |
|---|---|---|
| Rectangle | Shape mode (basics) | Track mode (basics) |
| Polygon | Annotation with polygons | Track mode with polygons |
| Polyline | Annotation with polylines | |
| Points | Points in shape mode | Liner interpolation with one point |
| Cuboids | Annotation with cuboids | Editing the cuboid |
| Tag | Annotation with tags |
Dump annotation

-
To download the annotations, first you have to save all changes. Click the Save button or press
Ctrl+Sto save annotations quickly. -
After you saved the changes, click the Menu button.
-
Then click the Dump Annotation button.
-
Lastly choose a format of the dump annotation file.
To learn more, go to downloading annotations