Docker Compose agent guide
Introduction
Since CVAT agents were announced, we have been working on making it easier for users to deploy their agents in CVAT and we are excited to share with you new ways to do that. In this guide we will cover how to deploy your agent to CVAT using Docker Compose. This approach is not the only way to deploy your agent (see Helm deployment guide), but it is a great option for those, who are not familiar with Kubernetes and want to quickly get started with deploying their agents in CVAT.
In this guide we will cover the following topics:
- High-level overview of the Docker Compose approach for deploying CVAT agents
- How to prepare your machine for running CVAT agents with Docker Compose
- How to configure Docker Compose to run your CVAT agent
- How to run CVAT agent with Docker Compose
- How to clean up after running CVAT agent with Docker Compose
- Troubleshooting common issues with Docker Compose deployment
High-level overview of the Docker Compose approach for deploying CVAT agents
In general the Docker Compose workflow consists of the following steps:
- Register your model as a function in CVAT using
cvat-cli - Run your agent that will be polling CVAT for new tasks and processing them with your model.
- When agent is not needed anymore, deregister function in CVAT to clean up.
How to prepare your machine for running CVAT agents with Docker Compose
To run CVAT agents with Docker Compose, you need to have the following software installed on your machine:
Please refer to the official documentation for instructions on how to install Docker and Docker Compose on your machine.
Also, it has to be mentioned that your machine should have network access to the CVAT instance where you want to deploy your agent, and you should have an API key for authentication in CVAT.
How to configure Docker Compose to run your CVAT agent
First of all you need to clone the CVAT repository to get access to Docker Compose files and templates:
git clone git@github.com:cvat-ai/cvat.git
Then you need to navigate to the cvat/ai-models/agents_deployment/sam2
cd cvat/ai-models/agents_deployment/sam2
In this folder you will find all necessary files to either build your own images based on the provided Dockerfile or to use already build images that are available on our Dockerhub.
Environment configuration
To configure Docker Compose you need to provide the following information in the .env file:
CVAT_BASE_URL - URL of the CVAT instance where you want to deploy your agent. Defaults to https://app.cvat.ai
CVAT_ACCESS_TOKEN - Access token to use with cvat-cli to connect to CVAT instance. You can get it in CVAT UI: https://app.cvat.ai/profile#security
FUNCTION_NAME - Name of the function to register in CVAT. For example it could be SAM2 or MY_GREAT_MODEL.
IMAGE_URL - URL of the image to use for your agent. You can either build your own image or just use the one from our repo: https://hub.docker.com/r/cvat/
AGENTS_COUNT - Number of agent replicas to run. Depends on the model.
ORG_SLUG - Your org slug. This is important if you want to share your function across the organization.
COMPOSE_PROFILES - whether to use cpu or gpu to run your agent. To use GPU, set this to “gpu”. Requires Linux + NVIDIA GPU + NVIDIA driver + NVIDIA Container Toolkit + GPU docker image
MODEL_CONFIG_PARAMS - Parameters to pass to the adapter function. Differs for each model.
Refer to the model documentation.
Also, some explanatory example could be found in
cvat/ai-models/agents_deployment/transformers/.env
How to run CVAT agent with Docker Compose
To run CVAT agent with Docker Compose, you need to run the following command in the terminal:
docker compose up
Now the image specified in the .env file will be pulled (if it is not already available locally):

And then the container will be started:
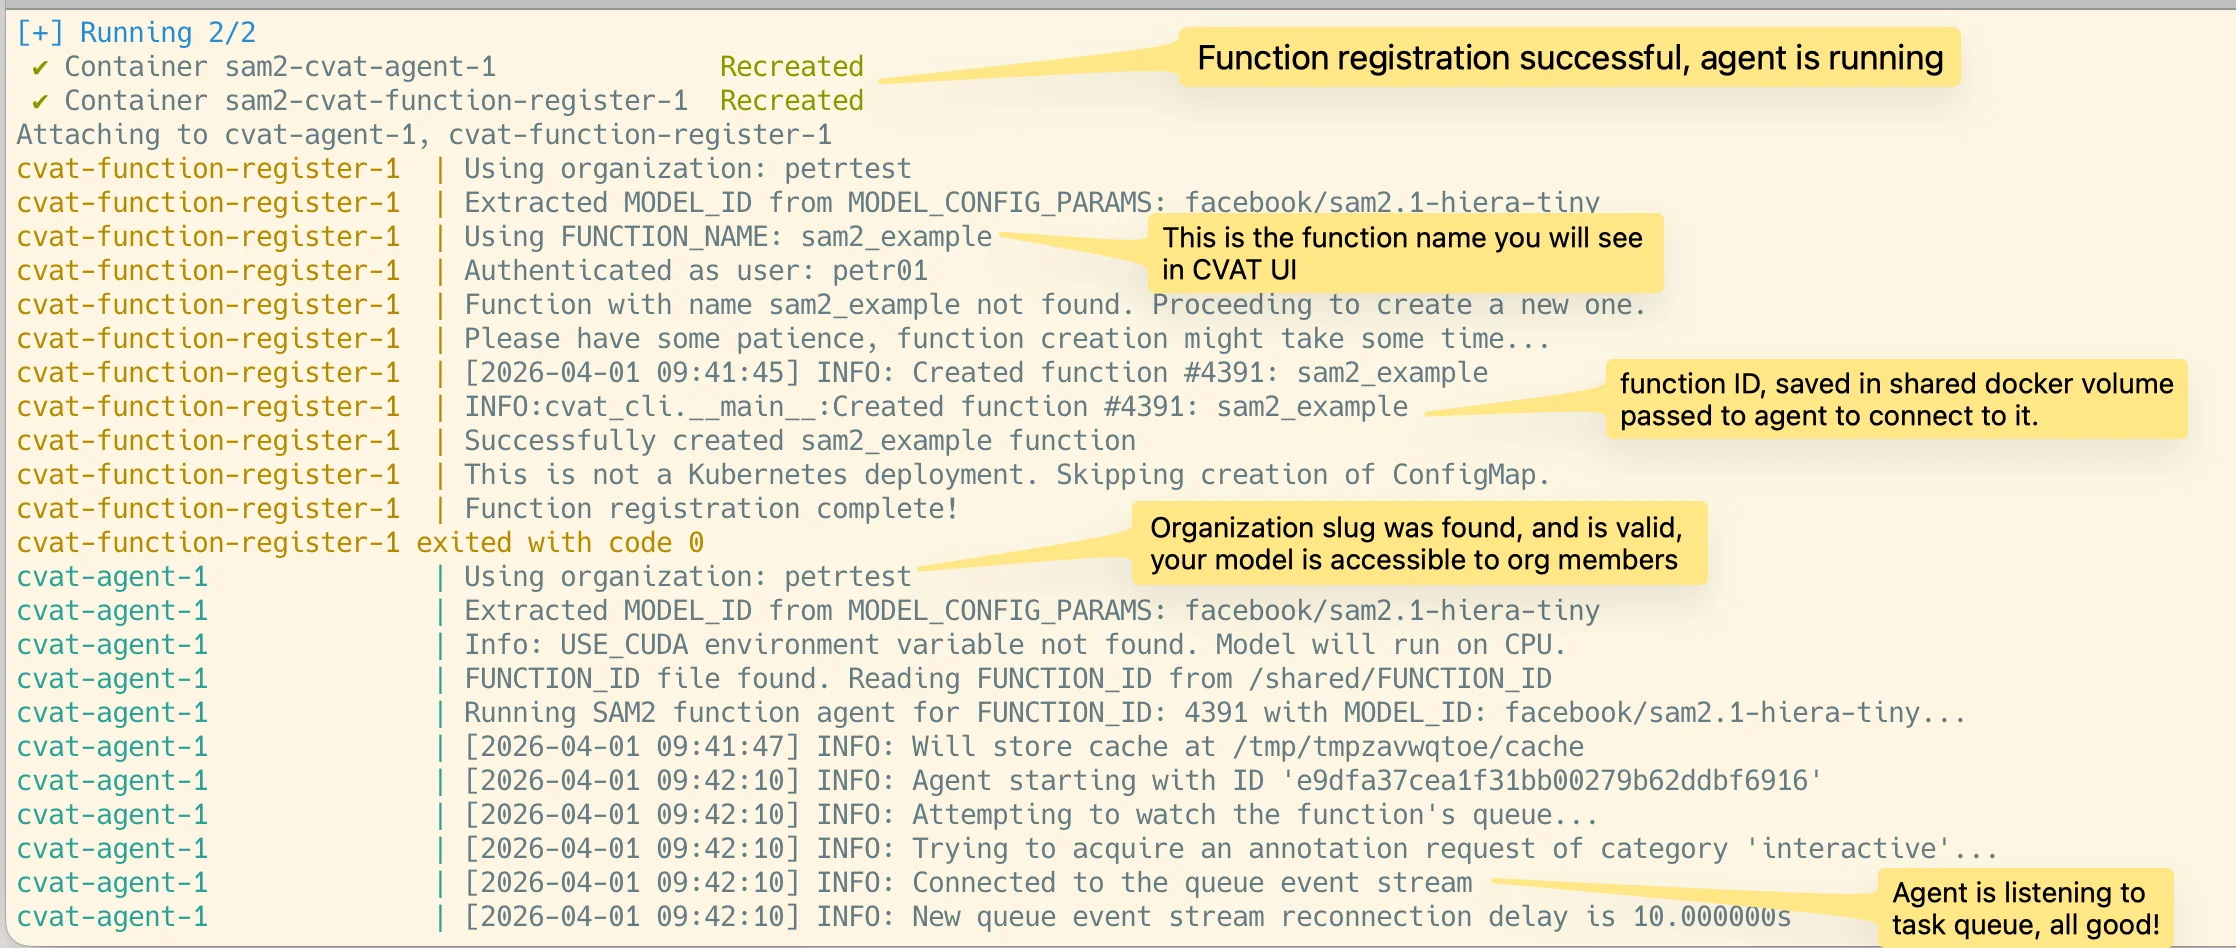
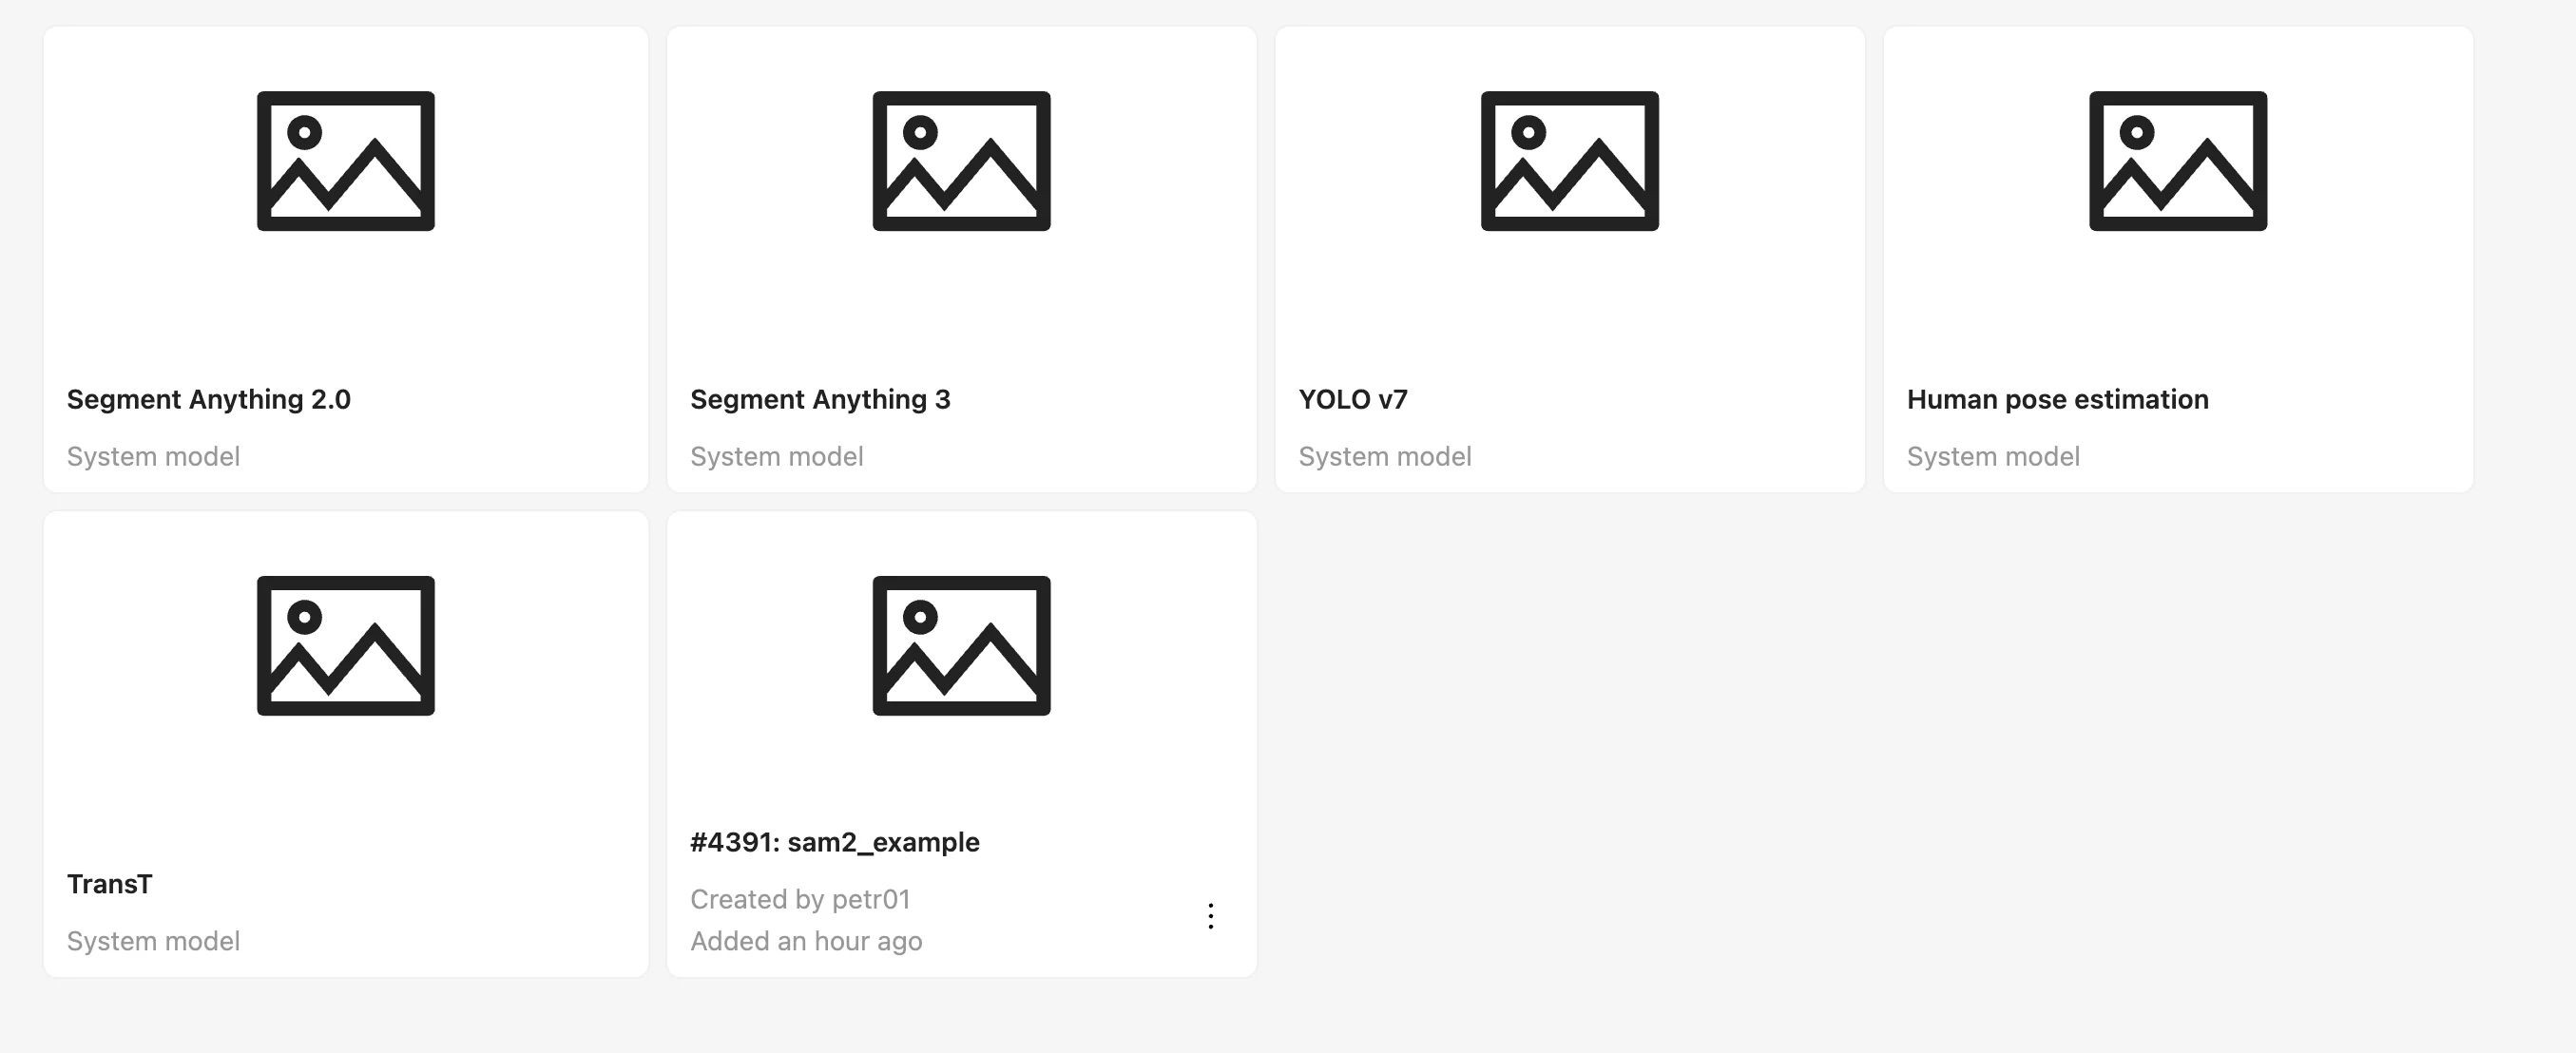
So now you can go to CVAT UI and check that the model is registered:
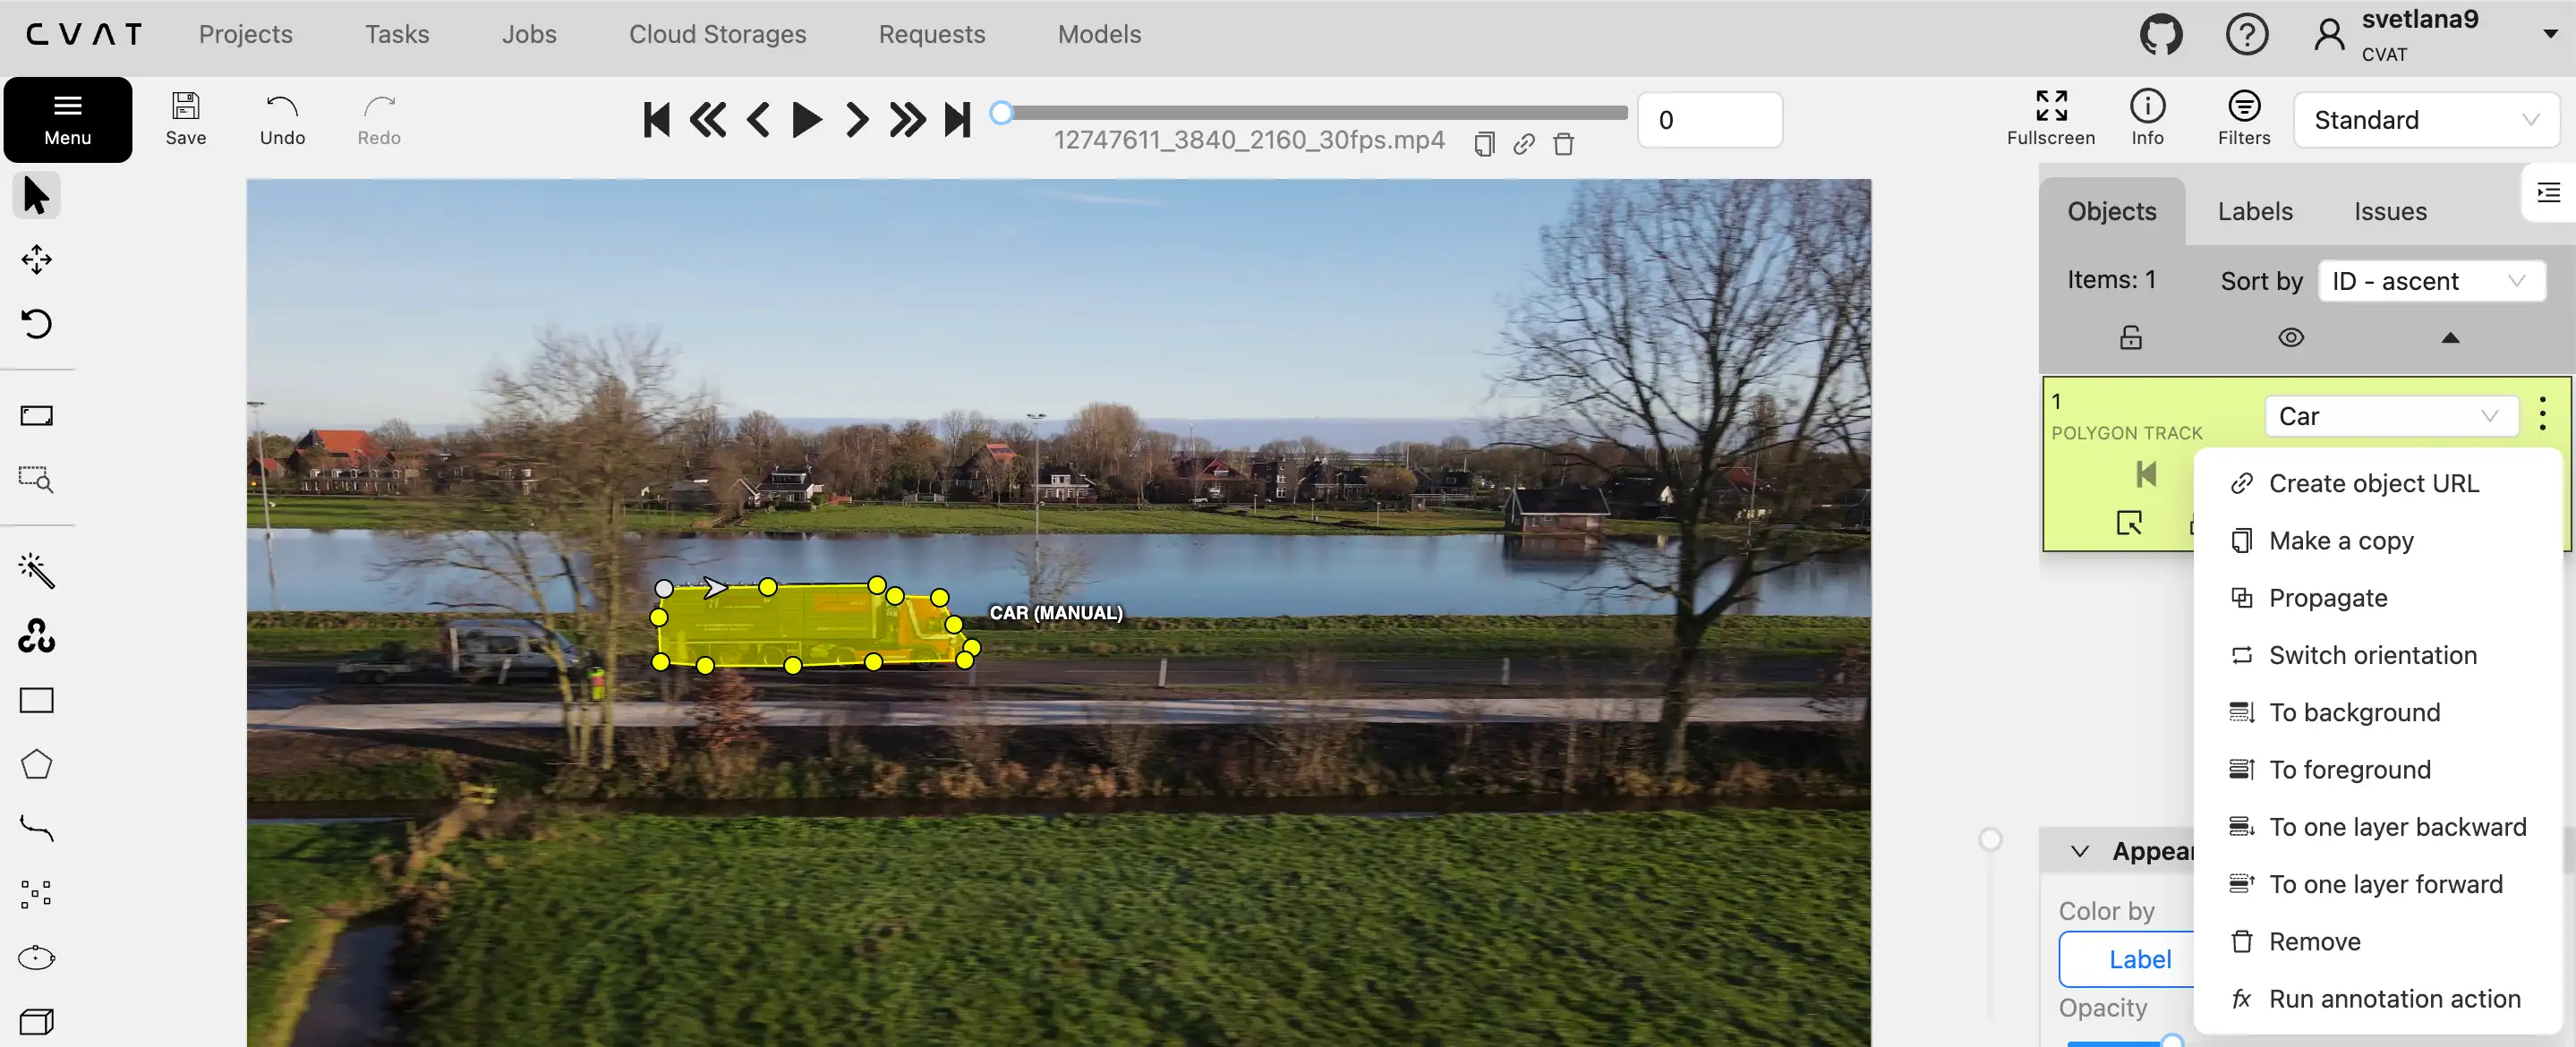
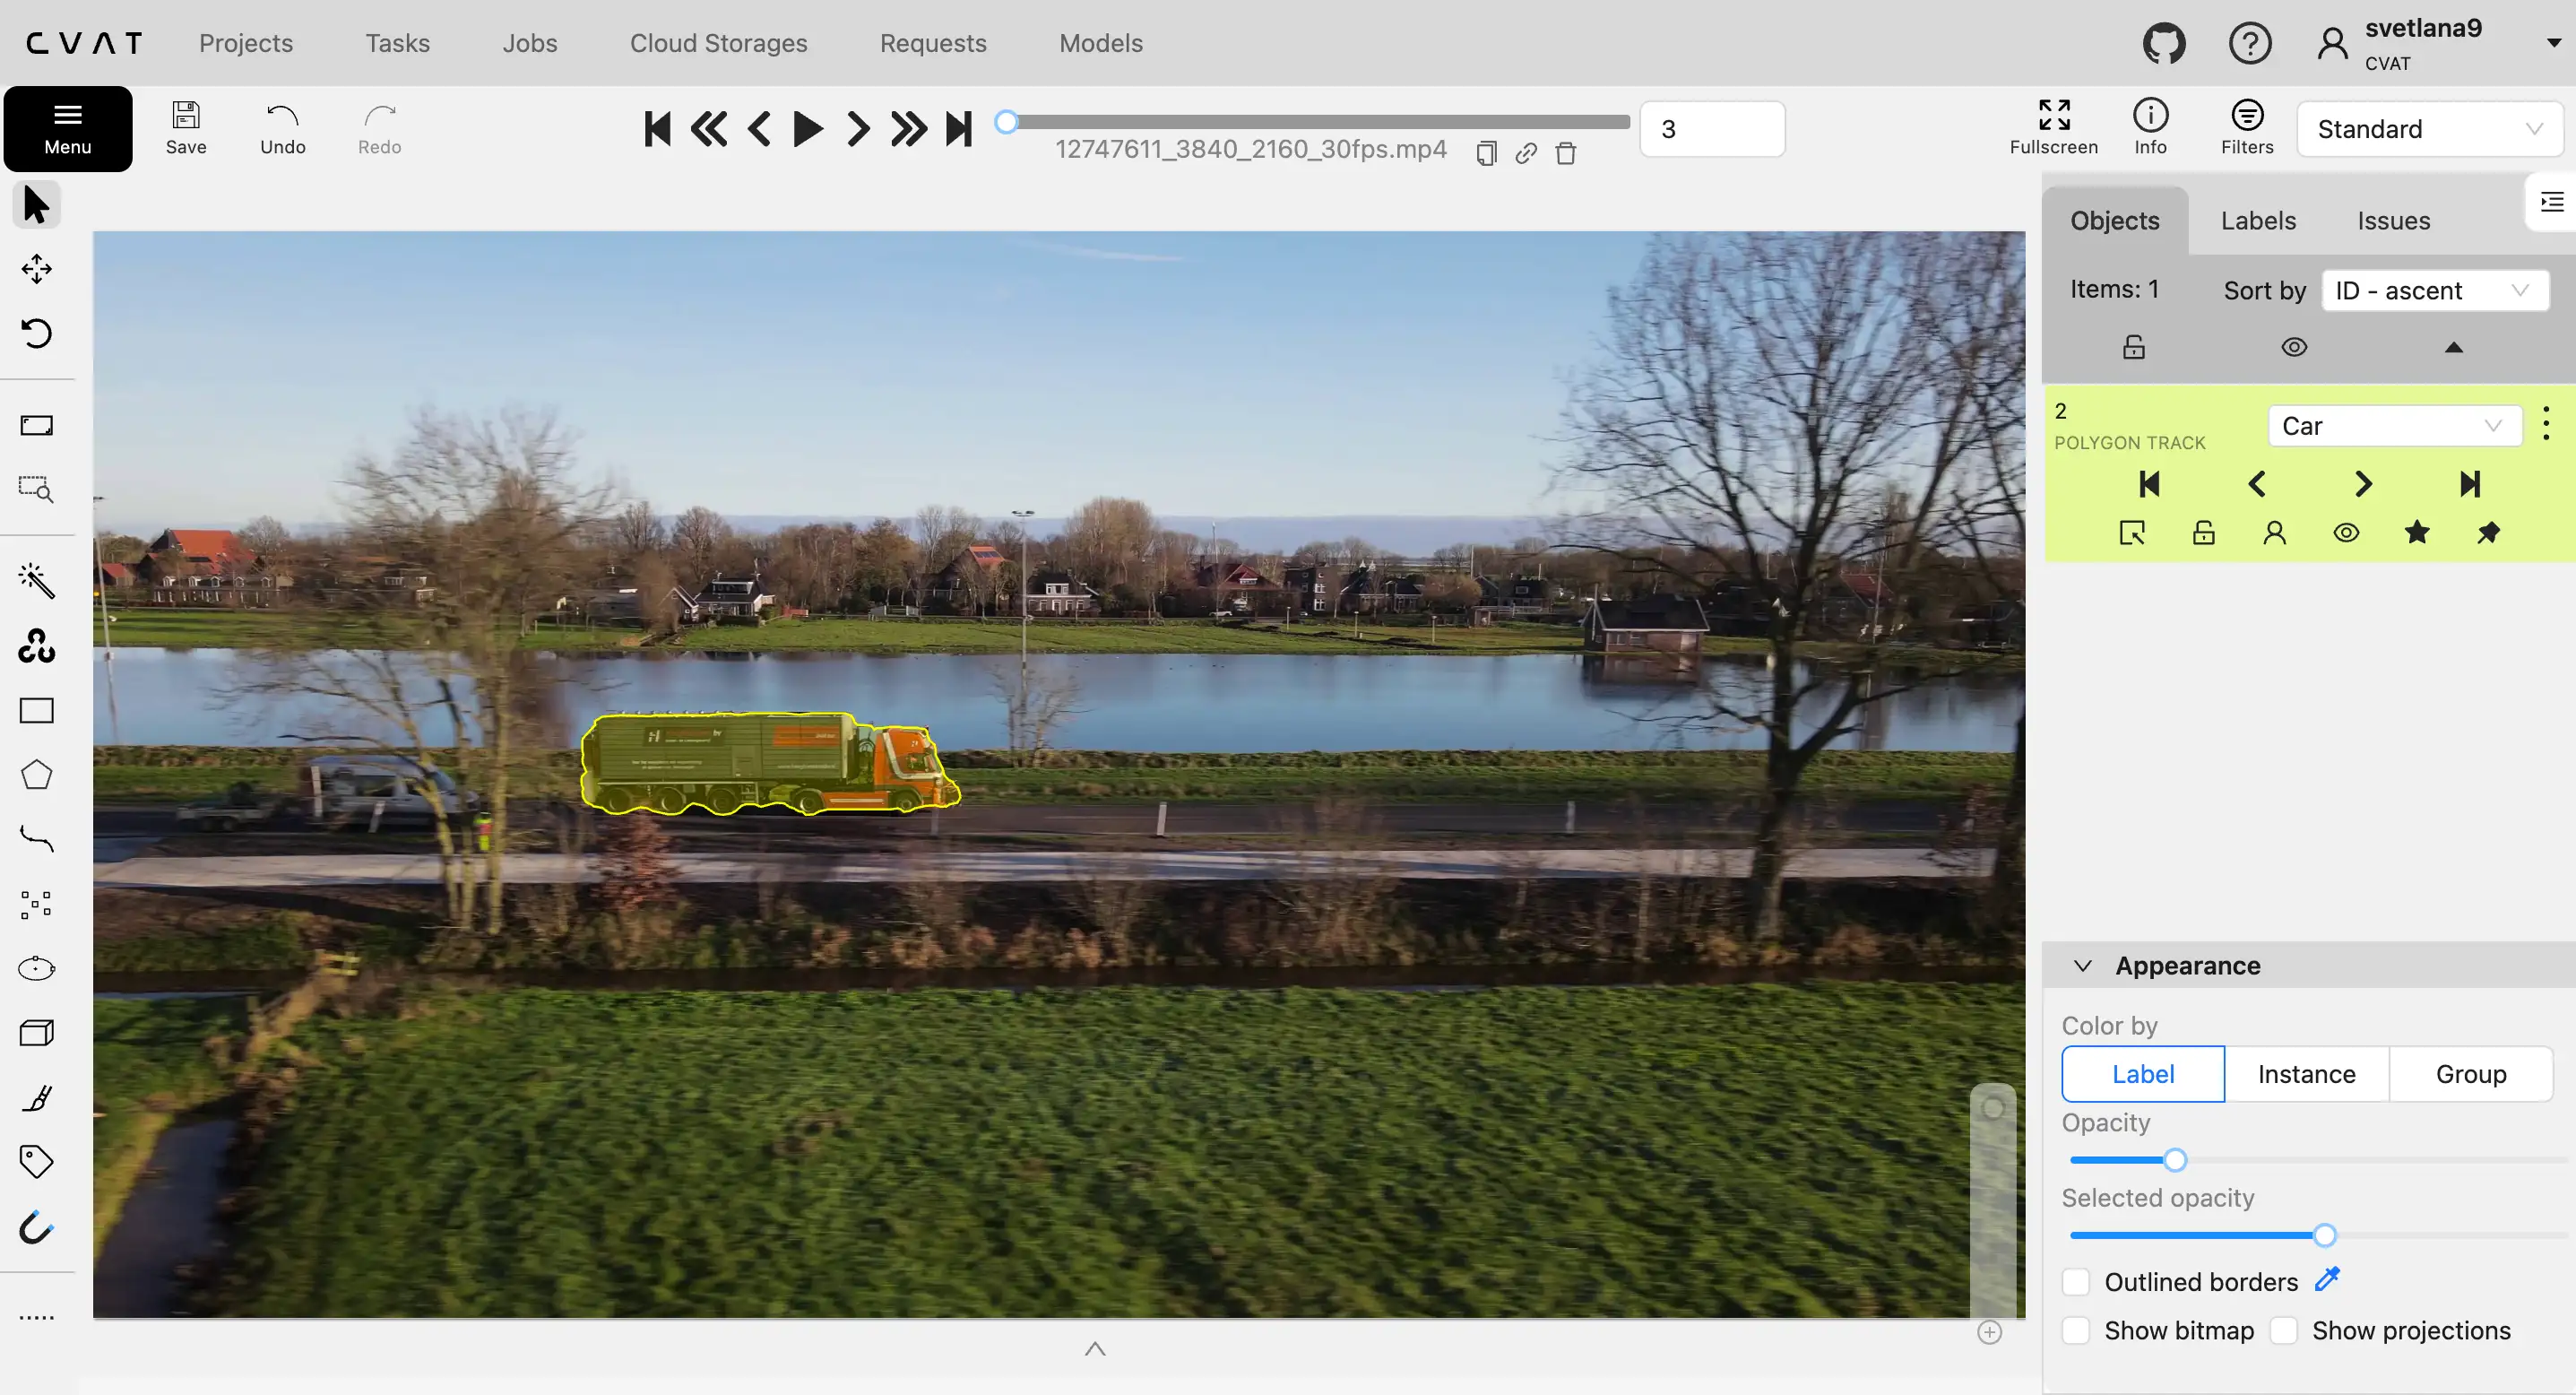
Now lets test and track something to ensure that the agent is working properly.
So in this example I will do the following:
- Open my existing job
- Draw a new polygon
- Run annotation function
![]()
In console you will be able to see logs from the agent, that will indicate that the task is being processed:
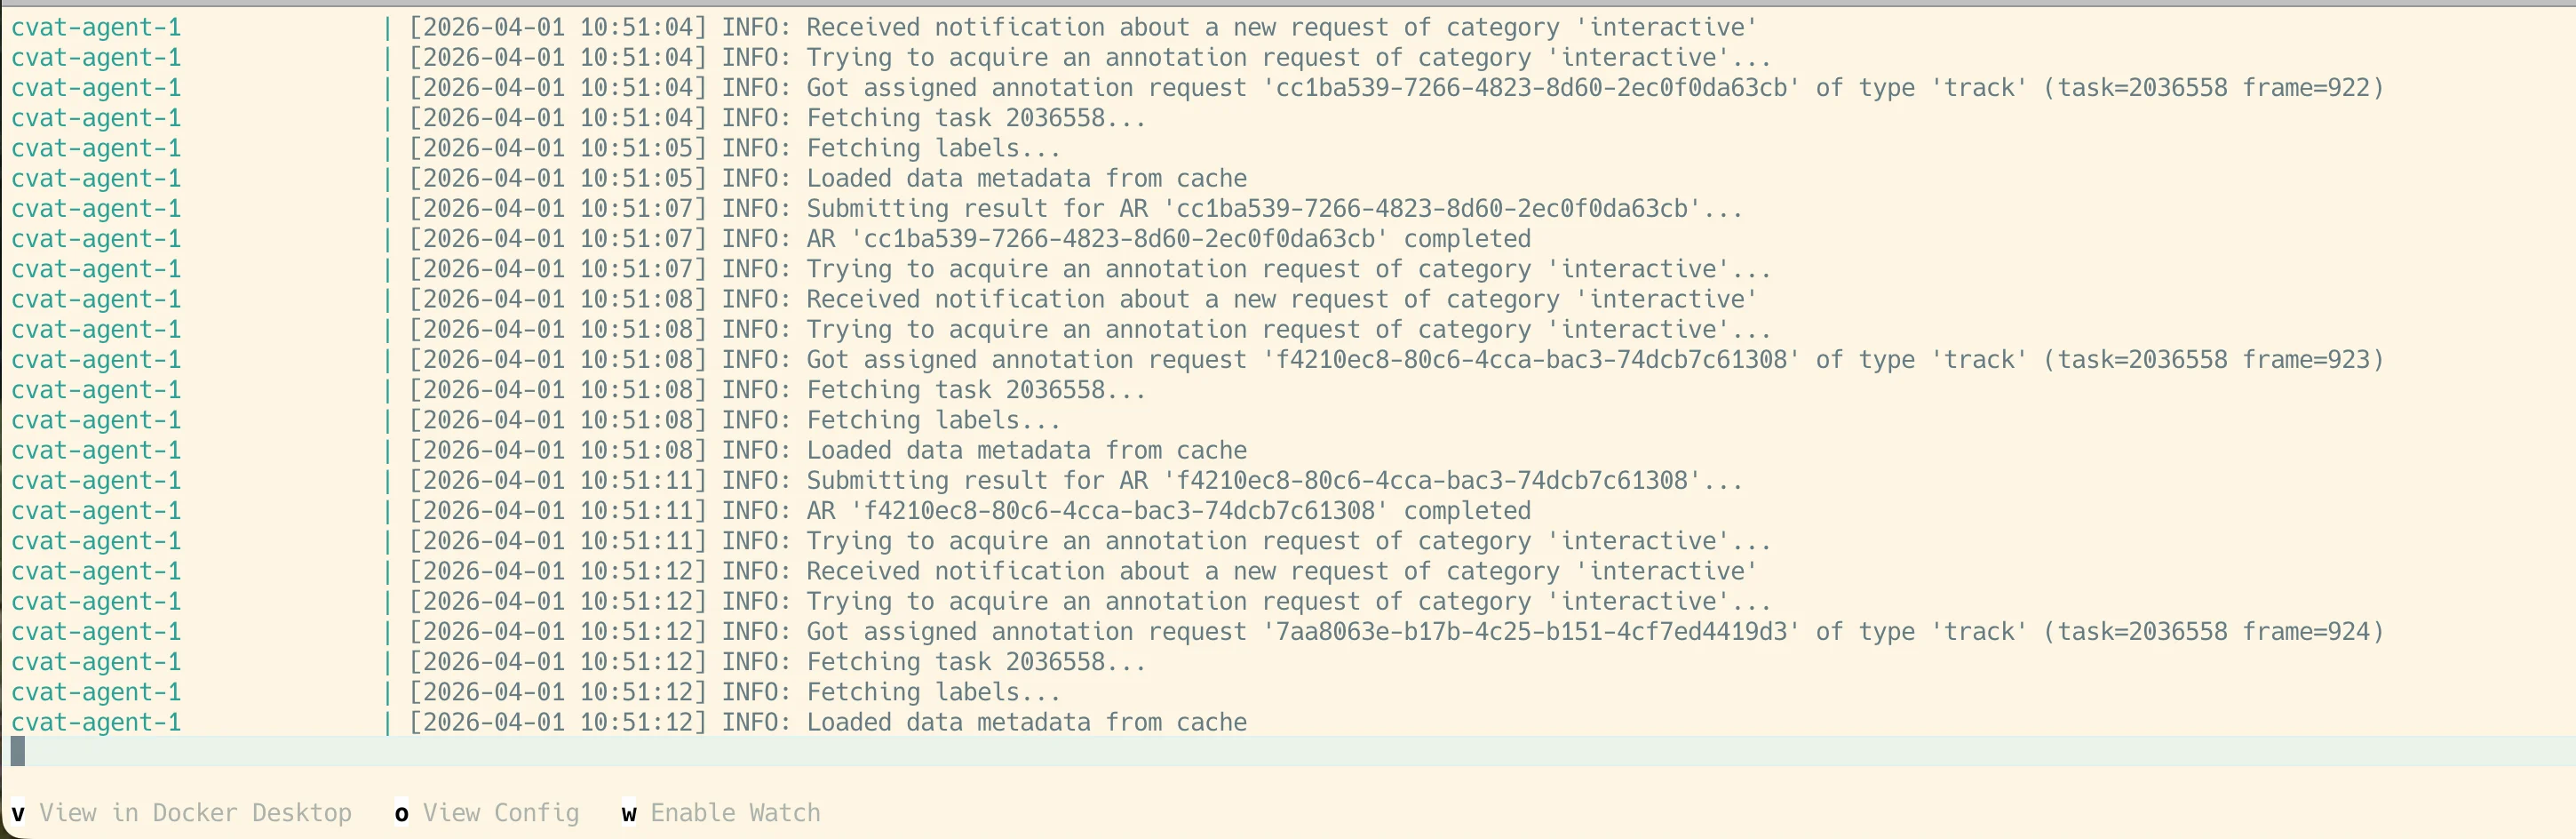
After that you can move forward through frames and see that the polygon is being tracked:
How to clean up after running CVAT agent with Docker Compose
Now, when you are done with testing your agent, you can stop it by pressing CTRL + C in the
terminal where you ran docker compose up command.
This will stop the container, but won’t deregister the function from CVAT.
To deregister the function from CVAT, you should run the following command in the terminal:
docker compose run --rm cvat-function-deregister

Troubleshooting common issues with Docker Compose deployment
So most of the issues with Docker Compose deployment are related to the following:
- Incorrect configuration in the
.envfile. Please make sure that you have provided correct CVAT_BASE_URL, CVAT_ACCESS_TOKEN, FUNCTION_NAME, IMAGE_URL and MODEL_CONFIG_PARAMS. - In rare cases, there could be some issues with data on shared volume. You can check that by running the following command in the terminal:
docker run --rm -v sam2_shared-data:/mnt alpine cat /mnt/FUNCTION_ID
Or you just can delete everything and start from scratch by running:
docker compose down -v
- Also there could be issues with MODEL_CONFIG_PARAMS. Please make sure that you have provided correct parameters for the model you are using. You can check the model documentation for more details on that.