Helm agent guide
Introduction
Since CVAT agents were announced, we have been working on making it easier for users to deploy their agents in CVAT and we are excited to share with you new ways to do that. In this guide we will cover how to deploy your agent to CVAT using Helm.
If you are familiar with Kubernetes and you want better control over your deployment and higher flexibility, you should go with Helm deployment instead of Docker compose.
In this guide we will cover the following topics:
- High-level overview of the Helm approach for deploying CVAT agents
- How to prepare your cluster for deploying CVAT agents with Helm
- How to configure
values.yamlfor your CVAT agent - How to deploy CVAT agent with Helm
- How to clean up after running CVAT agent with Helm
- Troubleshooting common issues with Helm deployment
High-level overview of the Helm approach for deploying CVAT agents
The Helm chart automates the full lifecycle of a CVAT agent:
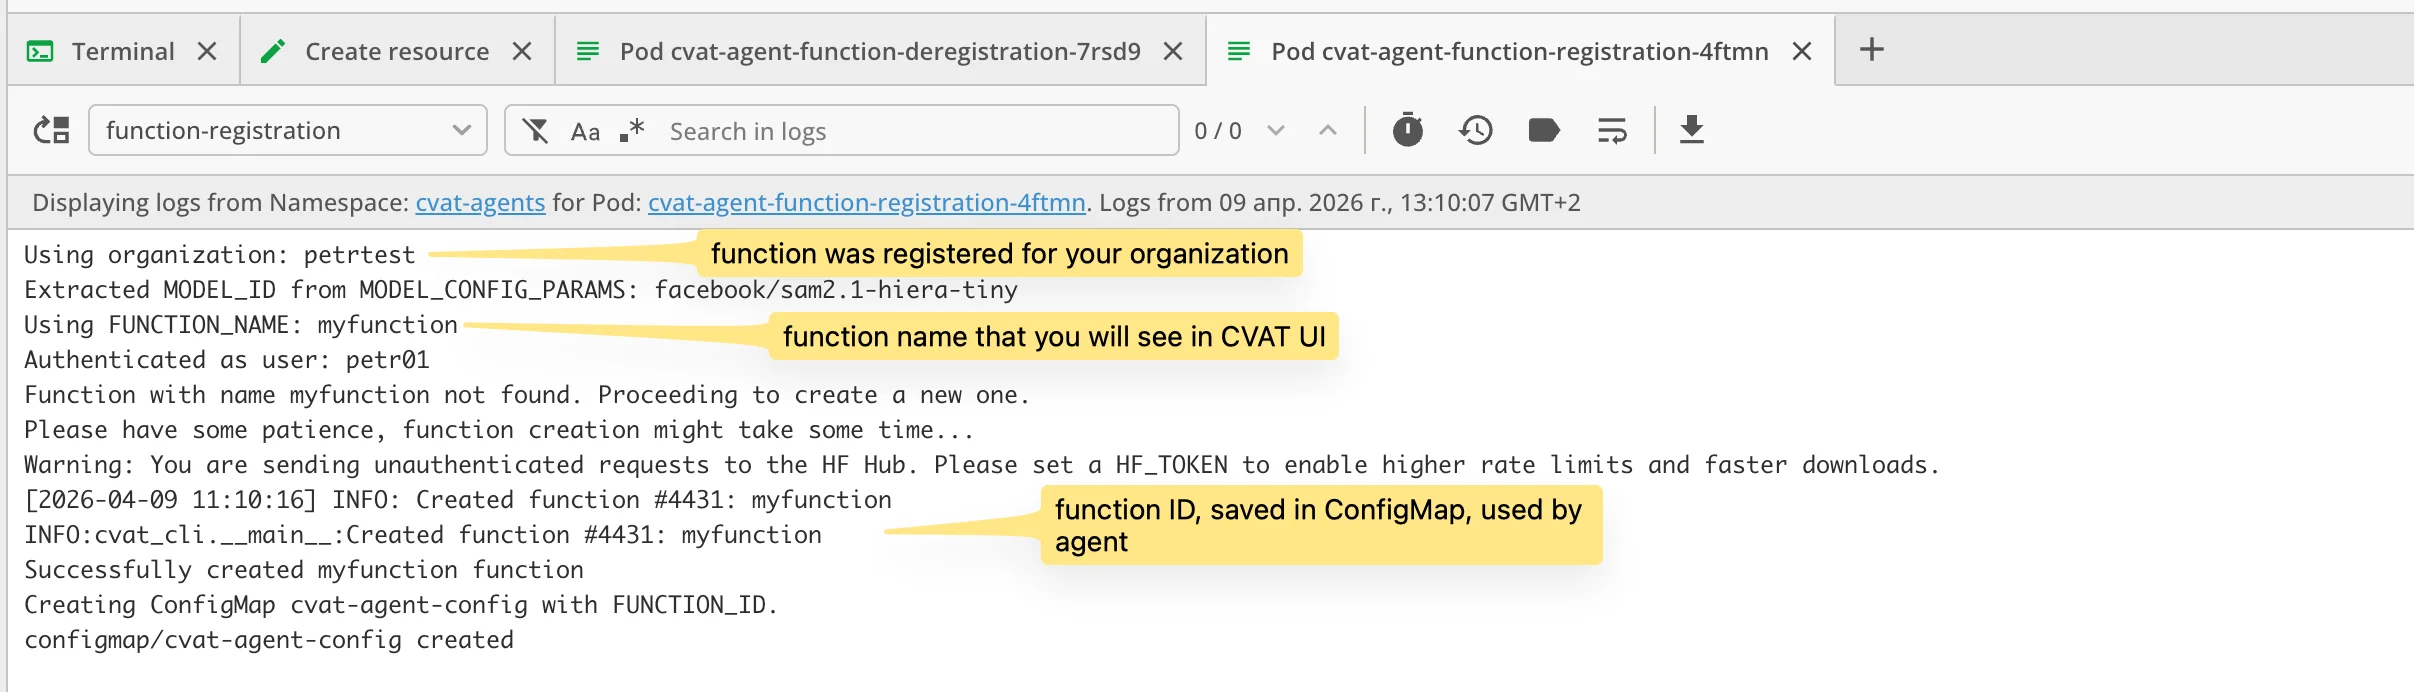
- Pre-install/pre-upgrade hook — a Kubernetes Job registers your model as a function in CVAT using
cvat-cli. The resulting function ID is stored in a ConfigMap so the agent Deployment can pick it up. - Deployment — agent pods start polling CVAT for new tasks and processing them with your model.
- Pre-delete hook — when you uninstall the release, another Job automatically deregisters the function from CVAT.
This means you don’t need to run cvat-cli manually — the chart handles registration and deregistration for you.
How to prepare your cluster for deploying CVAT agents with Helm
To deploy CVAT agents with Helm, you need the following:
- A running Kubernetes cluster (v1.23+)
kubectlconfigured to talk to your cluster- Helm 3 installed https://helm.sh/docs/intro/install/
- Network access from the cluster to your CVAT instance
- A CVAT access token for authentication https://app.cvat.ai/profile#security
If you plan to use GPU, make sure the NVIDIA device plugin is installed in your cluster and your
nodes have nvidia.com/gpu in .status.allocatable.
How to configure values.yaml for your CVAT agent
Clone the CVAT repository and navigate to the chart directory:
git clone git@github.com:cvat-ai/cvat.git
cd cvat/ai-models/agents_deployment/helm
Open values.yaml and configure the following sections.
Image
Specify the Docker image that contains your agent implementation:
image:
  repository: "cvat/sam2_agent"
  tag: "latest"
  pullPolicy: IfNotPresent
You can either build your own image or use one from the CVAT DockerHub
Common agent configuration
agent:
  function_name: "myfunction"       # Unique name for your function (unique per user)
  replicaCount: 1                   # Number of agent replicas
  org_slug: ""                      # Organization slug (leave empty for personal scope)
  use_cuda: false                   # Set to true if your image supports GPU
  cvat_base_url: "https://app.cvat.ai"  # URL of your CVAT instance
  cvat_access_token: ""             # Access token (NOT recommended — use secret_env instead)
Storing the access token securely
Instead of putting the token in plain text, create a Kubernetes Secret and reference it:
kubectl -n cvat-agents create secret generic cvat-agent --from-literal=token=YOUR_TOKEN_HERE
Then in values.yaml:
agent:
  cvat_access_token: ""   # leave empty so the secret is used
  secret_env:
    - name: CVAT_ACCESS_TOKEN
      secretName: cvat-agent
      secretKey: token
Warning: If you set cvat_access_token directly, it will override secret_env
and the token will be visible in the Helm release history and pod specs.
Model configuration
The chart ships with presets for popular models. Pick a preset and optionally override parameters:
agent:
  preset: sam2    # Available: yolo, sam2, transformers-detr, custom

  # Override or add parameters on top of the preset:
  modelParamsOverride: {}
  #  model_id:
  #    type: str
  #    value: "facebook/sam2.1-hiera-large"
Resources
agent:
  resources:
    limits:
      cpu: 1
      gpu: 1          # Only applied when use_cuda is true
    requests:
      cpu: 200m
      gpu: 1          # Only applied when use_cuda is true
      memory: 256Mi
When use_cuda: true, the gpu values are translated to nvidia.com/gpu resource requests/limits.
Node scheduling (optional)
Use nodeSelector, affinity, and tolerations to control where agent pods are scheduled:
agent:
  nodeSelector: {}
  #  nodetype: gpu
  affinity: {}
  tolerations: []
  #  - key: "nvidia.com/gpu"
  #    operator: "Exists"
  #    effect: "NoSchedule"
Extra volumes (optional)
Mount additional volumes into agent containers if your model needs them:
agent:
  extraVolumeMounts: []
  #  - name: model-cache
  #    mountPath: /models
  extraVolumes: []
  #  - name: model-cache
  #    persistentVolumeClaim:
  #      claimName: model-cache-pvc
How to deploy CVAT agent with Helm
Once values.yaml is configured, deploy with:
helm install my-agent . -n cvat-agents --create-namespace
Helm will:
- Create a ServiceAccount, Role, and RoleBinding for the registration Job
- Run the function registration Job (pre-install hook)
- Deploy the agent pods

Check that the registration Job completed:
kubectl get jobs -n cvat-agents -l app.kubernetes.io/instance=my-agent
Check that agent pods are running:
kubectl get pods -n cvat-agents -l "app.kubernetes.io/instance=my-agent,app.kubernetes.io/component!=job"
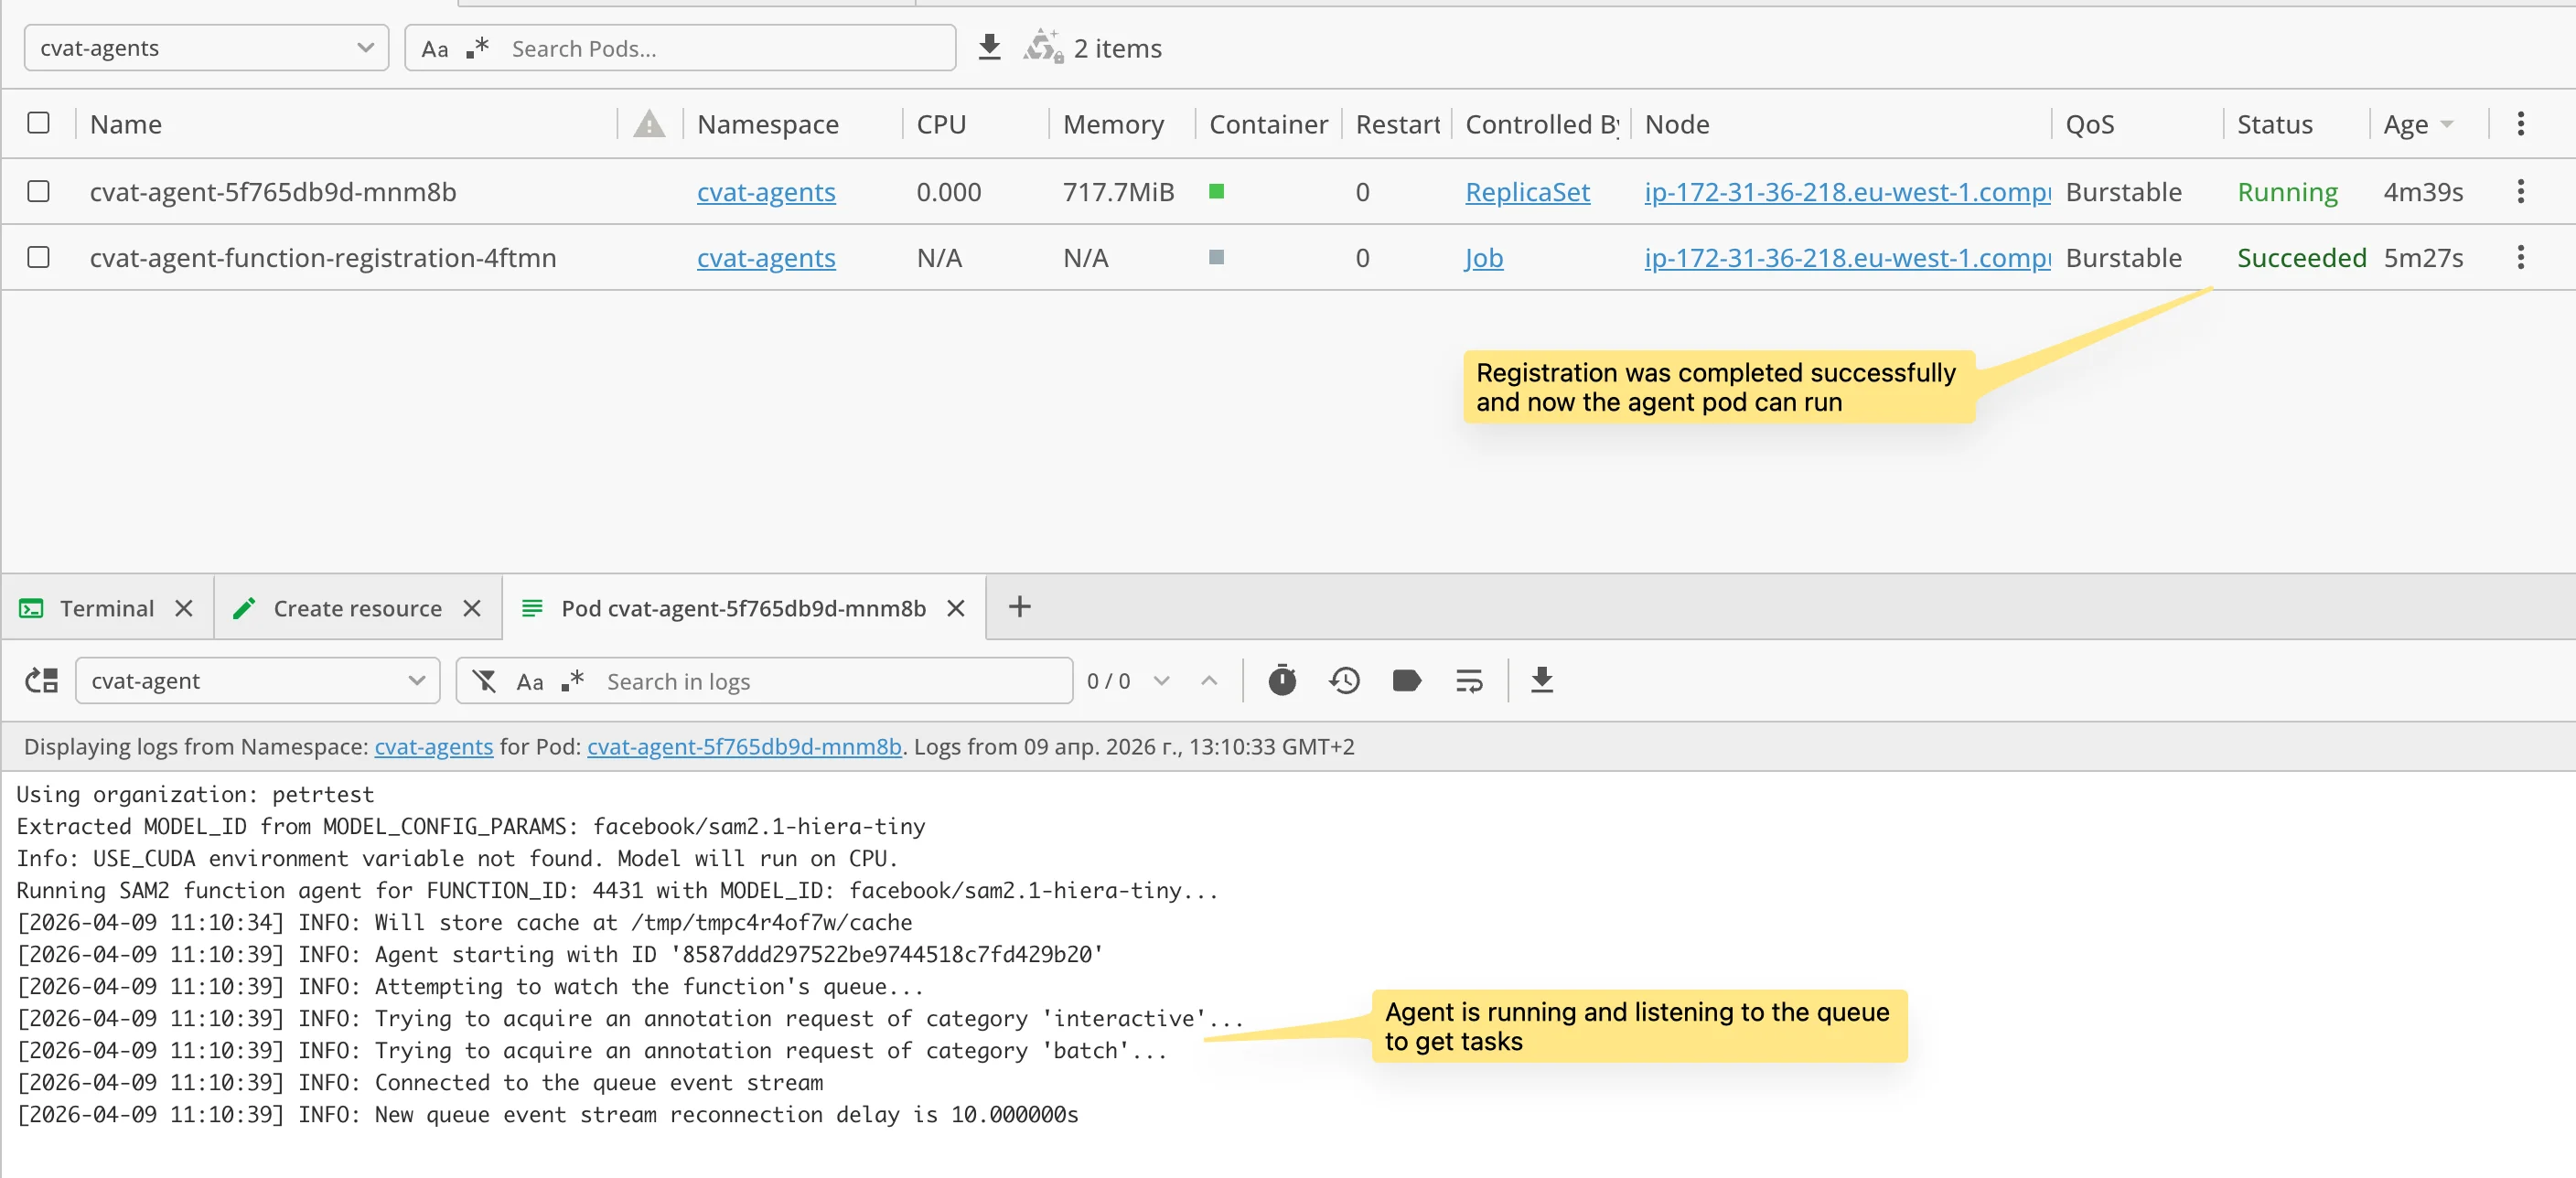
View agent logs:
kubectl logs -n cvat-agents -l "app.kubernetes.io/instance=my-agent,app.kubernetes.io/component!=job" -f
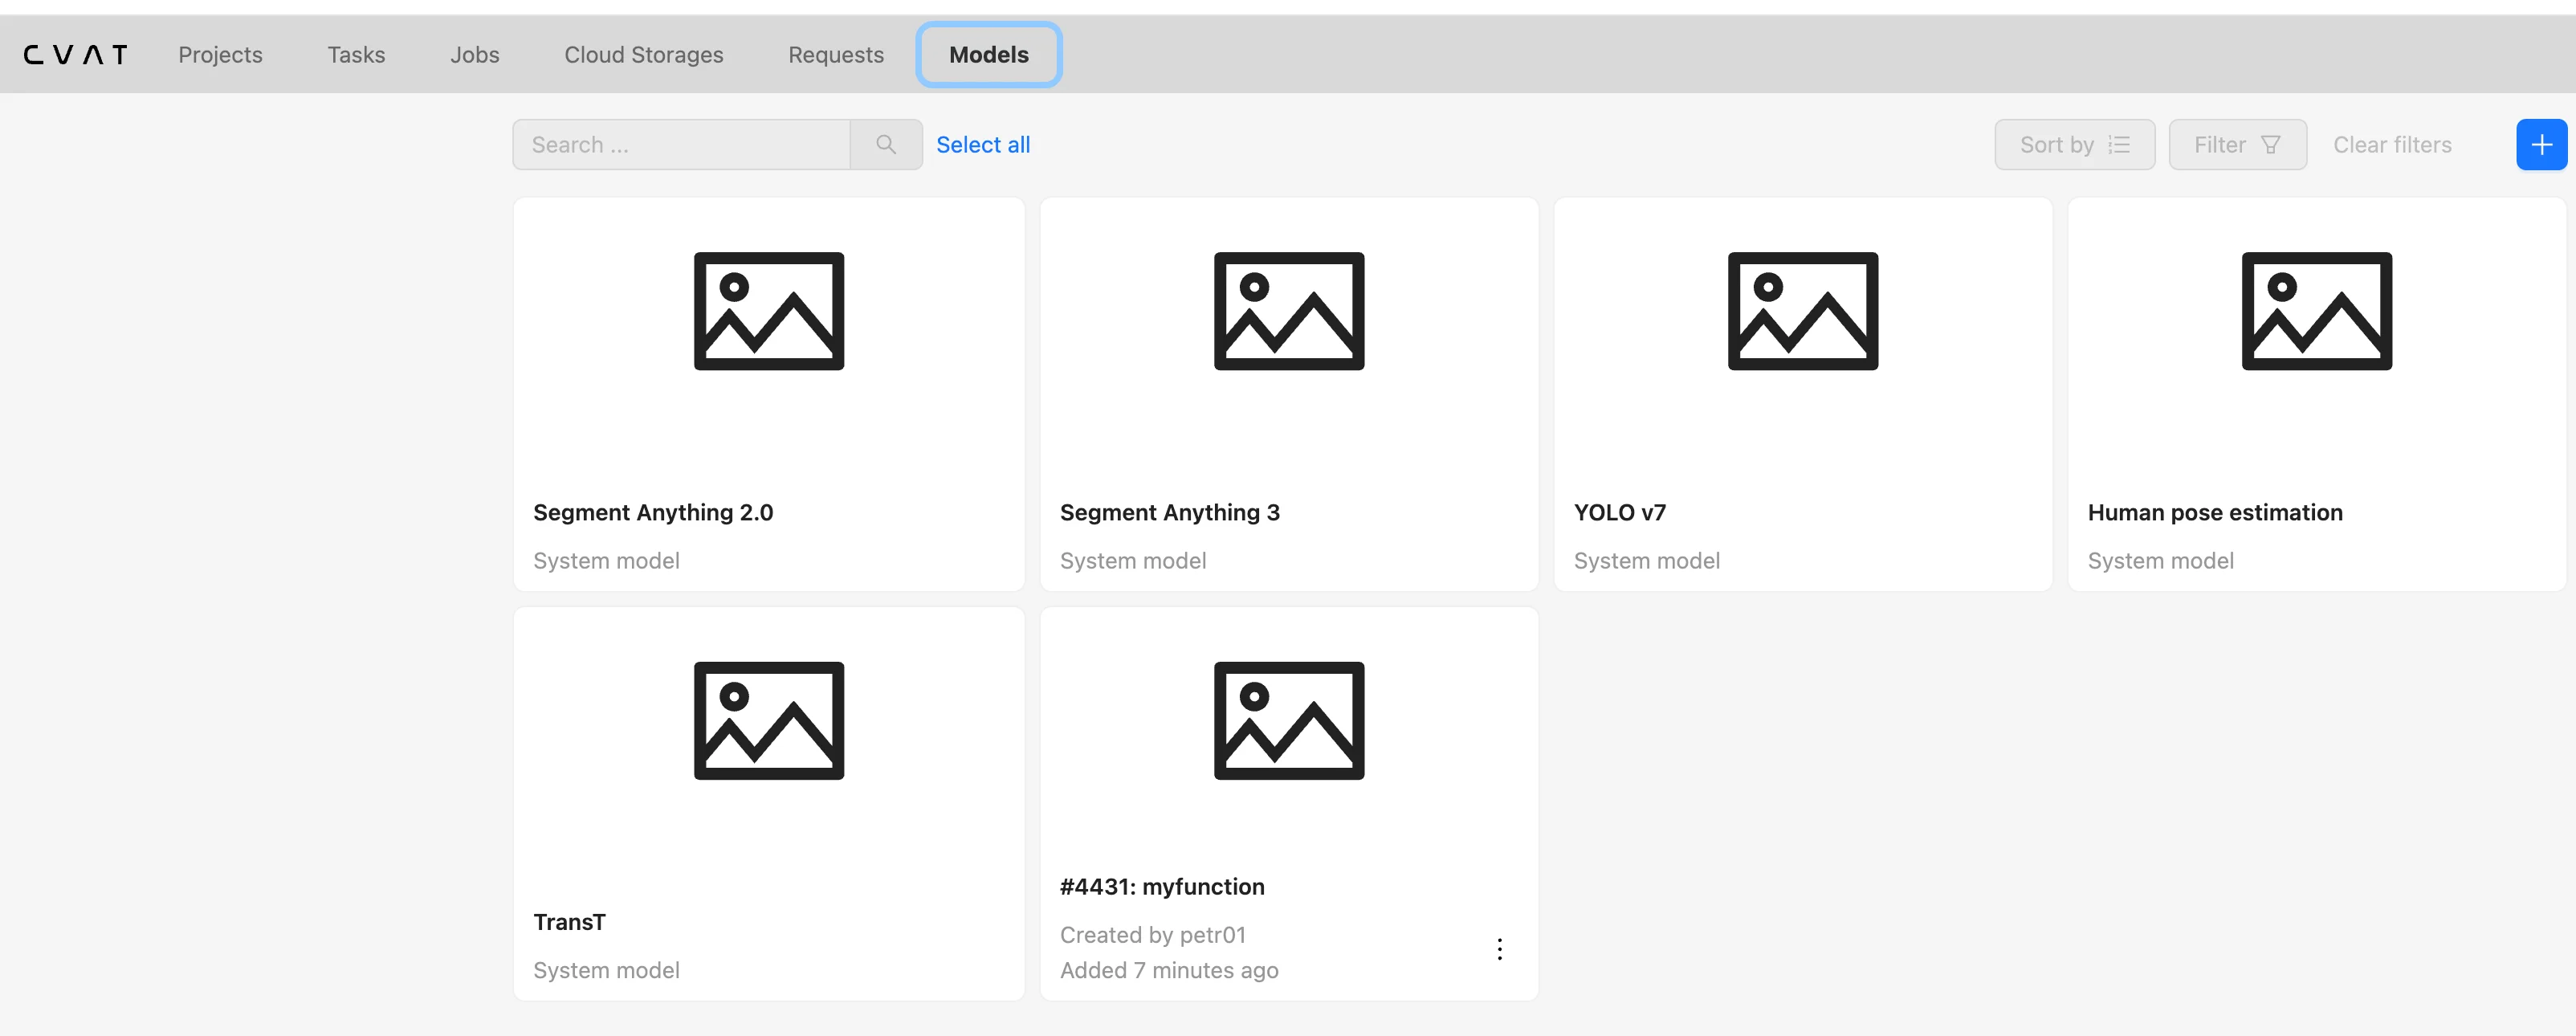
Now go to CVAT UI and verify that the model is registered and available.
Running agent powered model tracker in CVAT
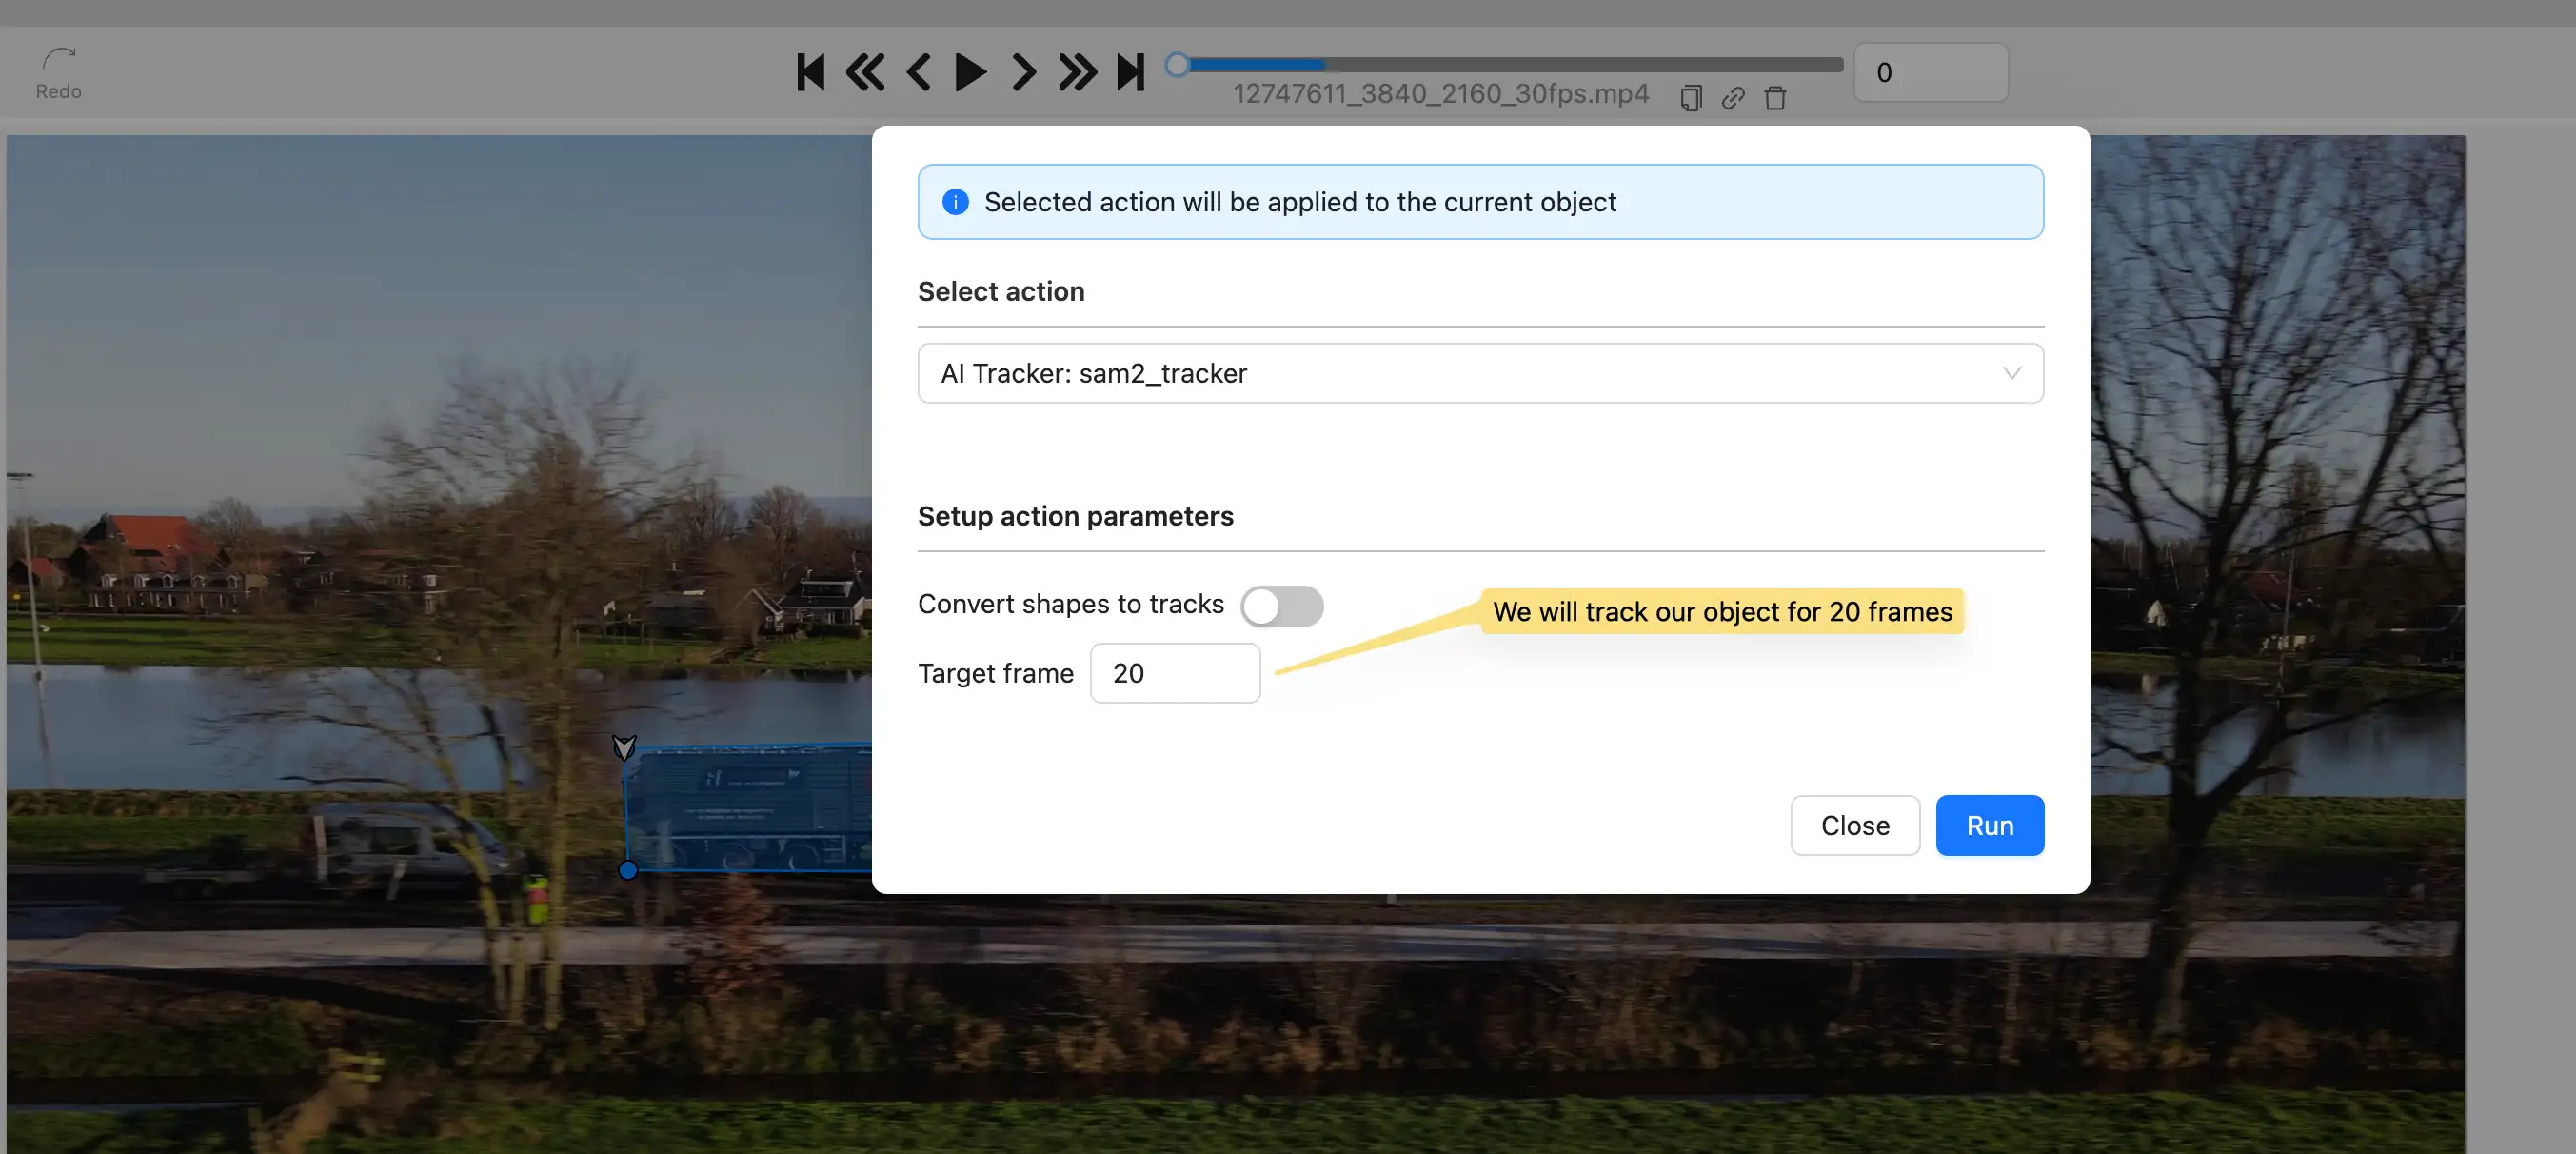
We will be running SAM2 tracker in this example, so I will draw a box around the object, then click on “Run annotation function”
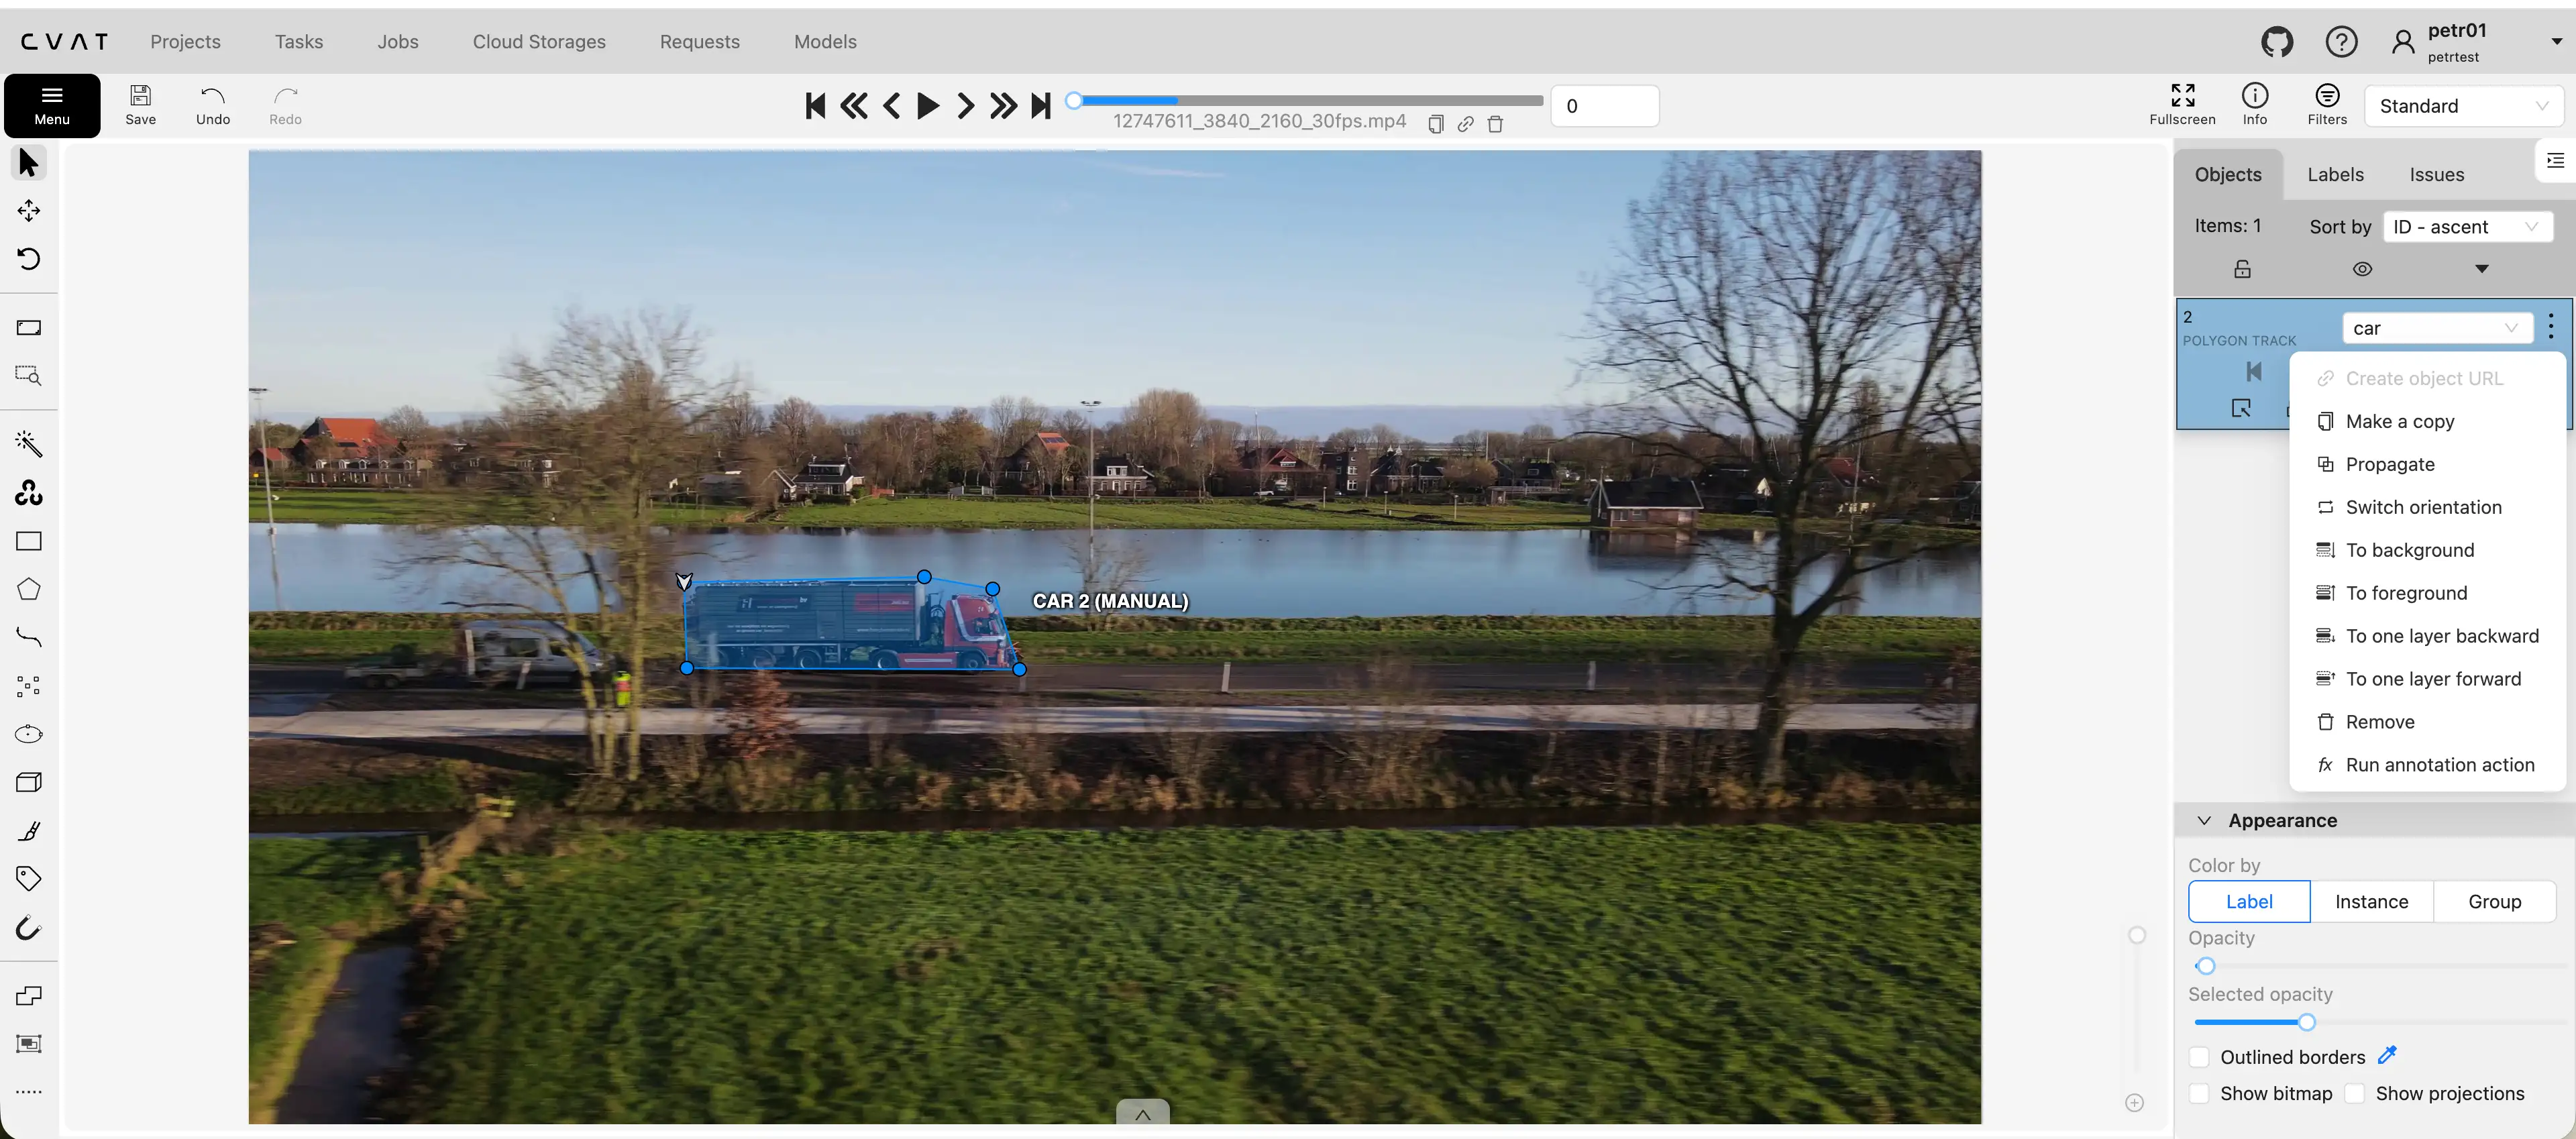
So now we need to decide for how many frames we want to run the tracker. Let’s say 14 frames.
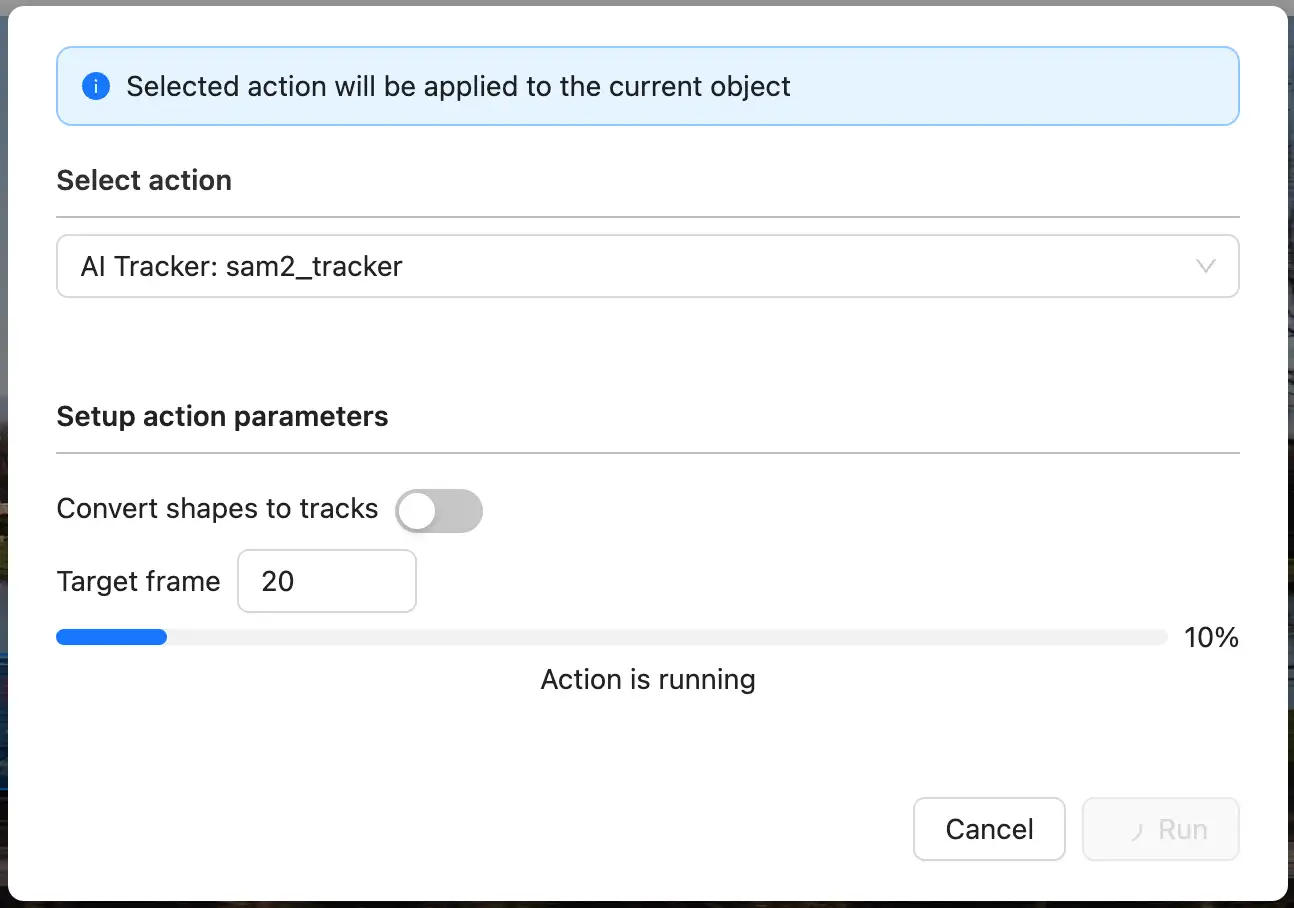
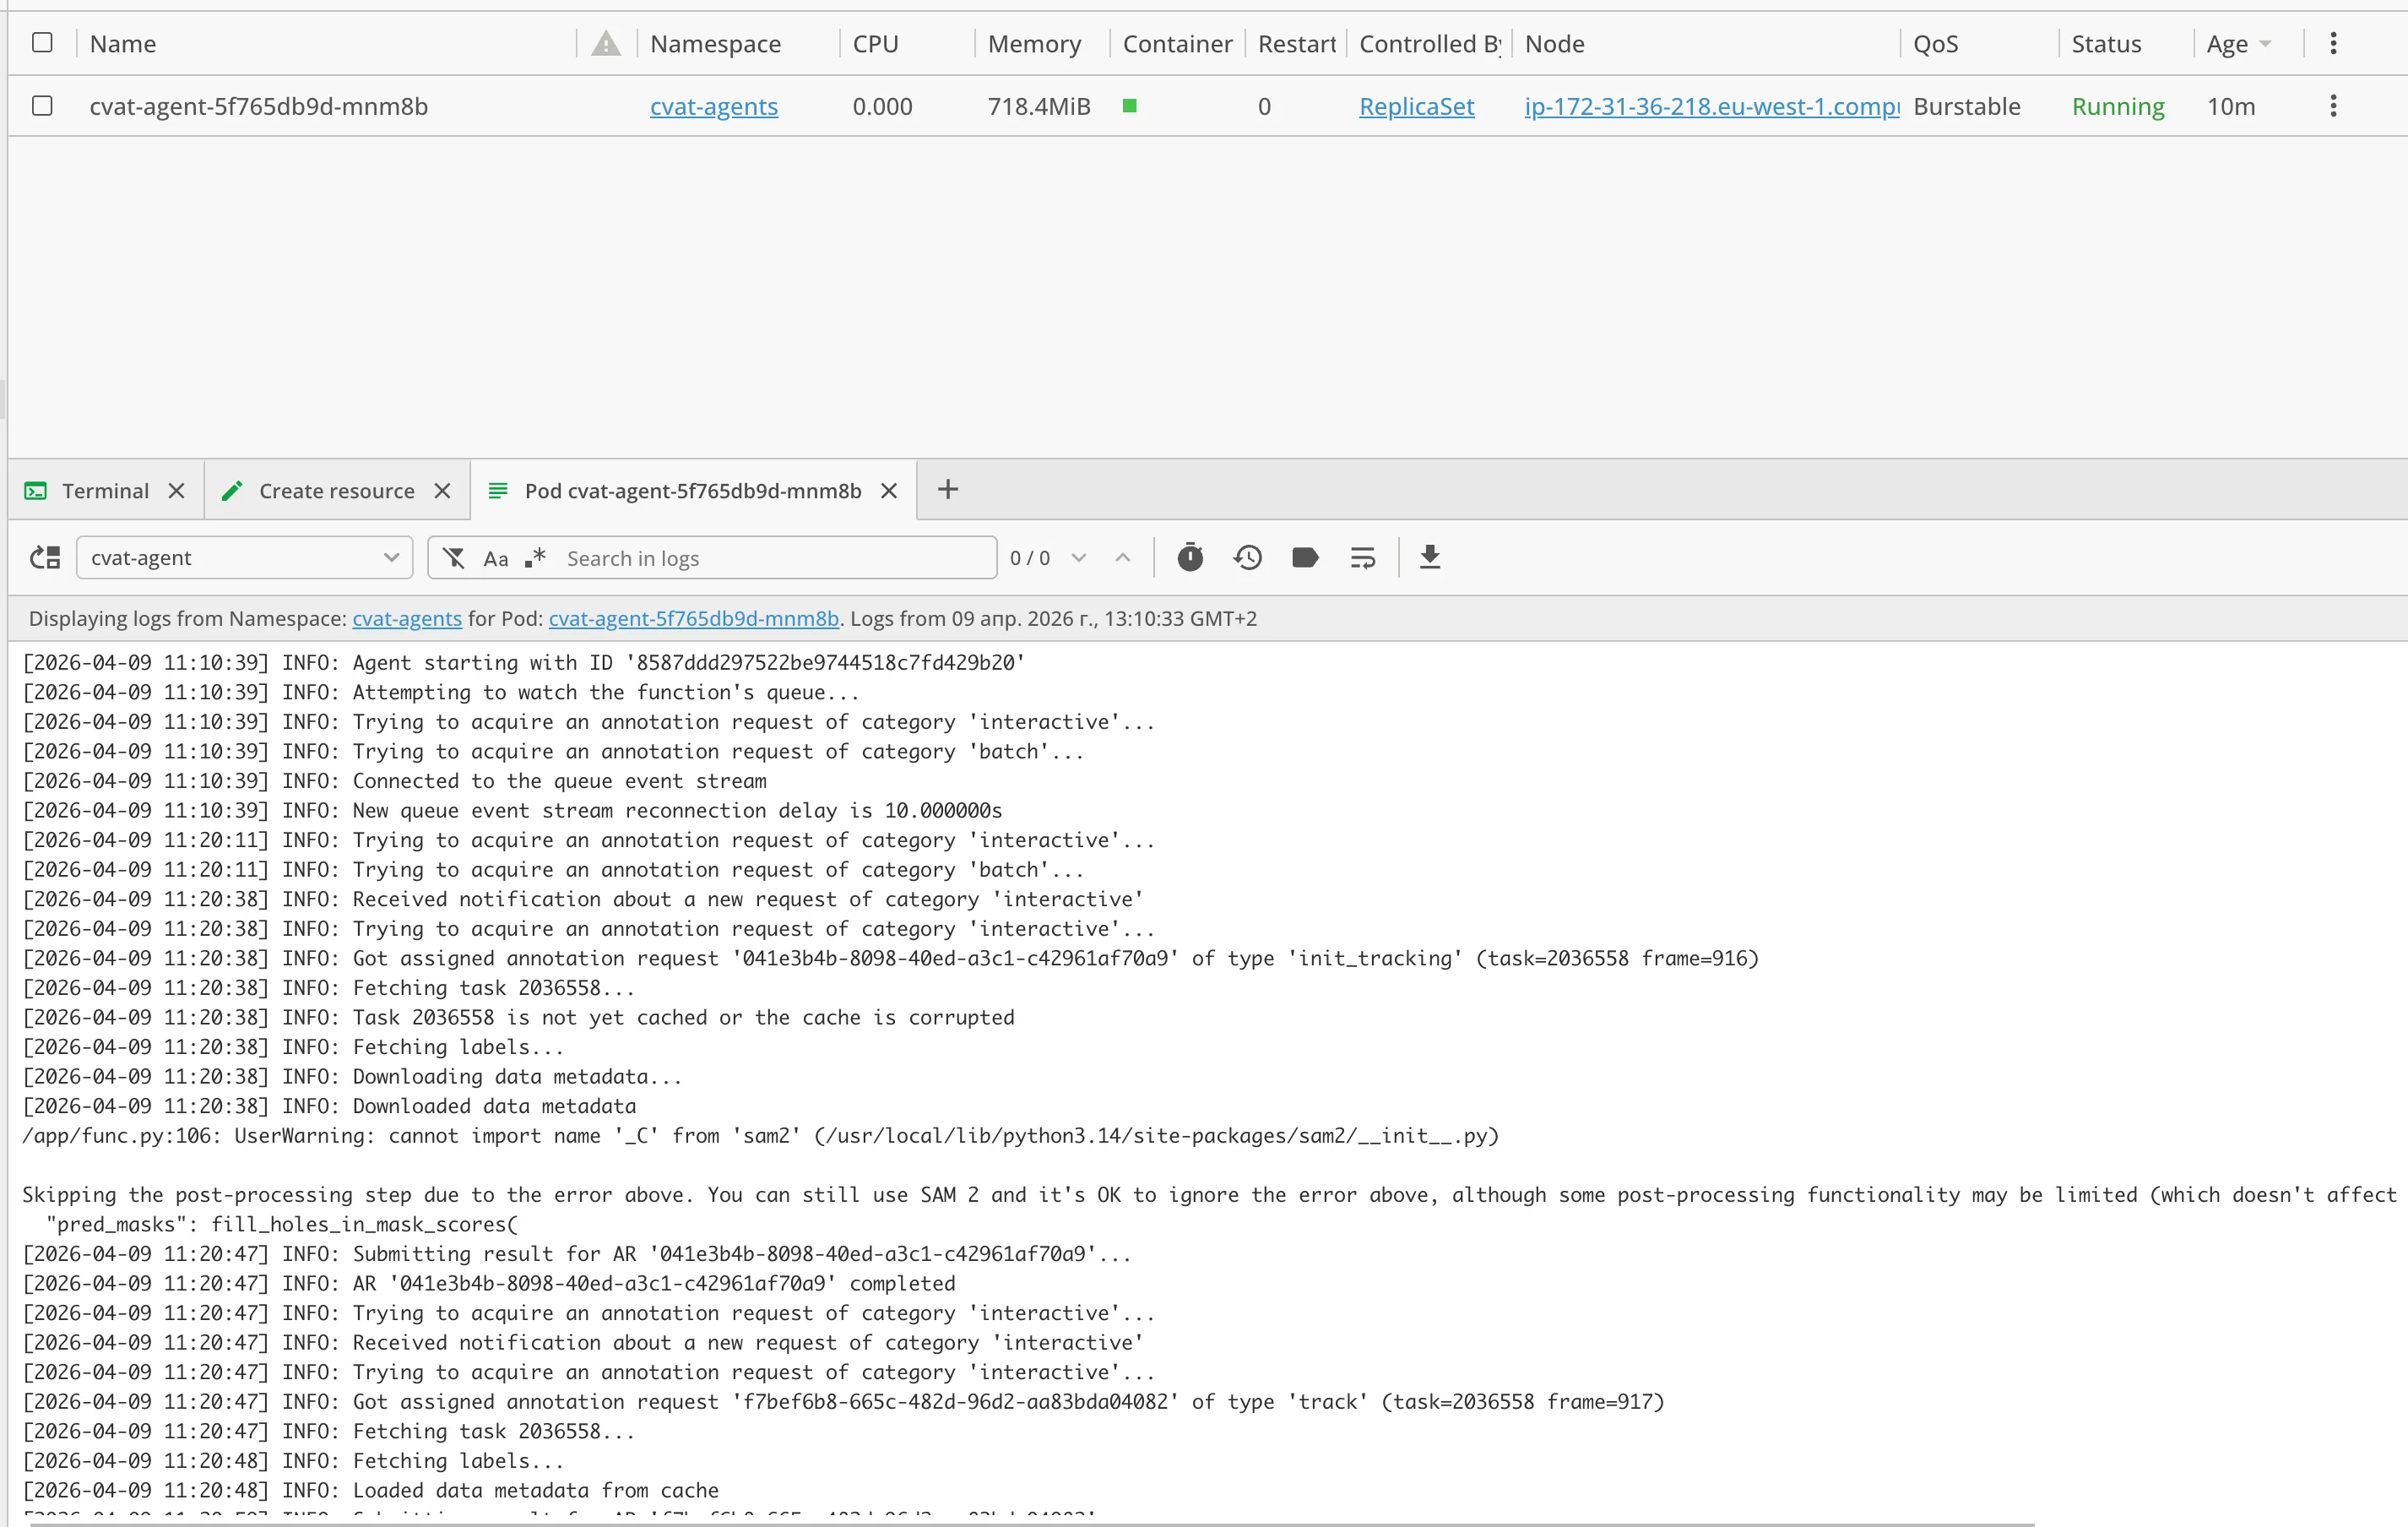
We can see that the agent pod is processing the task:
So now we can see that the tracker has finished and the annotations are updated in CVAT:
![]()
Upgrading the release
To update the configuration (e.g. change replicas or model parameters):
helm upgrade my-agent . -n cvat-agents
The pre-upgrade hook will re-run the registration Job with the new parameters.
How to clean up after running CVAT agent with Helm
Simply uninstall the release:
helm uninstall my-agent -n cvat-agents
The pre-delete hook will automatically run a deregistration Job that removes the function from
CVAT before deleting all Kubernetes resources. No manual cvat-cli commands needed.
Troubleshooting common issues with Helm deployment
Registration Job fails
Check Job logs:
kubectl logs -n cvat-agents -l app.kubernetes.io/component=job
Common causes:
- Incorrect
cvat_base_url— the cluster must be able to reach this URL - Invalid or expired
cvat_access_token— generate a new one in CVAT UI - Wrong
function_name— must be unique per user
Agent pods are in Pending state
kubectl describe pod -n cvat-agents -l app.kubernetes.io/name=agent
Common causes:
- Insufficient CPU/memory resources in the cluster
use_cuda: truebut no GPU nodes available or NVIDIA device plugin not installednodeSelector/tolerationsdon’t match any node
Agent runs but model doesn’t work
- Check
presetandmodelParamsOverride— make sure parameters are correct for your image - Verify that the image actually contains the model you expect
- Check agent logs for errors related to model loading
ConfigMap issues
The registration Job creates a ConfigMap <release>-config with the function ID. If something
goes wrong, you can inspect it:
kubectl get configmap -n cvat-agents -l app.kubernetes.io/instance=my-agent -o yaml
To start completely fresh, uninstall the release and reinstall:
helm uninstall my-agent -n cvat-agents
helm install my-agent ./chart -n cvat-agents