Jobs
On the Jobs page, users (for example, with the worker role) can see the jobs that are assigned to them without having access to the task page, as well as track progress, sort, and apply filters to the job list.
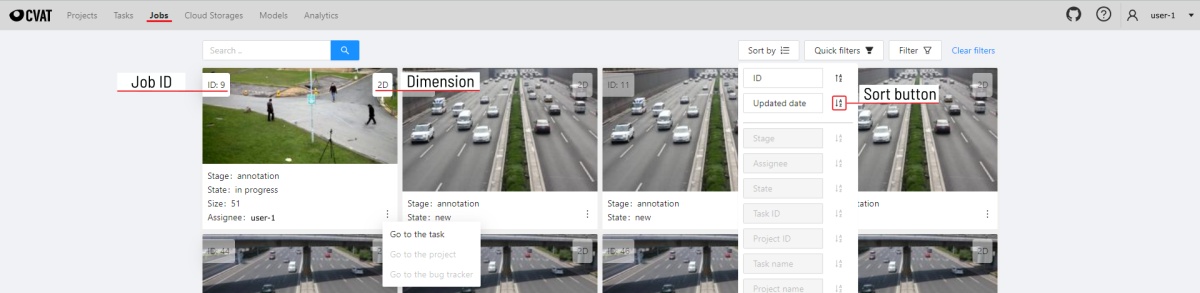
On the page, there is a list of jobs presented in the form of tiles, where each tile is one job. Each element contains:
- job ID
- dimension
1D,2D, or3D - preview
- stage and state
- when hovering over an element, you can see:
- size
- assignee
- menu to navigate to a task, project, or bug tracker.
Note
To open the job in a new tab, click on the job by holdingCtrl.
In the upper left corner, there is a search bar, using which you can find the job by assignee, stage, state, etc. In the upper right corner, there are sorting, quick filters, and filter.
Filter
Note
Applying a filter disables the quick filter.The filter works similarly to the filters for annotation, you can create rules from properties, operators, and values and group rules into groups. For more details, consult the filter section. Learn more about date and time selection.
To clear all filters, select Clear filters.
Supported properties for jobs list
| Properties | Supported values | Description |
|---|---|---|
State |
all the state names | The state of the job (can be changed in the menu inside the job) |
Stage |
all the stage names | The stage of the job (is specified by a drop-down list on the task page) |
Dimension |
1D, 2D, or 3D |
Depends on the data format (read more in creating an annotation task) |
Assignee |
username | Assignee is the user who is working on the job. (is specified on task page) |
Last updated |
last modified date and time (or value range) | The date can be entered in the dd.MM.yyyy HH:mm format or by selecting the date in the window that appears when you click on the input field |
ID |
number or range of job ID | |
Task ID |
number or range of task ID | |
Project ID |
number or range of project ID | |
Task name |
task name | Set when creating a task, can be changed on the (task page) |
Project name |
project name | Specified when creating a project, can be changed on the (project section) |
Job Type |
Annotation, Ground truth, or Replica |
The type of the job |
Parent ID |
number or range of job ID | The ID of the parent annotation job of a replica job |
Replica jobs
A replica job (replica) is a copy of an annotation job that is annotated separately. One of the ways to use replicas is consensus-based annotation. Replicas work similarly to regular annotation jobs - they can be assigned, annotated, imported and exported.
Key properties of replica jobs:
- Replicas are connected to annotation jobs (parent jobs). Each annotation job can have several related replicas.
- Only annotation jobs can have replicas. Ground Truth jobs cannot have replicas.
- Replicas use the same frame range as their parent annotation jobs.
- Annotations in replicas and parent jobs are independent from each other. Modifying a replica doesn’t affect the parent job or other replicas and vice versa. Removing annotations in a parent job doesn’t change annotations in its replicas.
- Replicas are not included in task annotation import or export. Per-job import and export still work for all job types, including replicas.
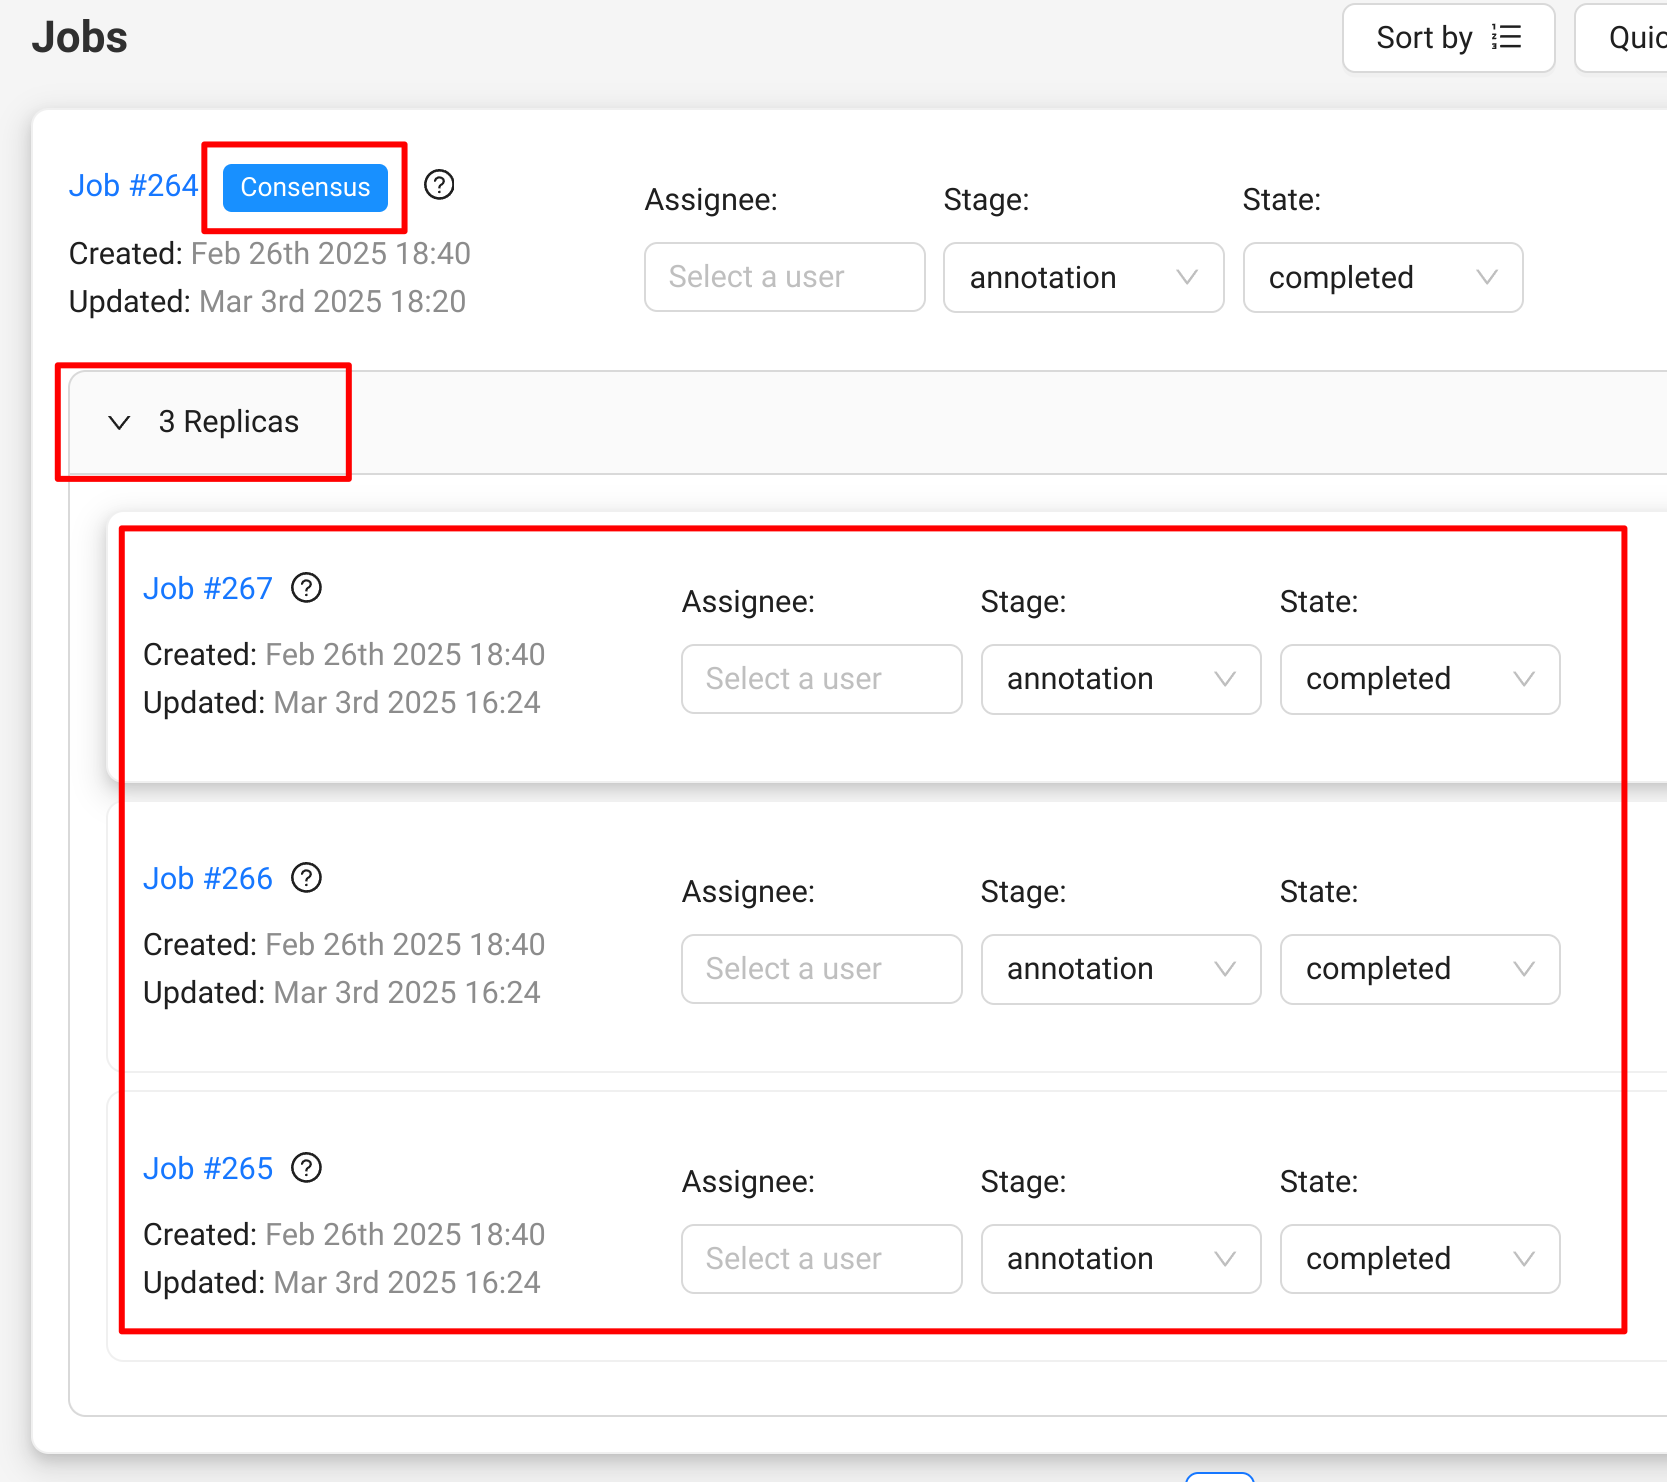
In the job list, parent jobs have the Parent tag and replicas have the Replica tag. By default, the task job list hides replicas. To see them, click Clear filters or use Go to replicas in the parent job Actions menu. To return from a replica to its parent job, use Go to parent.
How to create replicas with a task
You can set the number of replicas when you create a task. Each annotation job of the task gets this number of replicas.
-
Go to the task creation page
-
Configure basic and advanced parameters according to your requirements, and attach a dataset to be annotated.
-
Open the Advanced section and set Initial replicas to the number of replicas for each annotation job. The default value
0creates no replicas.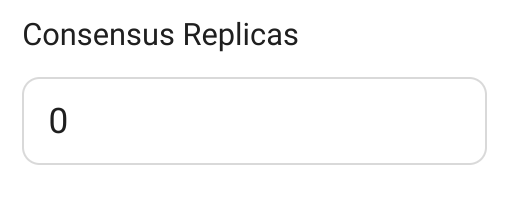
-
Create the task and open the task page
Initial replicas is used only when the task is created. To change the replicas later, add or delete them in the jobs.
How to add replicas to existing jobs
You can add replicas to any annotation job, including jobs of a task created without replicas. This way you can start consensus annotation in an existing task, or collect more opinions only for the jobs with difficult data.
-
Open the task page or the Jobs page
-
Select one or several annotation jobs and open the job Actions menu
-
Click Add replicas
-
Enter the number of replicas to add to each selected job and click Add
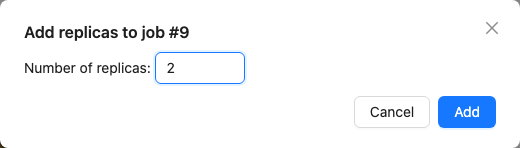
The new replicas have no assignee, and they are in the annotation stage and the new state.
How to delete replica jobs
If a job has more replicas than you need, you can delete the extra ones.
- Open the task page or the Jobs page
- Select one or several replica jobs and open the job Actions menu
- Click Delete and confirm the deletion
Deleting a replica also deletes its annotations. This operation cannot be undone. The parent job and its other replicas are not changed.
Note
Only replica and Ground Truth jobs can be deleted.Distribute jobs among users
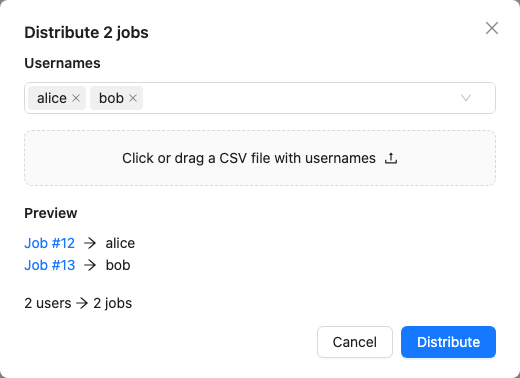
You can assign several jobs to a list of users at once. CVAT gives the jobs to the users in turn: the first job goes to the first user, the second job goes to the second user, and so on. When there are more jobs than users, it starts again from the first user.
The action is available on the Jobs page and in the job list of the task page when two or more jobs are selected. It is not available in the personal workspace.
-
Select the jobs. Read more about selecting several jobs in Bulk actions.
-
Open the job Actions menu and click Distribute among users.
-
Add the users in one of the following ways:
-
Start typing a username in the Usernames field and select the user from the list.
-
Paste several usernames into the Usernames field, for example, a column copied from a spreadsheet. The usernames can be separated by spaces, line breaks, commas, or semicolons.
-
Click the upload area or drag a CSV file to it. The file must have one column with usernames, without a header, for example, usernames.csv:
alice
bob
carol
Usernames that are not found and repeated usernames are skipped.
-
-
Check the Preview. It shows the user that each job will be assigned to.
-
Click Distribute.
The jobs are assigned in the order they are listed on the page. If there are more users than jobs, the extra users get no job.