Layers
What Are Layers in CVAT?
Layers in CVAT are used to manage the display order of objects on the canvas. Each object is assigned to a numbered layer, and multiple objects can share the same layer. An object on a higher-numbered layer appears above an object on a lower-numbered layer when they overlap.
Adjusting the display order is especially useful when working with overlapping polygons and masks, where you need to change how objects are displayed without modifying the annotations themselves.
Layer Stack Panel
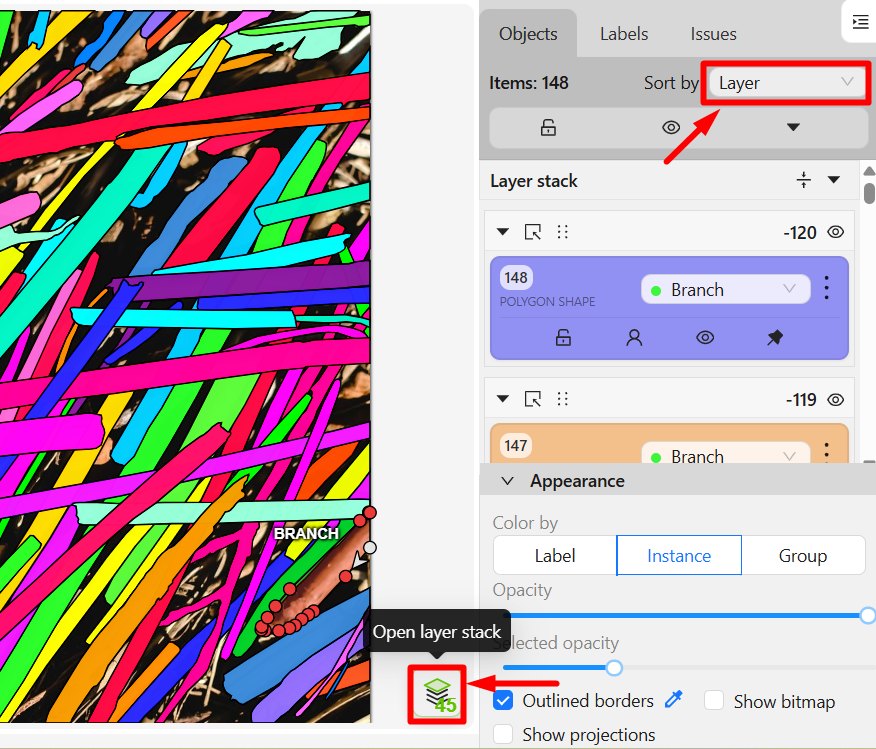
The Layer Stack panel allows you to view and change the layer order. It’s displayed in the sidebar. To open it, do one of the following:
- Click Open Layer Stack in the lower-right corner of the canvas.
- Select Sort by Layer in the sidebar.
Once open, the panel displays a list of layers for the current frame.
Panel Interface
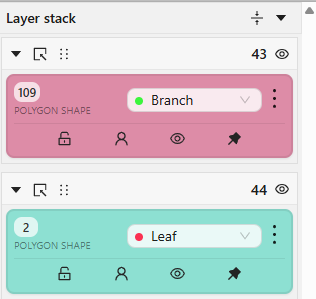
The Layer Stack panel lists objects in the order determined by their assigned layers. Each layer appears as a layer card; the objects placed on it appear as object cards nested underneath.
| Icon | Element name | Description |
|---|---|---|
 |
Open Layer Stack | Opens the Layer Stack panel and displays the number of the current layer. |
 |
Compact layers | Renumbers layers starting from 0 while preserving their current order. This is useful when layer numbers become non-consecutive after objects are moved or deleted. |
 |
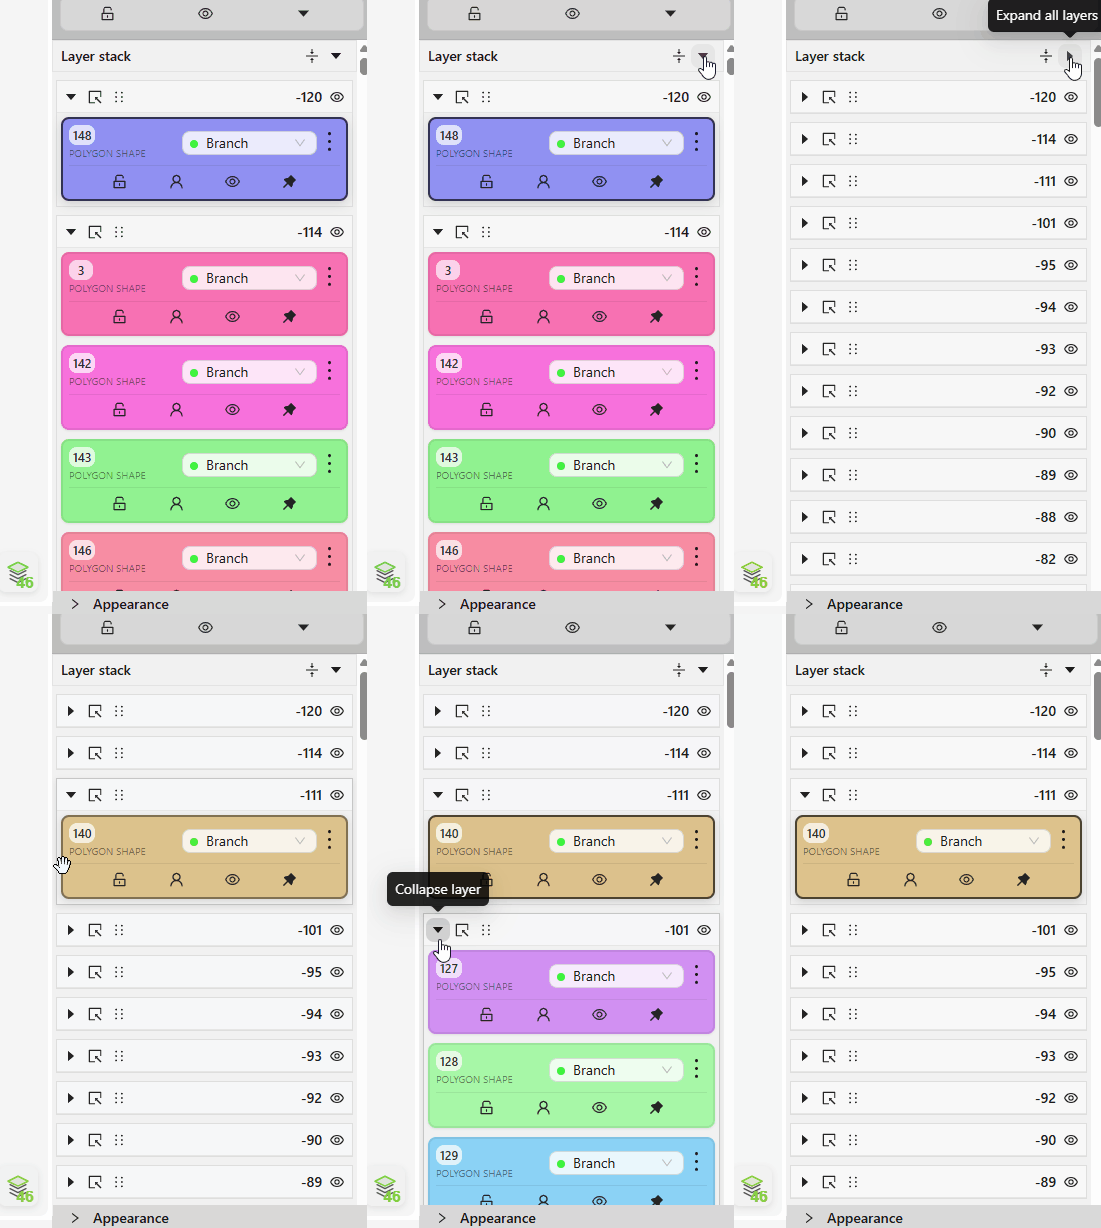
Collapse/Expand All Layers | Collapses or expands object cards in the sidebar. When collapsed, only the layers remain visible, making the list more compact. |
 |
Select as current layer | Makes the selected layer current. New objects are created on this layer. Selecting a hidden layer also makes it visible. |
 |
Layer number | Displays the layer number. |
  |
Layer visibility | Shows or hides the layer on the canvas. Shift-click the icon to apply the same action to the selected layer and all lower-numbered layers. |
Working with Layers
Selecting Objects by Layer
Hold Ctrl on Windows and Linux, or Command on macOS, and click a layer header to add all selectable objects on that layer to the active multi-object selection. Repeat the action to remove them. Hidden objects are not included when determining whether the layer is selected.
Use Shift+Click to select objects from a continuous range of layers. For other selection methods and available batch operations, see Multi-object selection.
Selecting the Current Layer
The current layer determines where CVAT places newly created objects. When you open a job, the highest occupied layer on the initial frame is selected by default.
To change the current layer:
- Open the Layer Stack panel.
- Find the layer you want to use.
- Click Select as current layer.
The number displayed on the Open Layer Stack button identifies the current layer. Selecting a layer does not change the visibility of other layers.
The current layer remains selected when you navigate between frames, apply an annotation filter, or delete the last object from that layer. An empty current layer may not appear in the panel, but it remains current and appears again when you create an object on it.
If the selected layer is hidden, CVAT makes it visible. CVAT also makes the target layer visible after creating an object, so a newly created annotation does not remain hidden.
Showing and Hiding Layers
All layers are visible by default. Click the visibility icon on a layer card to hide or show that layer without changing the current layer or the visibility of other layers.
To hide or show several layers at once, hold Shift and click the visibility icon. CVAT applies the action to the clicked layer and all existing lower-numbered layers:
- If the clicked layer is visible, CVAT hides it and the lower-numbered layers.
- If the clicked layer is hidden, CVAT shows it and the lower-numbered layers.
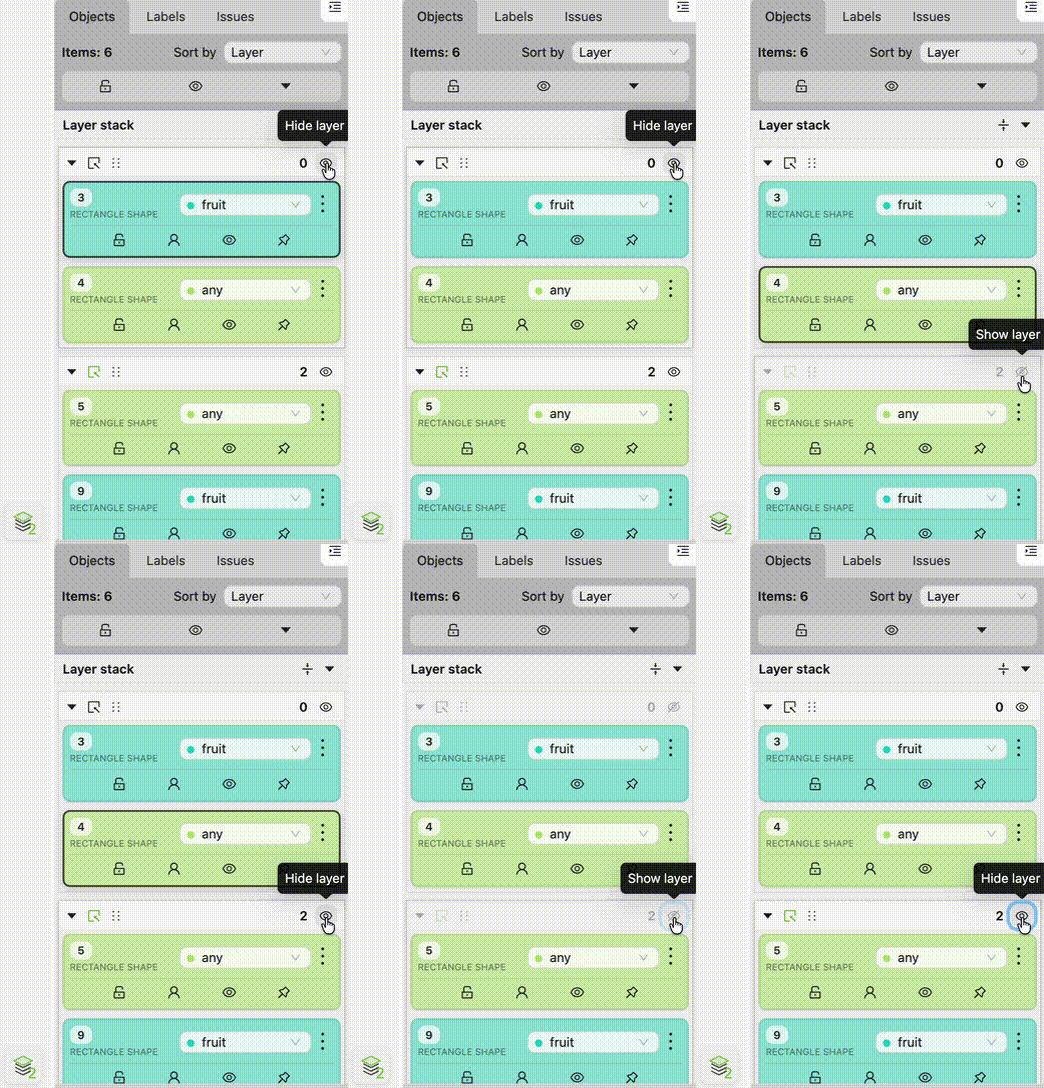
Visibility settings are stored separately for each frame during the annotation session. When you return to a frame, CVAT restores the visibility configuration used on that frame. Moving an object or a complete layer does not reset this configuration. An object moved onto a hidden layer becomes hidden; an object moved away from it follows the visibility of its new layer.
Moving Objects Using Drag and Drop
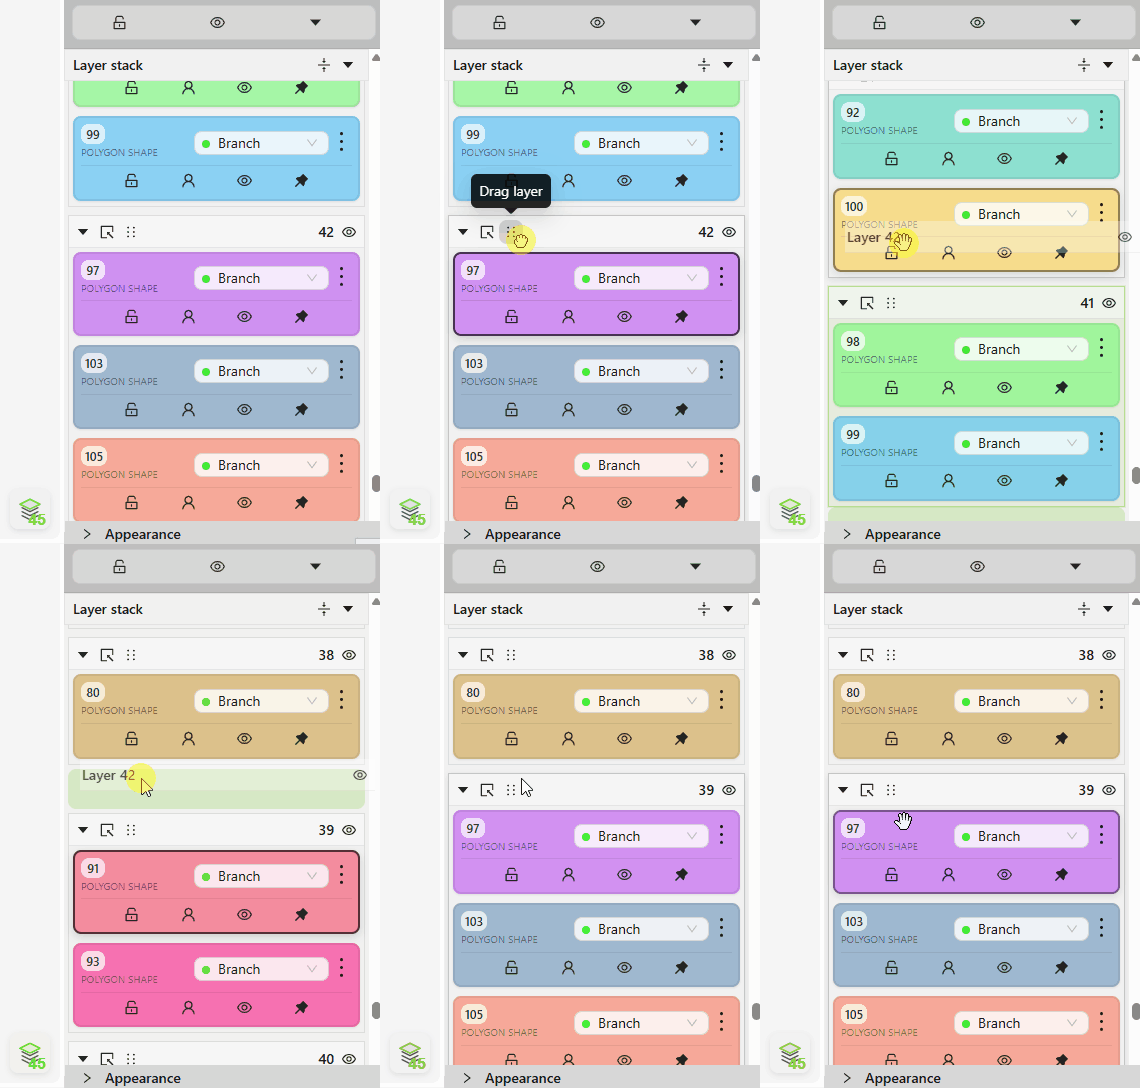
Drag an object or layer card in the Layer Stack panel to change its position against other layers on the canvas. When you drop it, the object (or group of objects) is placed on a new layer created at that position.
- Click and hold the left mouse button on an object or layer card in the Layer Stack panel.
- Drag the object or layer to the desired position in the list.
- Release the mouse button to place the object or layer in the new position.
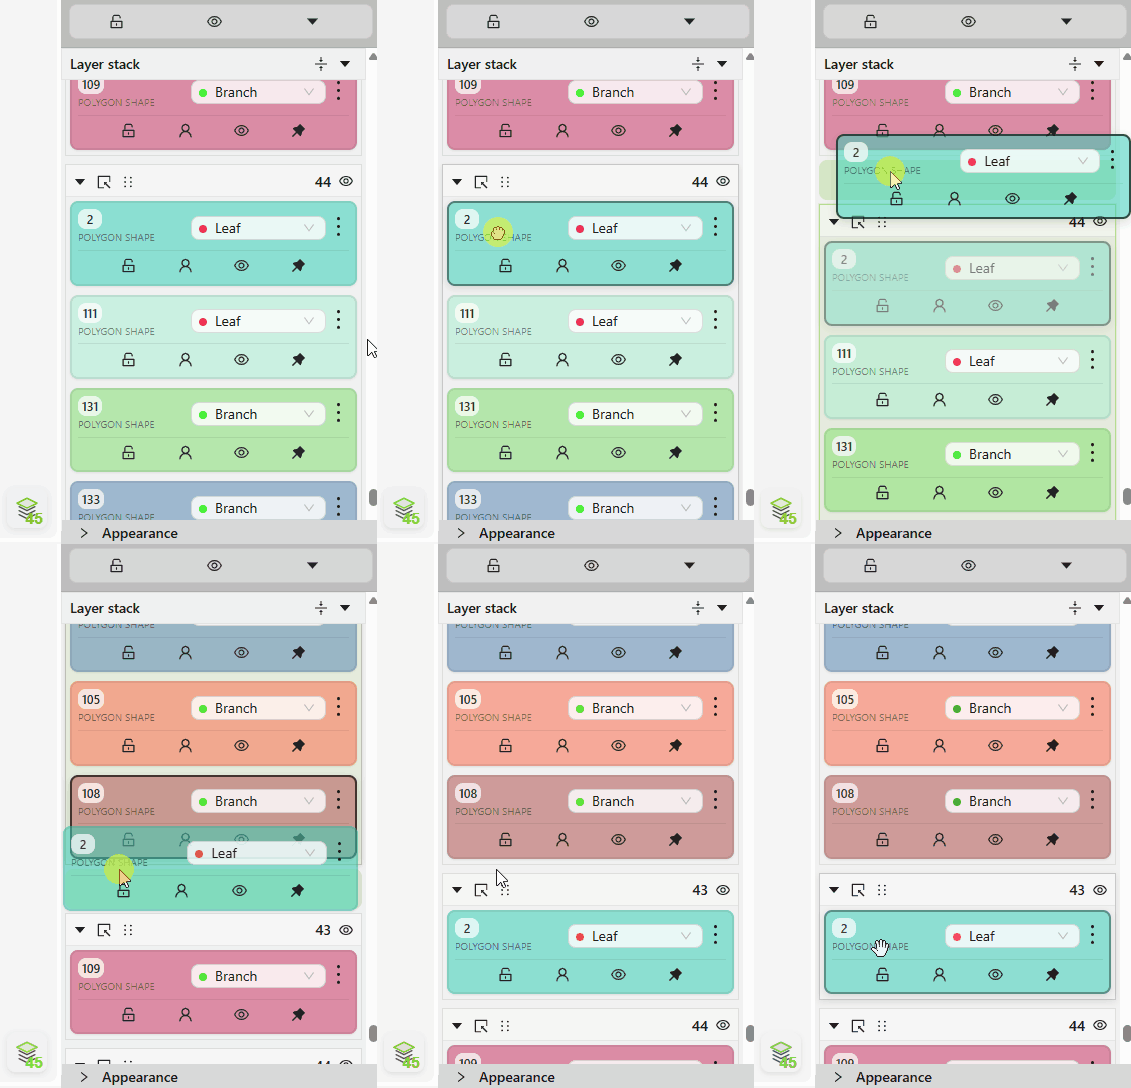
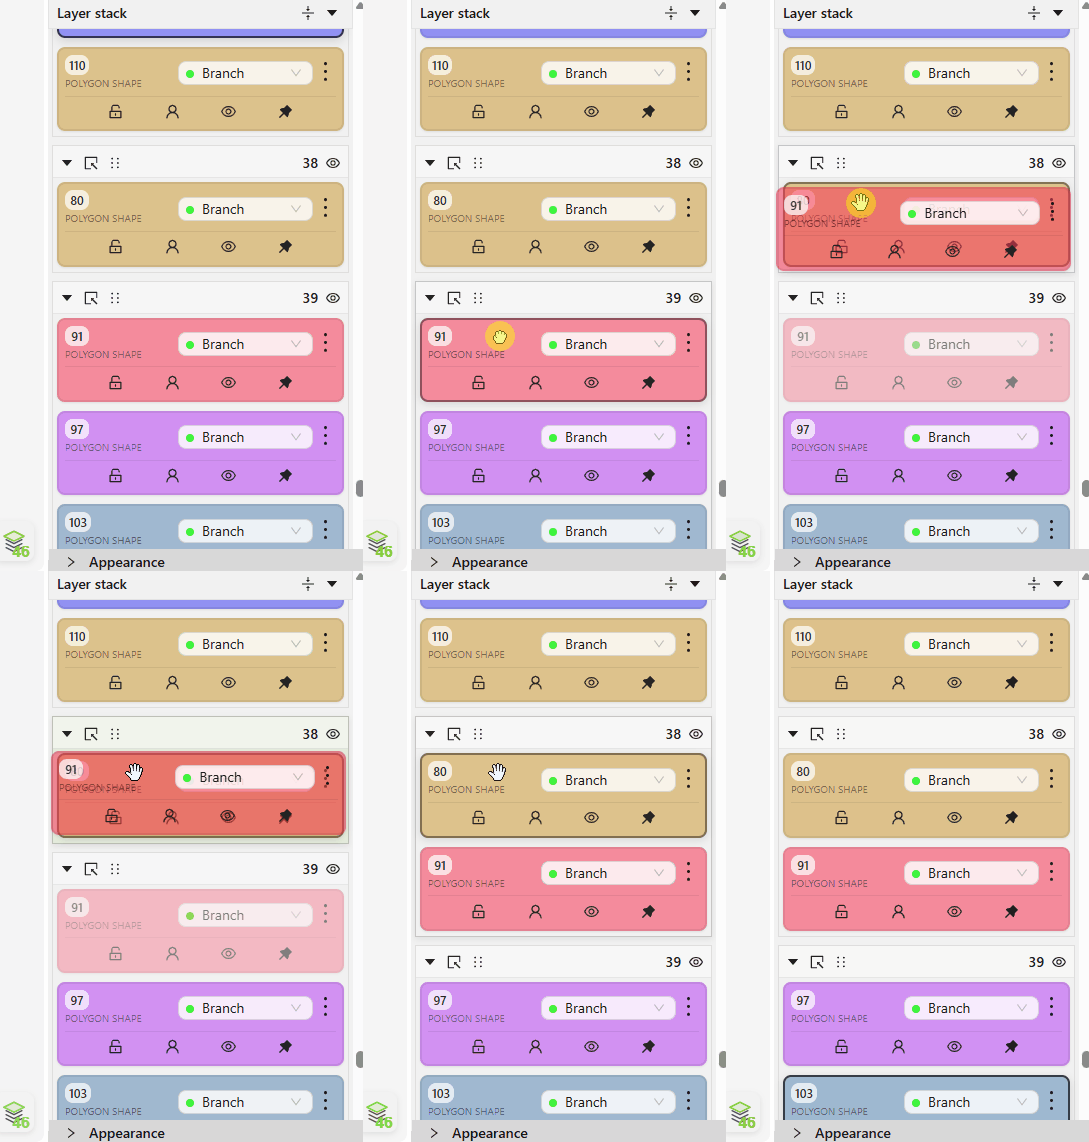
You can also drag an object onto an existing layer to move it there:
- Click and hold the left mouse button on an object card in the Layer Stack panel.
- Drag the object card onto the target layer.
- Release the mouse button so that the object moves to that layer.
Merging layers
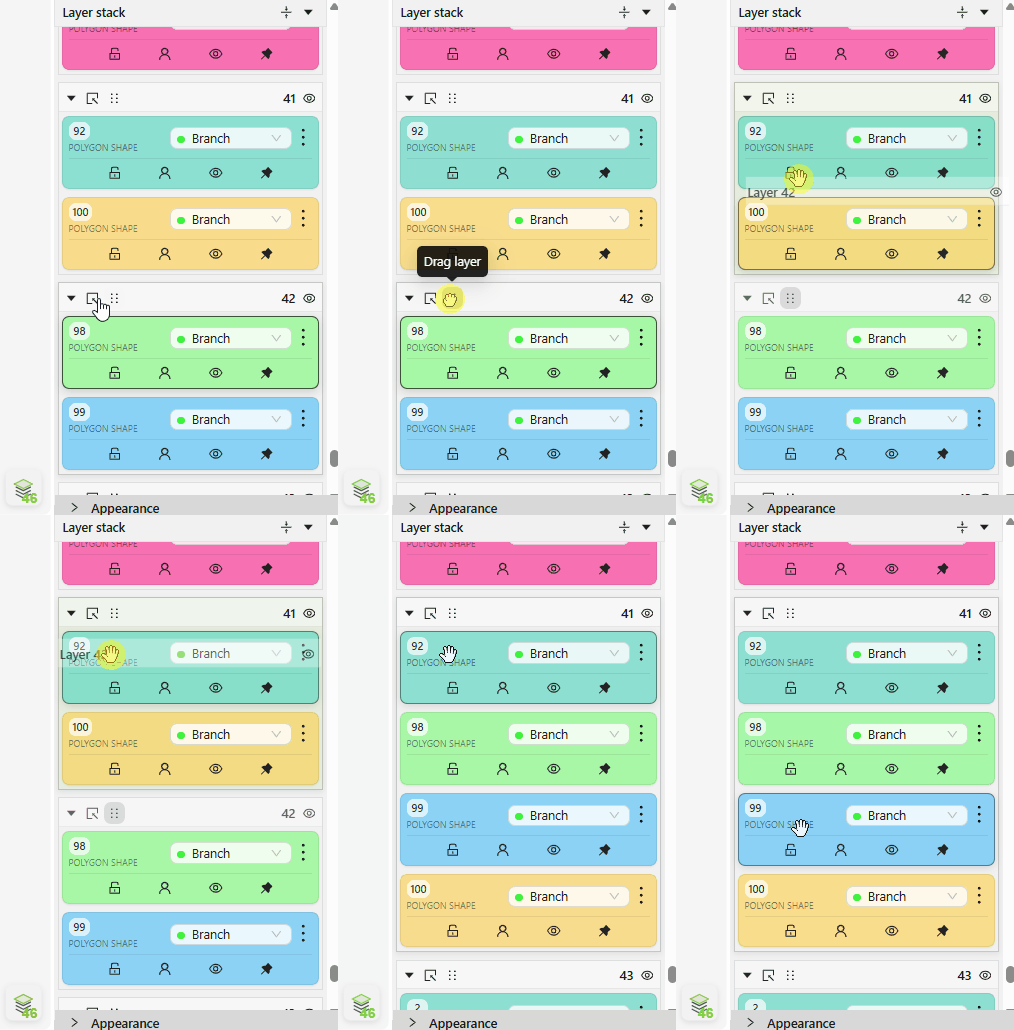
Drag one layer onto another to merge them. All objects from the dragged layer move to the target layer, and the original layer is deleted.
- Click and hold the left mouse button on a layer card in the Layer Stack panel.
- Drag the layer onto another layer.
- Release the mouse button.
Moving an object to background / foreground
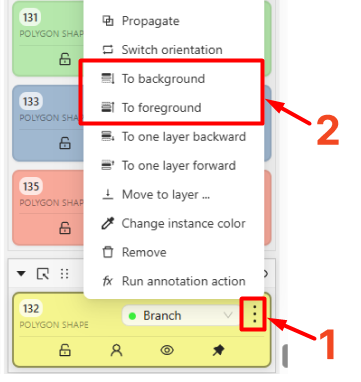
These commands move an object to the bottommost layer (Move to Background) or the topmost layer (Move to Foreground). CVAT creates a new layer for the object automatically.
- Click the ⋮ button on the object card.
- Select Move to Background or Move to Foreground.
Moving an object to one layer backward / forward
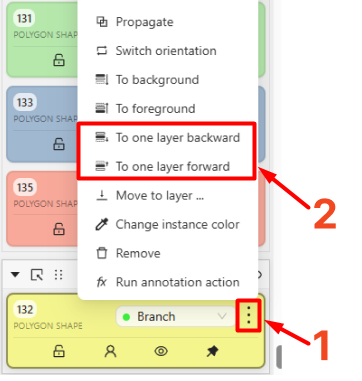
These commands move the selected object one layer forward (Move to One Layer Forward) or one layer backward (Move to One Layer Backward) on the canvas.
- Click the ⋮ button on the object card.
- Select Move to One Layer Backward or Move to One Layer Forward.
Moving an object to a specific layer
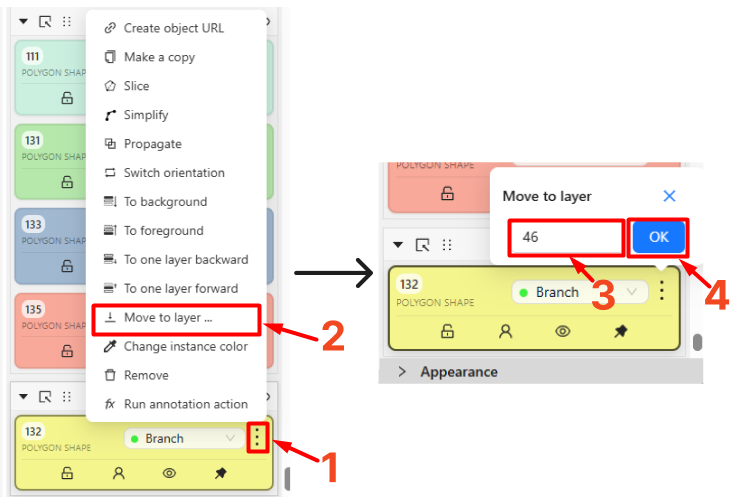
This command moves an object to a layer you specify.
- Click the ⋮ button on the object card.
- Select Move to layer… from the menu.
- Enter the number of the layer you want to move the object to.
- Click OK.
Compacting layers
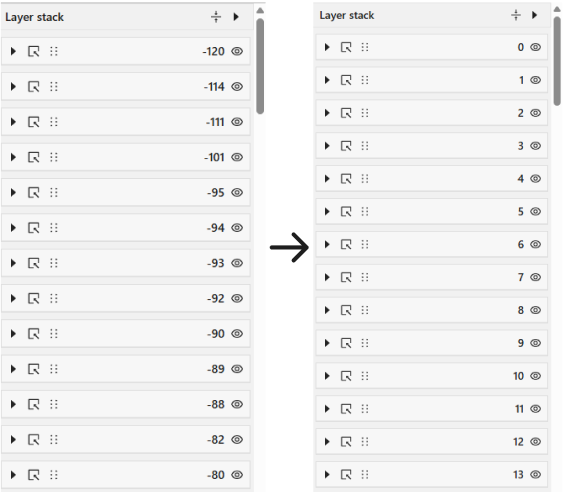
The Compact layers command removes gaps in layer numbering while preserving the current order, renumbering layers consecutively starting from 0. For example, the sequence 0, 2, 5, 8 becomes 0, 1, 2, 3.
Gaps typically appear after you delete or merge layers, or move objects between them. Use Compact layers to clean up the numbering:
- Open the Layer Stack panel.
- Click Compact layers.
The layer numbering updates automatically.
Collapse/Expanding layers
This setting allows you to collapse or expand object cards in the Layer Stack panel, for all layers at once or for an individual layer. When collapsed, only the layers are listed and the object cards they contain are hidden. This doesn’t affect object visibility on the canvas.
Displaying Layer Numbers on the Canvas
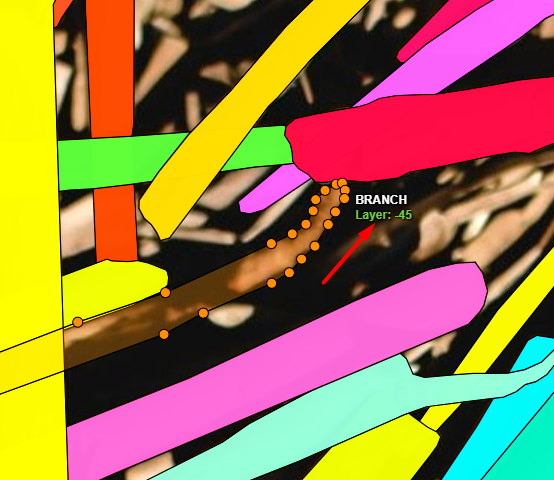
This setting allows you to display the layer number in an object’s text description on the canvas, so you can identify an object’s layer without opening the Layer Stack panel.
To enable it:
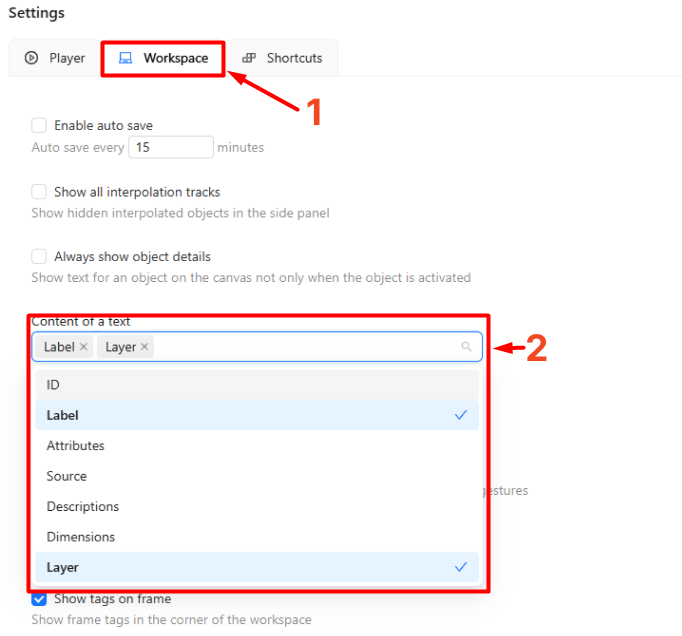
- Press F2 to open the settings, then go to the Workspace tab.
- Add the Layer parameter to the Content of a text field.
The layer number then appears in the text description of each object on the canvas.