Migrating data from Azure Machine Learning to CVAT
This guide explains how to migrate datasets and annotations from Azure Machine Learning (ML) Data Labeling component to CVAT.
It covers projects created for Object Identification (Bounding Box) and Instance Segmentation (Polygon) tasks, including Azure Blob Storage integration, dataset preparation, annotation export from Azure ML, task creation in CVAT, and annotation import.
Migrating Object Identification (Bounding Box) and Instance Segmentation (Polygon) Projects
Existing projects created in Azure ML Data Labeling can be migrated to CVAT, allowing you to continue working with your datasets and annotations on the CVAT platform.
The migration process for Object Identification (Bounding Box) and Instance Segmentation (Polygon) projects is nearly identical. In this guide, we will use an Object Identification project as an example.
Exporting Annotations from Azure ML
-
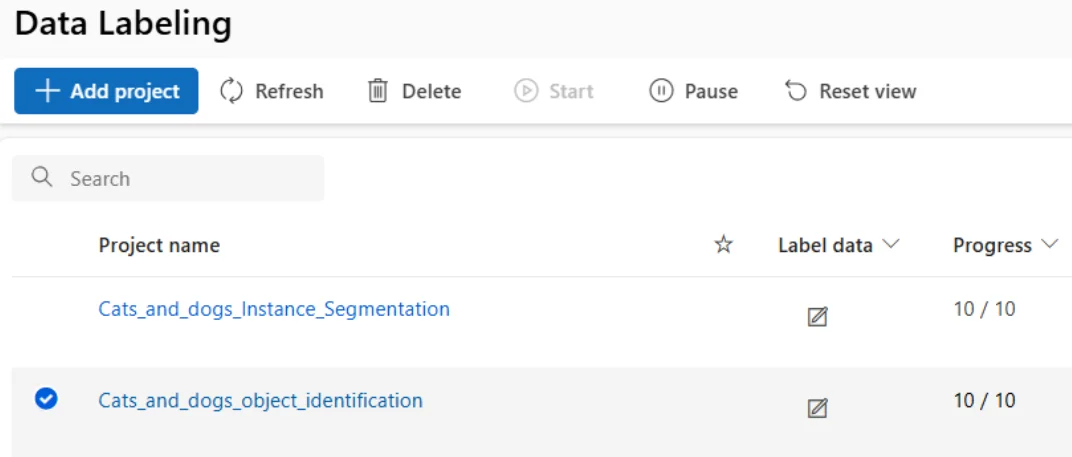
On the Data Labeling page in Azure ML, select the project you want to migrate.
-
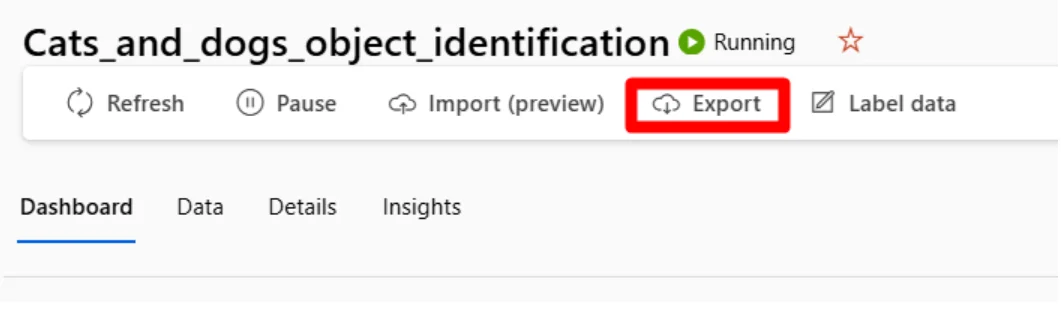
Open the project and click Export to begin exporting the annotation data.
-
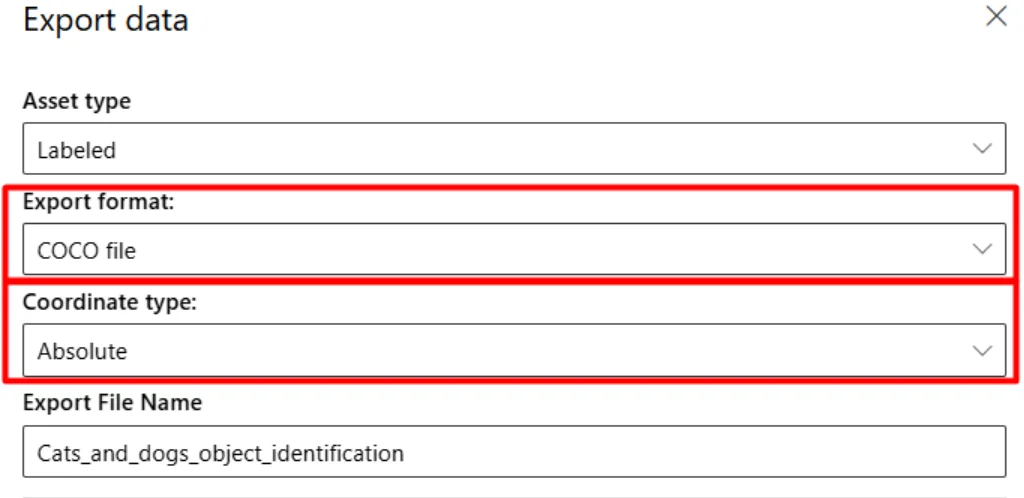
In the export dialog, select the following options:
- Asset type: Labeled
- Export format: COCO file
- Coordinate type: Absolute
- Export File Name: Optional
The most important settings are Export format and Coordinate type. These must be configured correctly to ensure that the annotations can be successfully imported into CVAT.
-
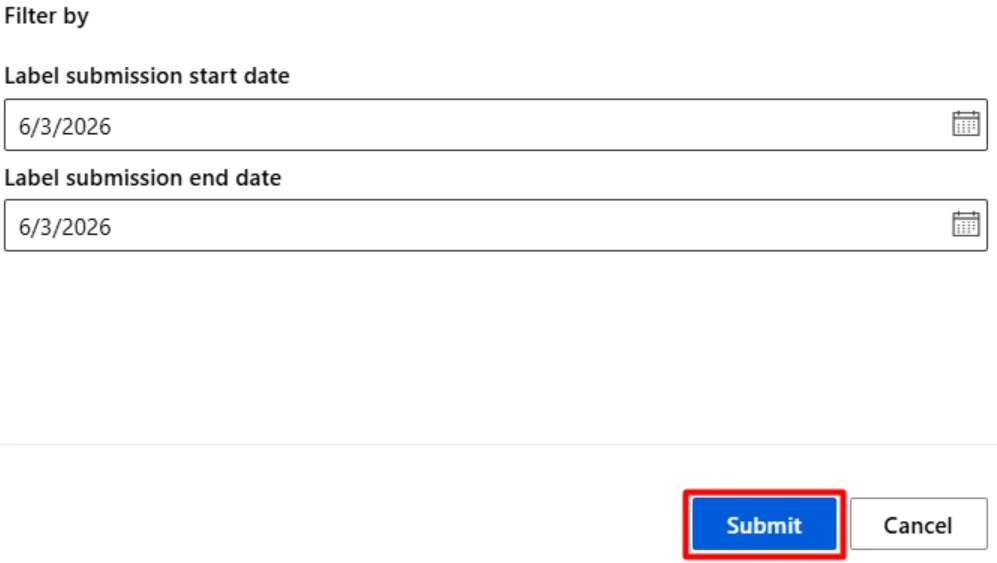
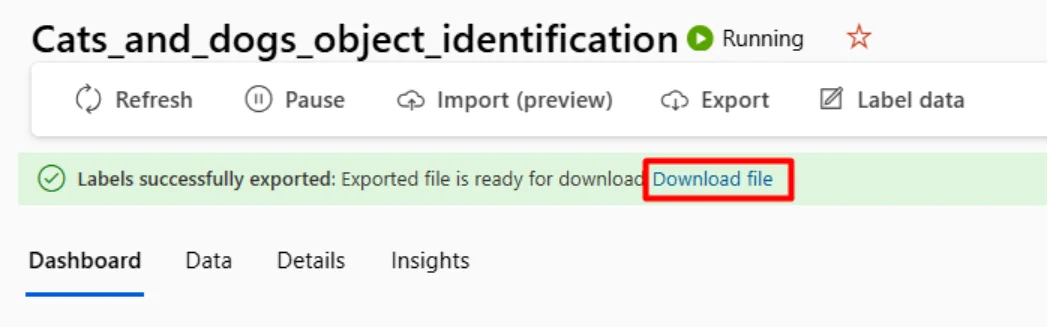
Confirm the export by clicking Submit.
-
Wait until the export process is complete. Once the export file is ready, a notification will appear. Download the exported annotation file.
Creating a Task in CVAT
After downloading the annotation file, the next step is to create a task in CVAT. For detailed information about task creation, see the Tasks page documentation.
-
On the Tasks page, click the + button in the upper-right corner and select Create a new task from the menu.
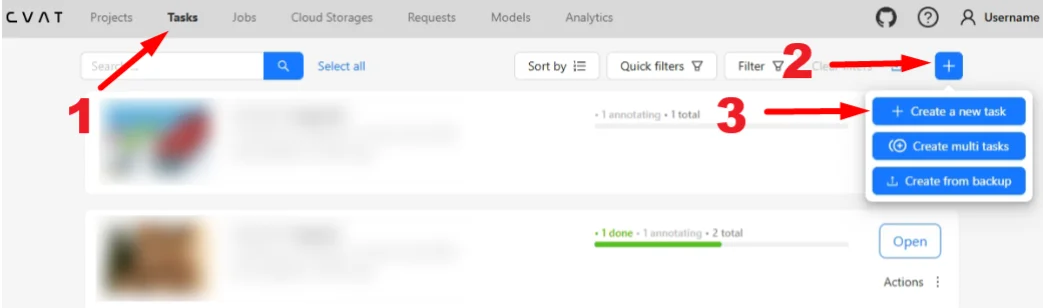
-
A task creation form will open. Specify:
- Task name
- Labels
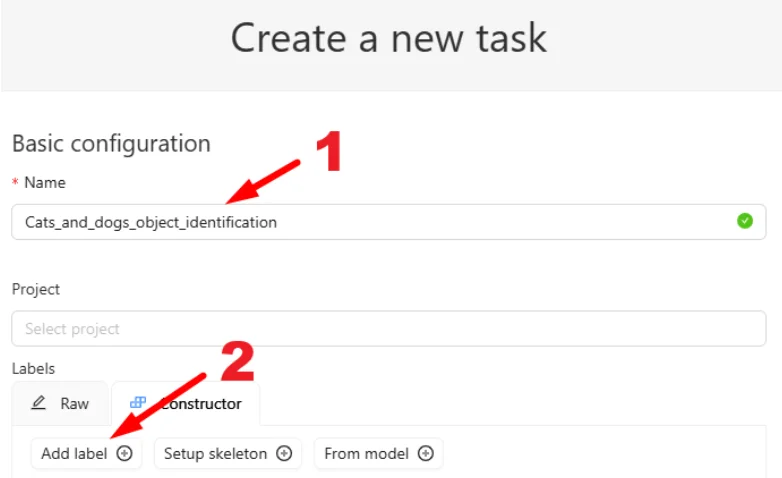
Adding Labels
-
Click Add label.
-
Enter the label name.
-
Click Continue to create the label.
-
Repeat the process if additional labels are required.
-
When finished, click Cancel to close the dialog.

The added labels will appear in the Constructor.
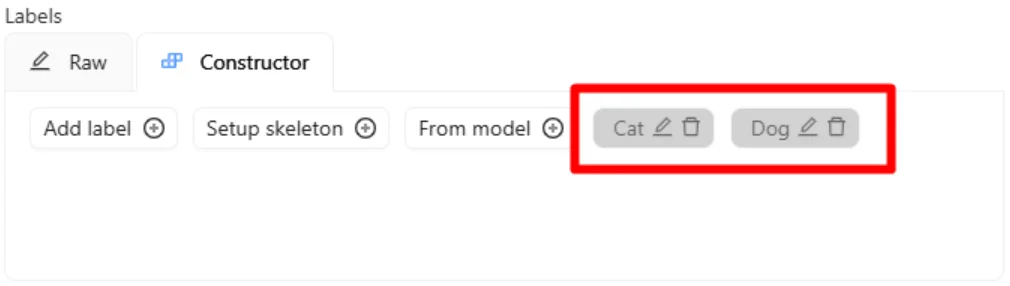
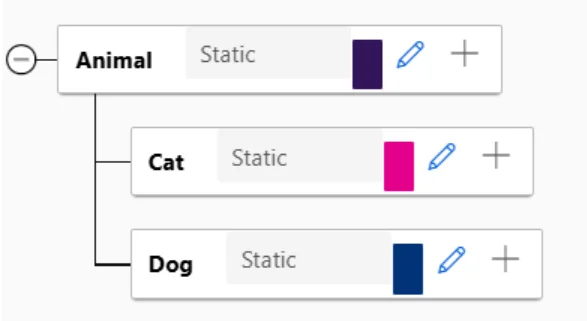
If you used categories in Azure ML Data Labeling, as shown below:
The corresponding labels in CVAT must follow this format:
Animal/Cat
Animal/Dog
The category name comes first, followed by a forward slash (
/), then the label name.
Adding the Dataset
There are two ways to add a dataset to the task:
Option 1: Use a dataset stored in Azure Blob Storage
If the dataset was previously uploaded to Azure ML Data Labeling, you can connect it through the Cloud Storage integration described in the Connecting Azure Blob Storage to CVAT section.
-
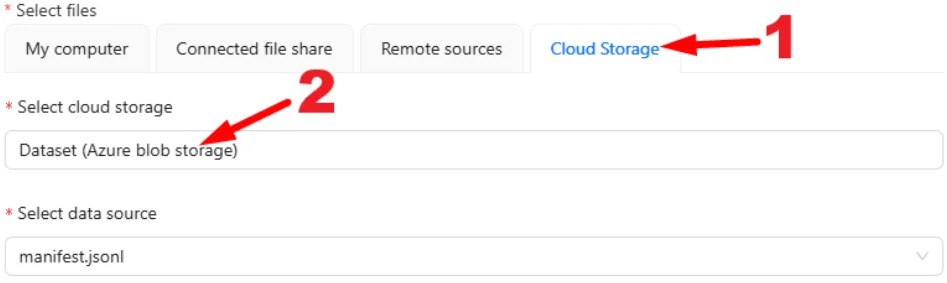
Open the Cloud Storage tab and click Select cloud storage.
-
Choose the storage connection previously added to CVAT.
-
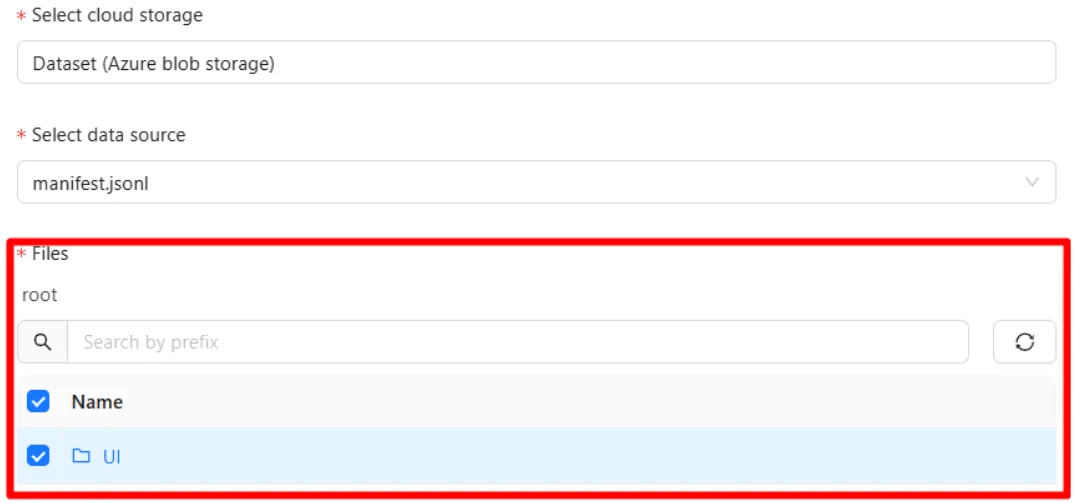
Select the folder containing the images.
Option 2: Upload files from your computer
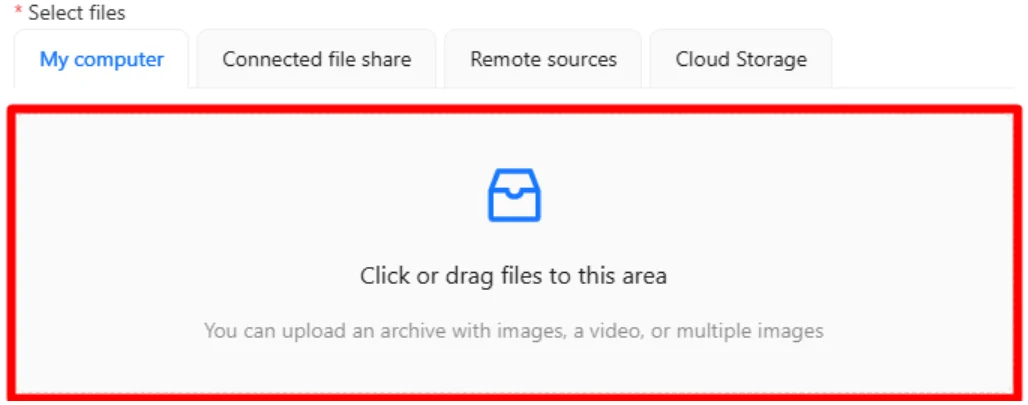
If the dataset is stored locally, you can upload it directly by either:
- Dragging and dropping the files into the upload area.
- Clicking the upload area and selecting the dataset from your computer.
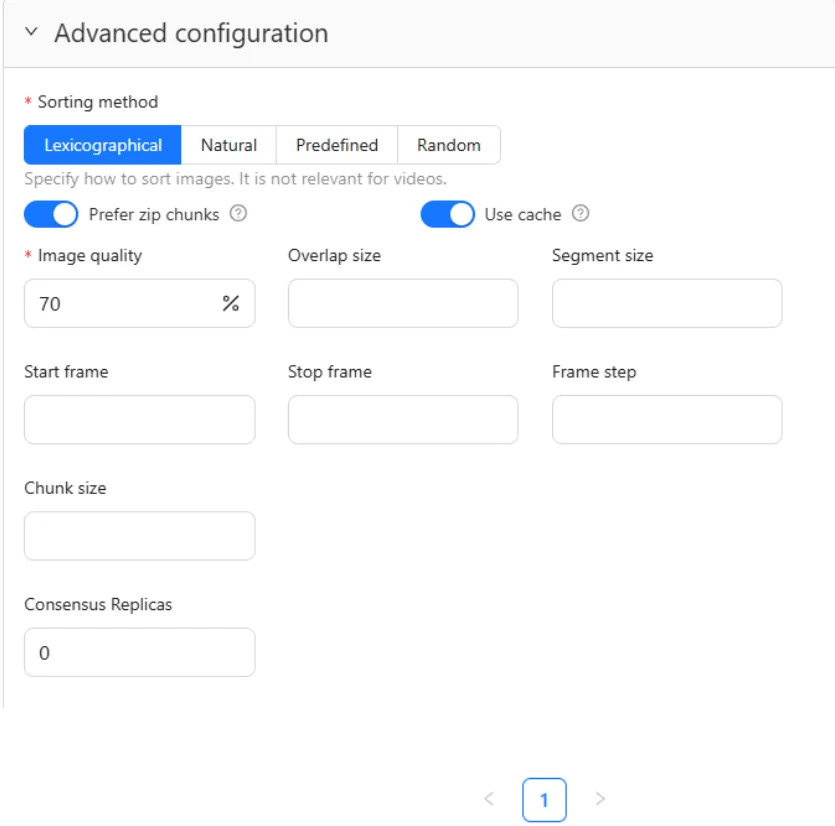
Advanced Configuration
The Advanced configuration section allows you to customize additional task settings, including:
- Image quality
- Image sorting methods
- Splitting the task into multiple jobs for parallel annotation
- Creating consensus tasks
- Other advanced options
For more information, see the Advanced configuration documentation.
After selecting or uploading the dataset, click Submit & Open to create the task.

Matching Image Paths Between CVAT and the Annotation File
After the task has been created, you can import the annotation file that was previously exported from Azure ML Data Labeling.
Pay close attention to the image paths stored in the annotation file.
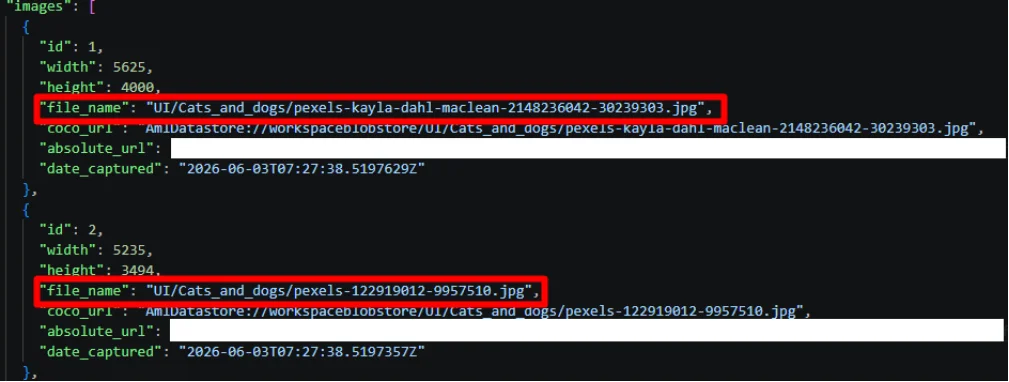
For example, if the annotation file contains image paths such as:
"file_name": "UI/Cats_and_dogs/pexels-kayla-dahl-maclean-2148236042-30239303.jpg"
then the image paths in CVAT must match exactly. For additional details, refer to the Important Manifest Requirements section.
If the task was created by uploading files directly from a local computer, CVAT will typically store image names without any folder structure:
pexels-kayla-dahl-maclean-2148236042-30239303.jpg
In this case, the annotation file exported from Azure ML Data Labeling will contain image paths that include the original folder structure:
UI/Cats_and_dogs/pexels-kayla-dahl-maclean-2148236042-30239303.jpg
To successfully import the annotations, modify the annotation file so that the values in the file_name field
match the image names stored in the task. For example, change:
"file_name": "UI/Cats_and_dogs/pexels-kayla-dahl-maclean-2148236042-30239303.jpg"
to:
"file_name": "pexels-kayla-dahl-maclean-2148236042-30239303.jpg"
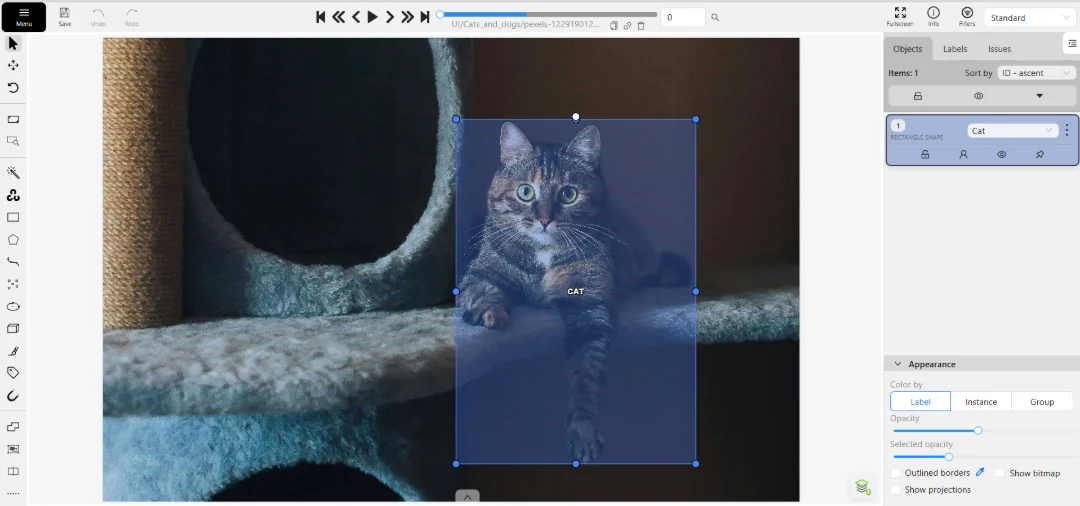
You can verify the exact image path used by CVAT by opening the task and checking the filename displayed below the player.

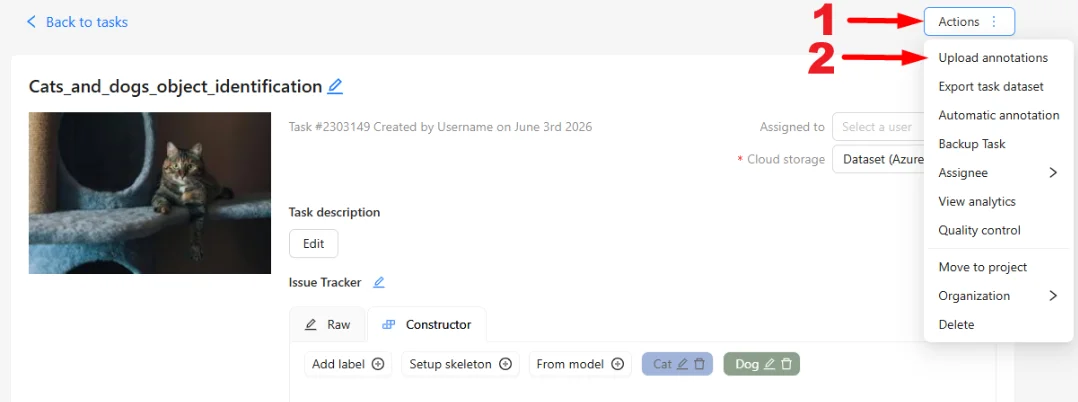
Importing the Annotation File
After reviewing the annotation file and ensuring that the image paths match those used by CVAT, import the file into the task.
-
Open the task and select Actions > Upload annotations.
-
In the dialog that appears, click Import format and select COCO 1.0.
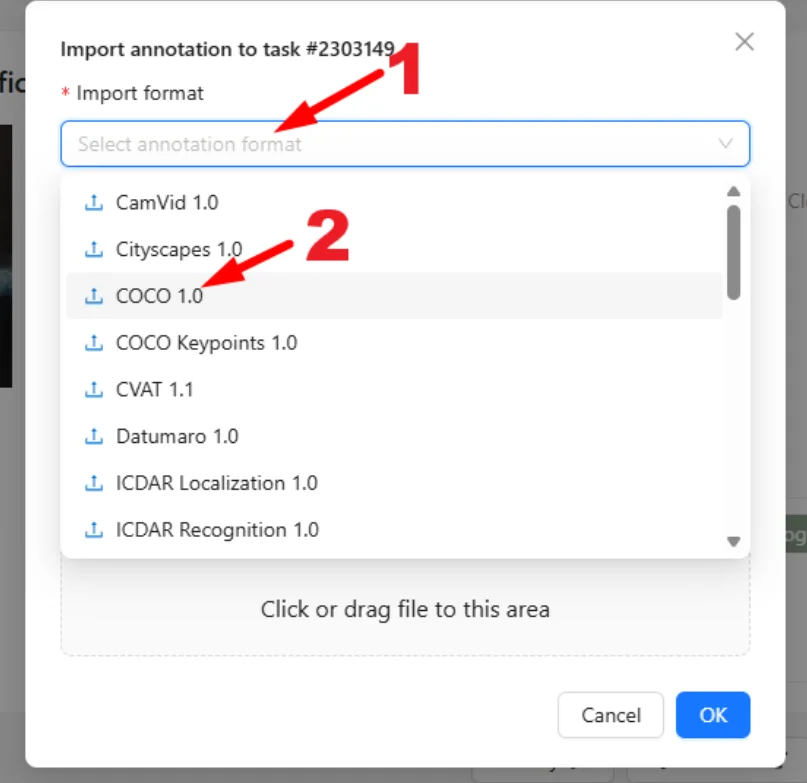
-
Click the upload area and select the annotation file from your computer, or drag and drop it into the upload area.
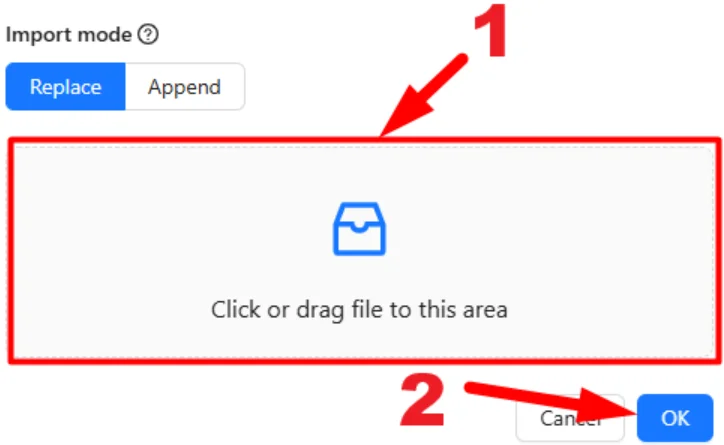
-
Click OK.
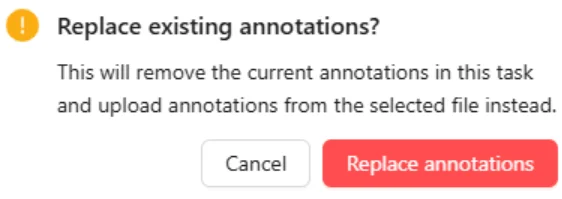
If the task already contains annotations, CVAT will display a warning asking whether the existing annotations should be replaced. Click Replace annotations.
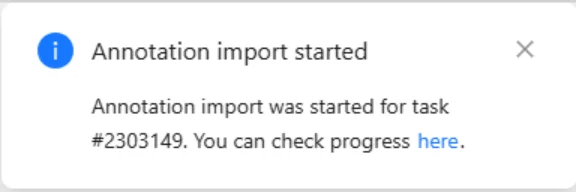
A notification will confirm that the annotation import process has started.
Verifying the Imported Annotations
Once the import process is complete, a confirmation notification will appear. Click the Job link to open the annotation job.
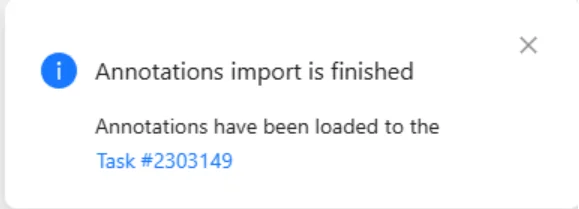

The imported annotations should now be visible in the workspace.
Connecting Azure Blob Storage to CVAT
CVAT supports integration with cloud storage providers, including Azure Blob Storage. If your datasets and annotations created in Azure ML Data Labeling are stored in cloud storage, there is no need to download them locally. Instead, you can connect your storage directly to CVAT and work with your data without transferring files to your computer. For more information, see Cloud storages.
To connect Azure Blob Storage:
-
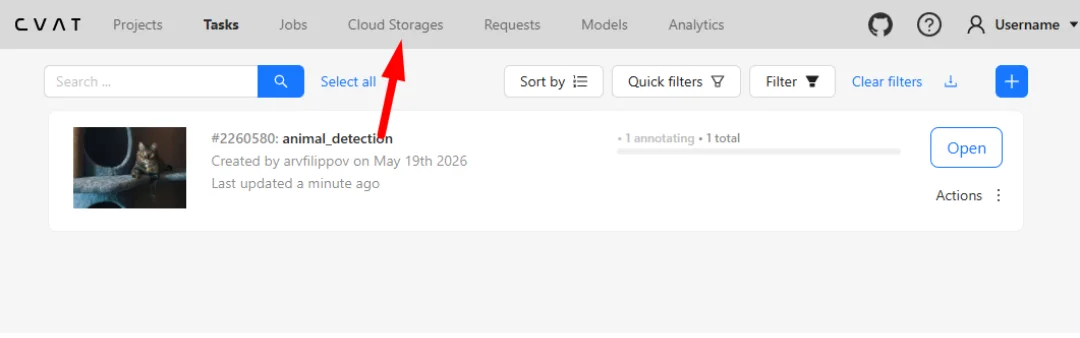
Sign in to app.cvat.ai and navigate to the Cloud Storages page.
-
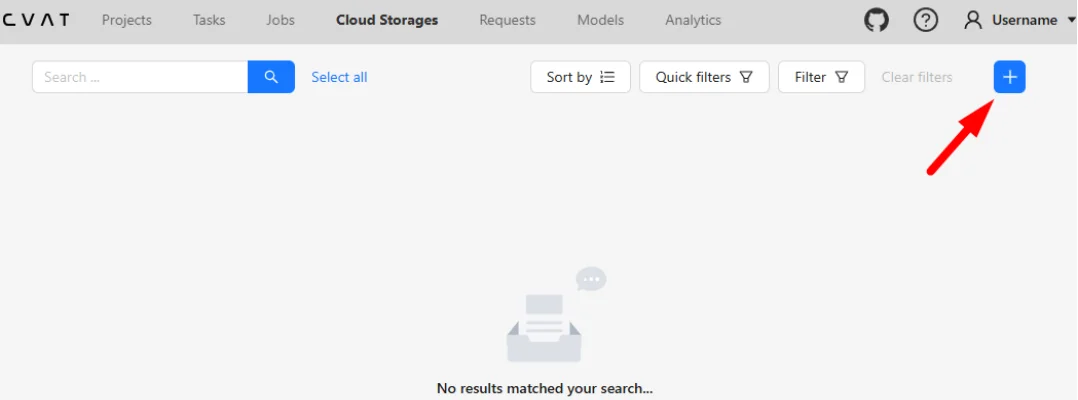
Click the + button in the upper-right corner to add a new cloud storage connection.
-
A form for configuring the cloud storage connection will open.
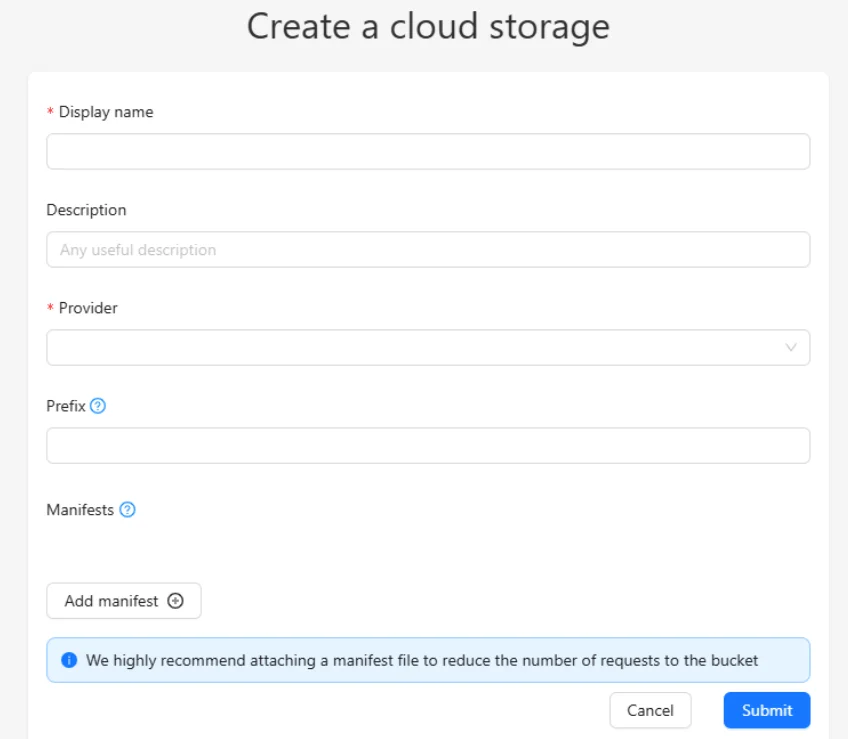
Fill in the following fields:
- Display name (required) — the name displayed in the list of available cloud storages.
- Description (optional) — a description of the cloud storage.
- Provider (required) — the cloud storage provider.
- Prefix (optional) — used to pre-filter content within the storage container.
- Manifest — a dataset index file listing all images in the container with their exact dimensions.
-
To connect Azure Blob Storage, provide the following information:
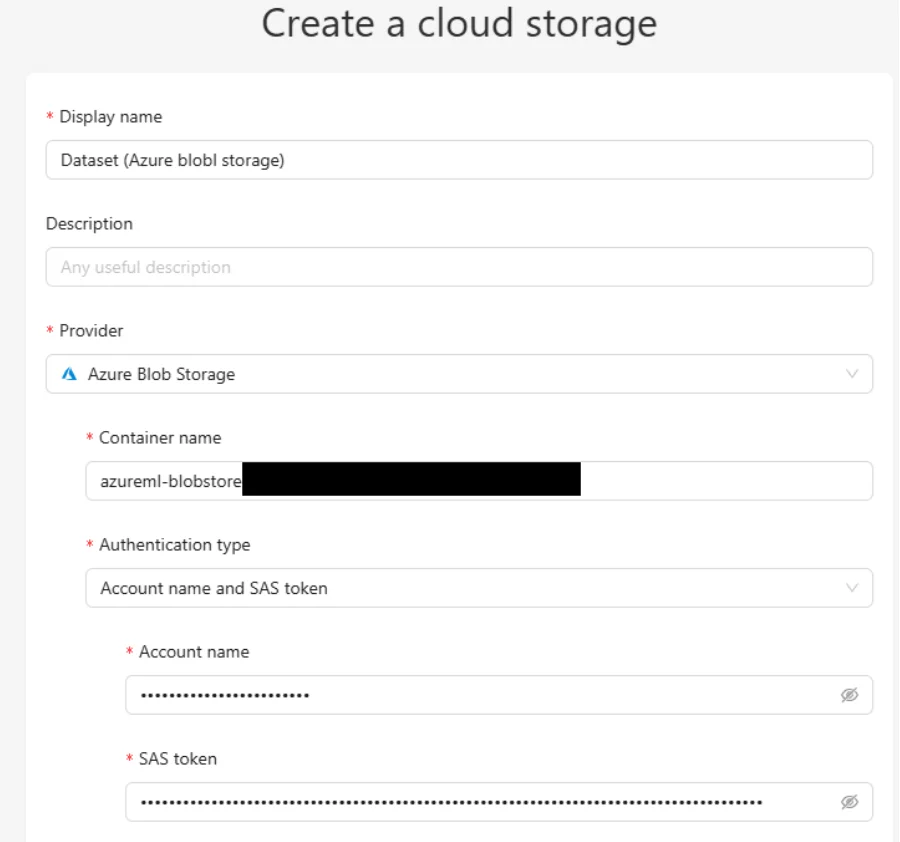
- Container name — the name of the container that stores your data.
- Authentication type — one of the following:
- Account name and SAS token
- Anonymous access
- Connection string
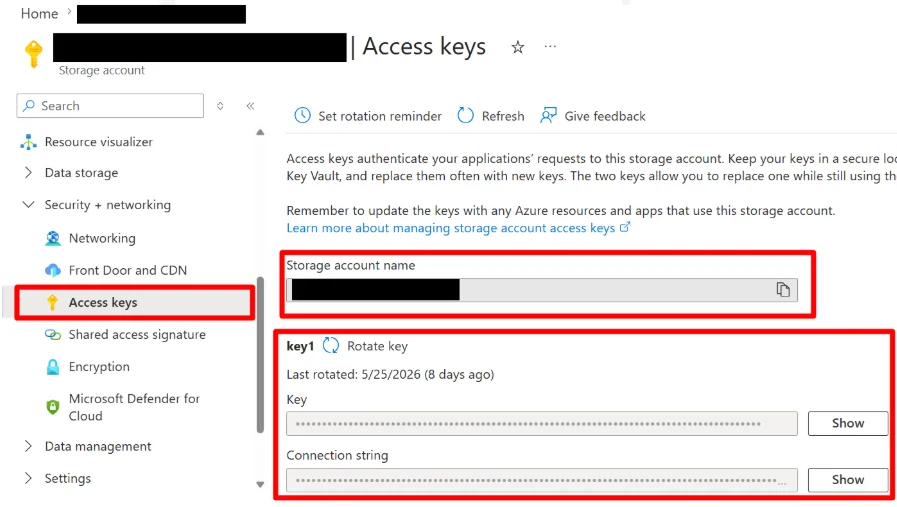
You can find the required connection details on the Azure Blob Storage account page.
-
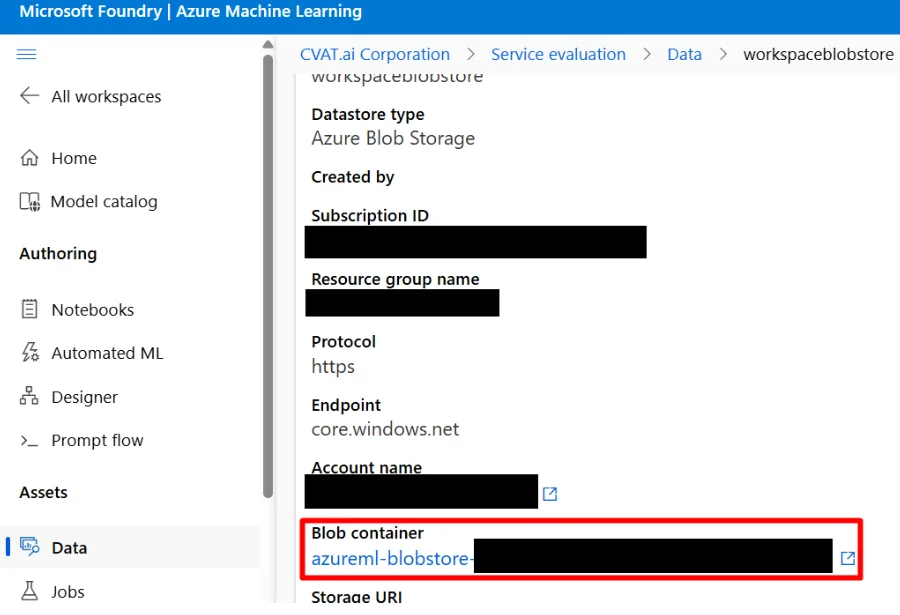
If your dataset was created through Azure ML, you can identify the container name by navigating to Assets > Data, locating the desired dataset, and clicking the Datastore link in the Data source column.
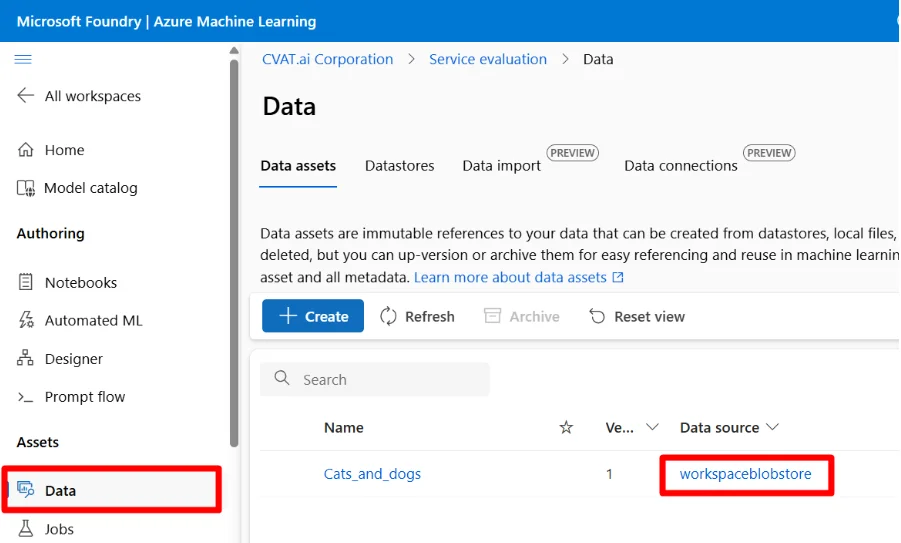
There, you can find the Blob container name.
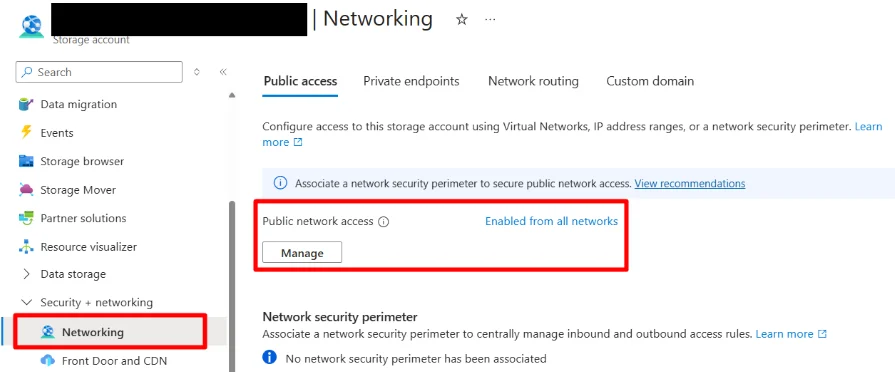
To ensure that CVAT servers can access the data stored in your Azure Blob Storage, open the Azure Portal and navigate to your Storage Account settings.
Go to Security + networking > Networking and verify that Public network access is set to Enabled from all networks.
Preparing the Manifest File
Before connecting the storage, you must prepare a manifest file containing image paths, image dimensions, and metadata. The manifest file must be placed in the root directory of the container.

For detailed instructions on creating a manifest file, see the Dataset manifest documentation.
In the cloud storage configuration form, specify only the manifest file name. In most cases, the default name is:
manifest.jsonl
Important Manifest Requirements
To ensure that app.cvat.ai successfully recognizes and processes the manifest file, follow these rules carefully.
File Extensions
The extension field in the manifest must:
- Include the leading period (
.jpg, notjpg). - Match the file extension in Azure exactly, including letter case.
Examples:
- If the file is stored as
.jpg, the manifest must contain.jpg. - If the file is stored as
.JPG, the manifest must contain.JPG.
File Names
The name field in the manifest must contain the file name without the extension.
Example:
"name": "dataset/image_001"
Critical Path Matching Rule (Manifest + COCO)
When annotations are exported from Azure ML in COCO format, image paths are stored relative to the root of the container.
Example:
"file_name": "UI/dataset/photo.jpg"
To ensure that image paths in the COCO annotation file match the paths defined in the manifest, use the following configuration:
In the manifest file — specify the full relative path in the name field:
"name": "UI/dataset/photo"
In Azure Storage — upload the completed manifest.jsonl file to the root of the container, alongside
the dataset folder:
Container Root
├── manifest.jsonl
└── UI/
    └── dataset/
        ├── photo.jpg
        └── ...
In CVAT — leave the Prefix field empty when creating the Cloud Storage connection.
Manifest File Format
The manifest file must use the .jsonl format (JSON Lines). Each line must contain a separate JSON object.
Example:
{"version":"1.1"}
{"type":"images"}
{"name":"image1","extension":".jpg","width":x,"height":y}
{"name":"image2","extension":".jpg","width":x,"height":y}
{"name":"image3","extension":".jpg","width":x,"height":y}
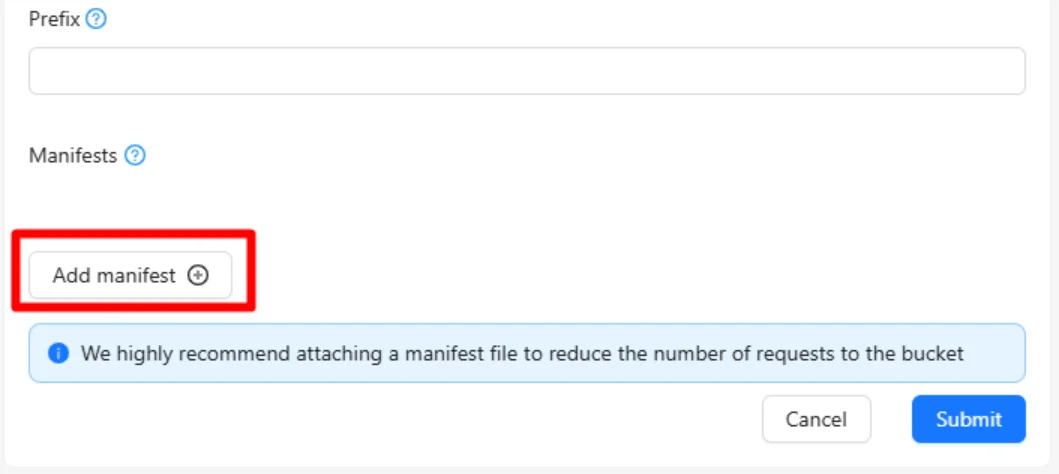
Once the manifest file has been added and all required fields have been completed, click Submit.

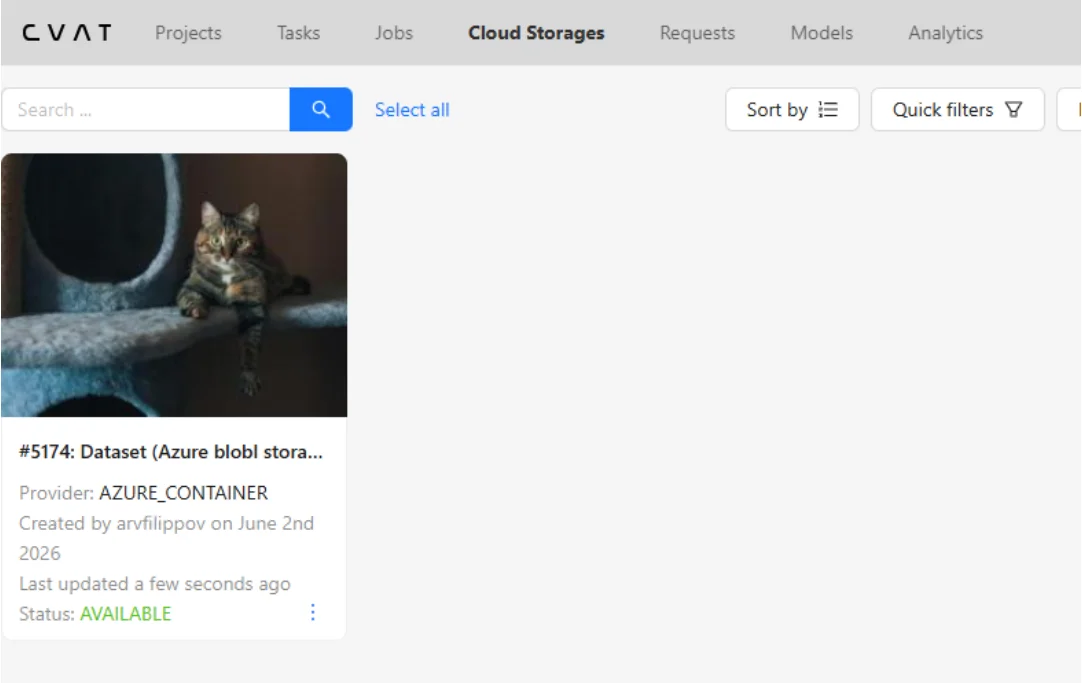
After the cloud storage has been successfully added, it will appear on the Cloud Storages page.
Summary
The migration workflow from Azure ML Data Labeling to CVAT consists of the following steps:
- Connect Azure Blob Storage to CVAT.
- Prepare and upload a valid manifest file.
- Export annotations from Azure ML in COCO format with the following settings:
- Asset type: Labeled
- Export format: COCO file
- Coordinate type: Absolute
- Create a task in CVAT.
- Configure labels to match the Azure ML project structure.
- Add the dataset using either Azure Blob Storage or local file upload.
- Modify the exported COCO annotation file and ensure image paths match the paths used in CVAT.
- Import the annotations using the COCO 1.0 format.
- Verify that the annotations are displayed correctly in the task.
Following these steps will allow you to successfully migrate datasets and annotations from Azure ML Data Labeling to CVAT while preserving the existing annotation work.