Manual drawing
It is used for semantic / instance segmentation.
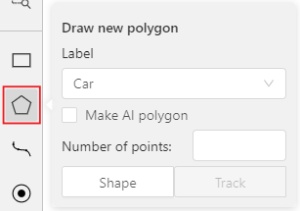
Before starting, you need to select Polygon on the controls sidebar and choose the correct Label.
- Click
Shapeto enter drawing mode. There are two ways to draw a polygon: either create points by clicking or by dragging the mouse on the screen while holdingShift.
| Clicking points | Holding Shift+Dragging |
|---|---|
 |
 |
-
When
Shiftisn’t pressed, you can zoom in/out (when scrolling the mouse wheel) and move (when clicking the mouse wheel and moving the mouse), you can also delete the previous point by right-clicking on it. -
You can use the
Selected opacityslider in theObjects sidebarto change the opacity of the polygon. You can read more in the Objects sidebar section. -
Press
Nagain or click theDonebutton on the top panel for completing the shape. -
After creating the polygon, you can move the points or delete them by right-clicking and selecting
Delete pointor clicking with pressedAltkey in the context menu.Additional options
-
Fixed number of points: Set a specific value in the
Number of pointsfield to automatically stop drawing after that many points. -
Enable dragging: Right-click inside the polygon and choose
Switch pinned propertyto enable moving the polygon.